|
|
|
|
|
||||
 |
|||||
|
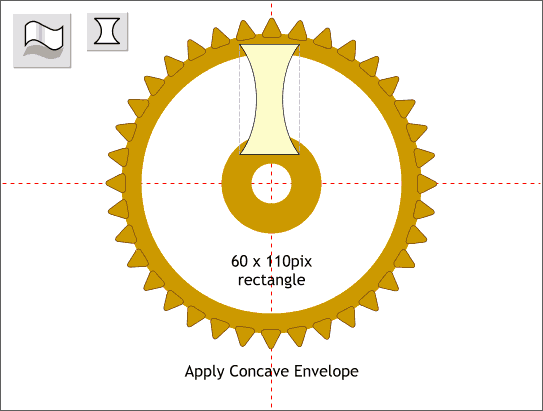
Step 7 Create a rectangle to the size shown and center it between the two O-shapes. With the rectangle selected, select the Mould Tool and apply a Concave Envelope by pressing the Concave Envelope icon on the Infobar.
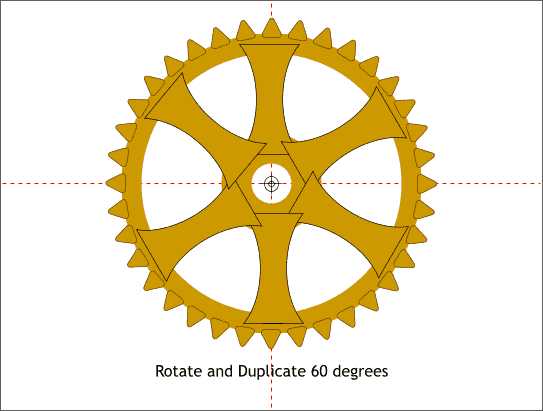
Step 8 Rotate and duplicate the concave rectangle using the process from the last page. Watch the setting on the Infobar to make sure the rectangle is rotated 60 degrees each time.
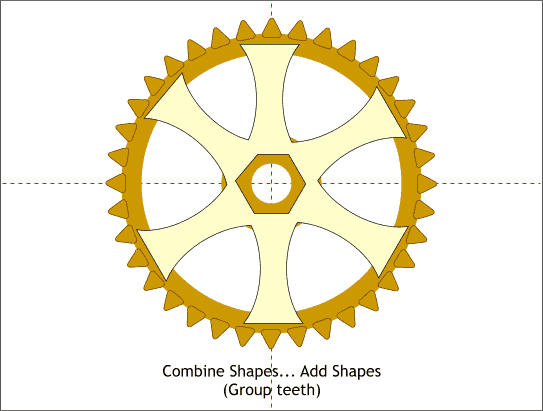
Step 9 Select the six rectangles (Shift click to multiple select) and from the Arrange menu, select Combine Shapes... Add Shapes. This creates a shape with one common outline as shown.
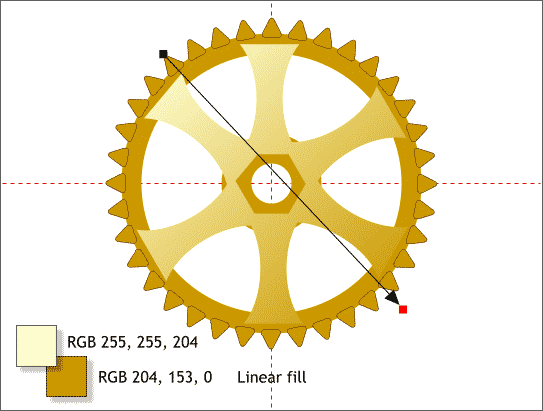
Step 10 Using the Fill Tool, apply a two color Linear fill adjusting the fill path arrow and using the two colors shown.
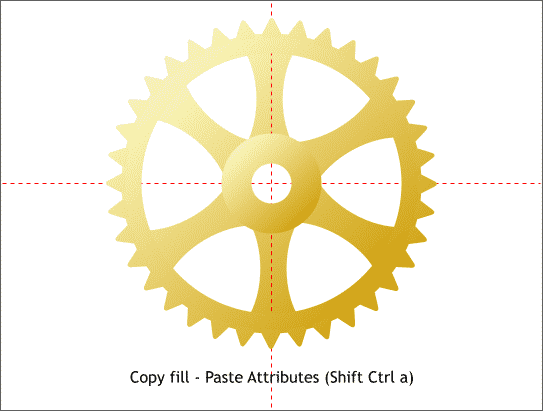
Step 11 Copy the shape you just filled (Ctrl c). Select the two O-shapes and the gear teeth and press Shift Ctrl a (or Edit > Paste Attributes ) to apply the same fill to the other selected shapes.
Step 12 Apply an Inner Chiseled Bevel to all the shapes except the teeth. Adjust the depth of the bevel as needed until you are happy with the results. Experiment with the different types of bevels and the settings. So that wraps up Workbook #8. Do you find the Workbooks helpful? Is there something you would like to see covered in the issues to come. Use the form on the next page to send me your comments. Also, if you are interested in winning one of the two copies of the Communication Arts Magazine Design Annuals, please indicate this in your comments. |
|
