|
|
|
|
|
||
 |
|||
|
Al Kolka requested a tutorial for creating cloth with folds. At art school it was one of my least successful pursuits. So I set about to see if there was an easier way that did not require rendering the highlights and shadows which are the key to cloth with folds. And here is what I came up with.
Step 1 Select the Freehand and Brush Tool and move the Smoothness slider on the Infobar at the top of the screen to around 10. (The lower settings have less smoothing and the image created is more accurate). Draw a shape similar to the one shown above.
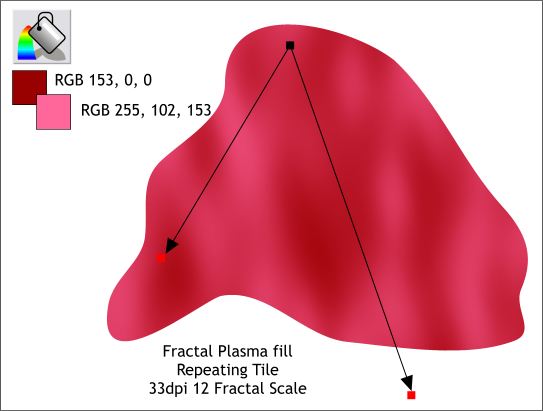
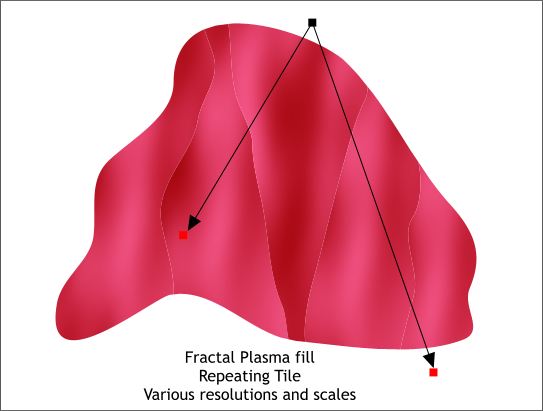
Step 2 Using the two colors shown, apply a Fractal Plasma fill. Right click on the shape with the Fill Tool and on the Infobar, set the Resolution to 33dpi and the Fractal Scale to 12. Adjust the fill path arrows as shown to achieve the appearance of folds. Modify the the position and settings until you get something close to the image above as this will vary due to the nature of the fill. Use the two colors shown above.
To apply the two colors, open the Color Editor (Ctrl e or click the tiny color wheel icon to the left of the screen palette). Select RGB Color Model from the list of Color Models in the Color Editor. Click on the small square where the two fill path arrows come together on the image and enter the three values (RGB 255, 102, 153) in the three text entry boxes. Now select either of the boxes at the ends of the arrows and enter the three values for the second color. |
|
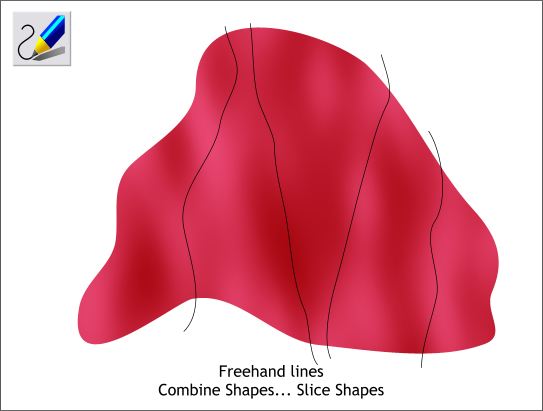
Step 3 Clone the shape (Ctrl k). This makes an inplace duplicate of the object. Using the Freehand and Brush Tool, draw four wavy lines as shown. One by one, select the line, then the shape and from the Arrange menu, select Combine Shapes... Slice Shapes. Repeat until all the lines are gone and you are left with five separate sliced shapes. (say that ten times quickly!)
Step 4 Select the left most shape with the Fill Tool and adjust the arrows and settings to create a smooth transition of light and dark values. You may need to extend the bottoms of the arrows to achieve this. Select the next shape to the right and repeat the last step. Repeat until you have done this to all five shapes so they look something like shown above.
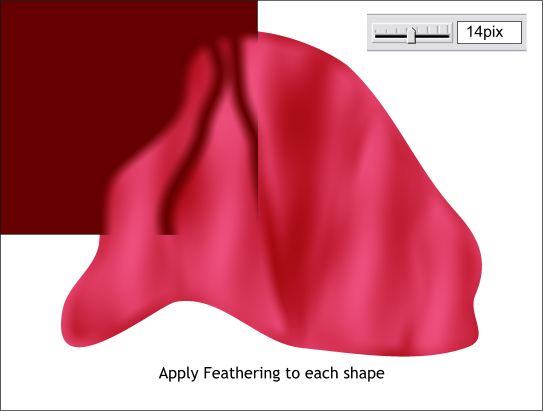
Step 5 Select the five shapes (hold down the Shift key and click each shape to multiple select all five). Set the Feathering slider (on the upper right area of the Infobar) to 14pix (or whatever setting looks best). Feathering softens the edges of the five shapes allowing the shape beneath to show though around the edges. You can see this demonstrated in the top left portion of the image above in which the dark shape is between the feathered shape and the original shape below.
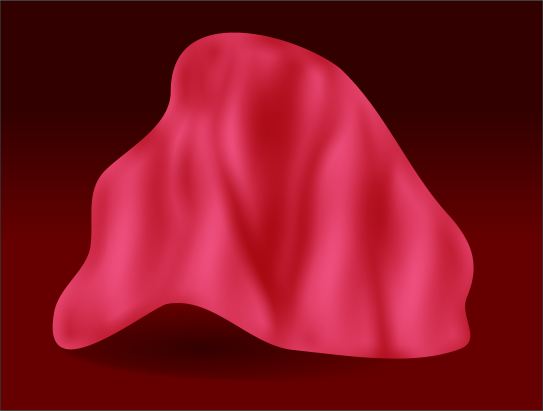
And here is the result of the cloth effect set against a dark background. I think it looks like cloth. What do you think? |
|