|
|
|
|
|
||||
 |
|||||
|
Gerry Woodruff requested a tutorial dealing with creating website graphics. As one of the more frequent complaints lodged by new users (Gerry is not one of these by the way) is why do my images have a white fringe around the edges? I thought we could create a tutorial that deals with both issues. In the first part of the tutorial, we'll create a tiling background image and then create some elements to place over the background.
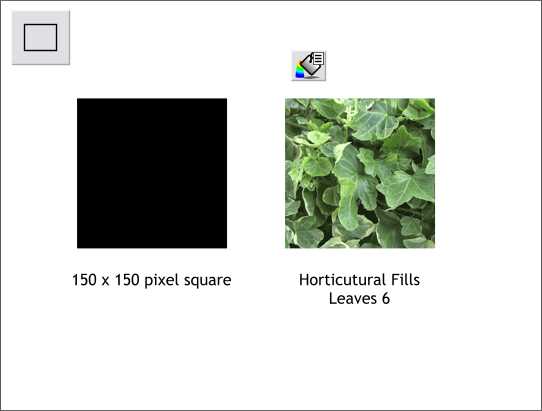
Step 1 Using the Rectangle Tool, hold down the Ctrl key and drag a 150 pixel square. Select the square then open the Fill Gallery and from the Horticultural Fills folder, apply a Leaves 6 fill (variegated Ivy).
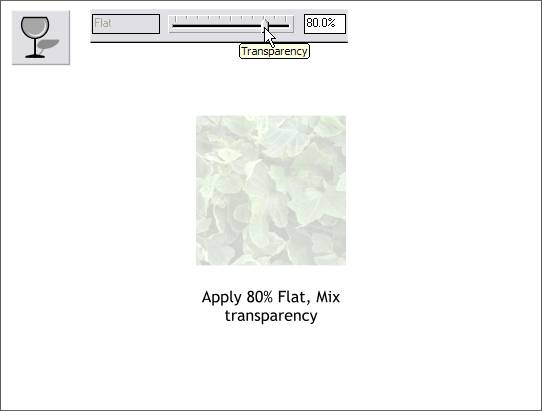
Step 2 Select the ivy-filled square with the Transparency Tool and change the Transparency slider setting on the Infobar to 80% to ghost the image.
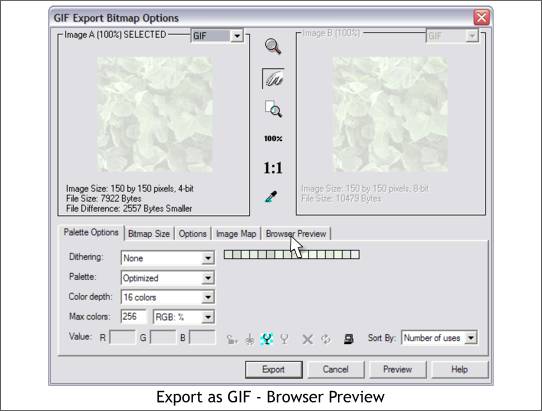
Step 3 Select the ivy-filled square and then select File > Export... In the Export File dialog (not shown) select GIF from the File Type drop down list and call the image Background. Press Export which brings up the dialog shown above. Change the Color Depth to 16 colors and press the Browser Preview tab.
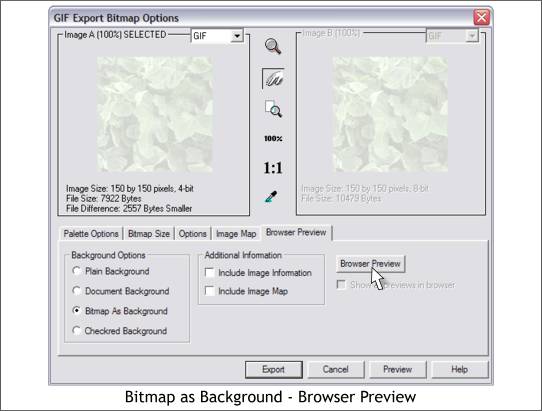
Step 4 In the Browser Preview tabbed section, check Bitmap as Background and then press the Browser Preview button.
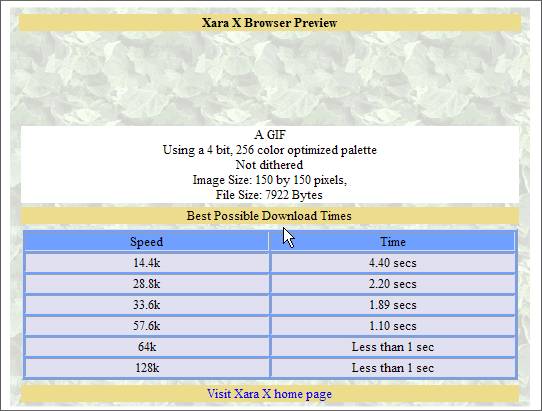
Step 5 Pressing the Browser Preview button launches your default web browser (Internet Explorer, Netscape, Opera, etc.) and fills the screen with the bitmap and displays The Xara X Browser Preview page shown above (greatly truncated). In addition to previewing the tile as it fills the screen, Xara displays a chart showing estimated loading times for a variety of modem speeds. The image will take approximately 2.2 seconds to load at a connect speed of 28.8k and under a second at connect speeds greater than 64k. The file size for the image as well as the color depth and other information is also displayed.
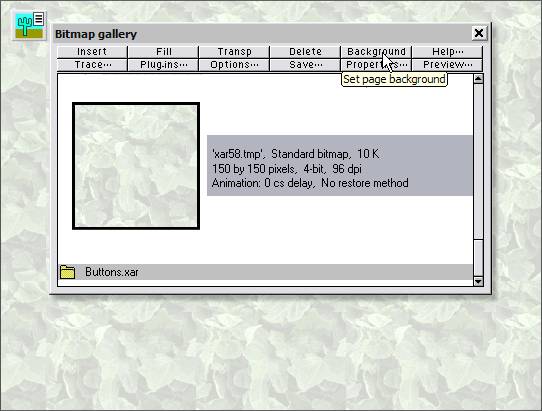
Step 6 Another way to preview how the image will fill the screen, and one which is important for the next part of the tutorial, is to import the GIF into Xara (File > Import... ). Once the image is in Xara, a copy is placed in the Bitmap Gallery. Open the Bitmap Gallery (located on the upper right portion of the Infobar), locate the bitmap and select it, then press Background. Xara fills the page portion of the screen with the tiled bitmap. For clarification, we will assume the bitmap background is the background pattern to be used on our website. In the next step, we'll create some graphics and text that will appear on the same website with the same background. This is the step that will eliminate the white fringe that is so often complained about.
Step 7 Create some elements to represent graphics you might want on your website. I've created a variety of objects with bevels and shadows and in the case of the W, a Glow shadow.
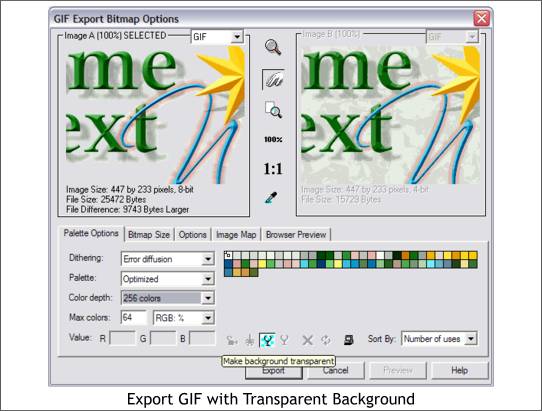
Step 8 Select the object or objects you wish to export. In the File menu select Export and select GIF as the file type. In the GIF Export Dialog (shown above) press the wine glass icon to make the background transparent. Select your Color Depth. In this case I have used a Color Depth of 256 Colors but changed the maximum number of colors to 64 and selected the Error Diffusion option to make the file size smaller. Press Export.
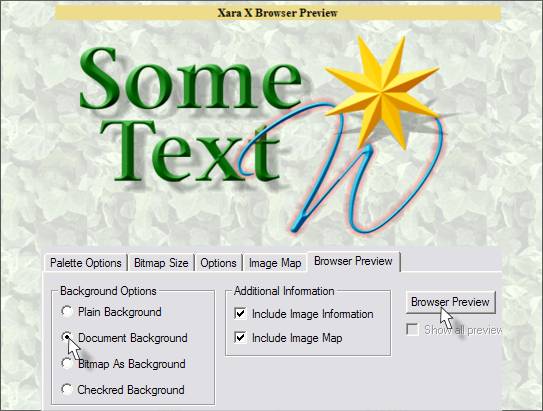
Step 9 If you want, you can preview how the images will look on your web page by opening the Browser Preview tabbed section, checking Document Background and pressing the Browser Preview button. (I have superimposed a portion of the export dialog over the Xara X Browser Preview screen). When you export the image(s), Xara anti-aliases the image(s) using bits of the background image to smooth the edges of the image.
To illustrate the effect of Xara's anti-aliasing, I have placed the transparent bitmap over white, the ivy background, and a yellow panel. The image when placed over the ivy background looks smooth while over the yellow background the edges are most apparent. Any questions? |


|