|
|
|
|
|
||||
 |
|||||
|
Maggie McClellen requested a tutorial on water drops. I have almost complied. This tutorial creates tear-shaped water drops.
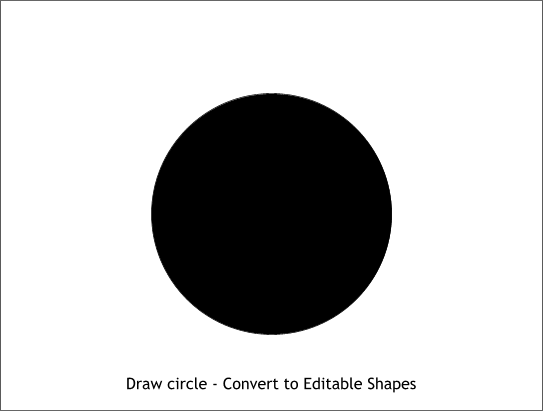
Step 1 Using the Ellipse Tool and holding down the Ctrl key to constrain the ellipse to a circle, draw a circle. The size is not important but make it about the size shown above. With the circle still selected, select Convert to Editable Shapes from the Arrange menu. (This enables us to edit the circle's control points for the next step).
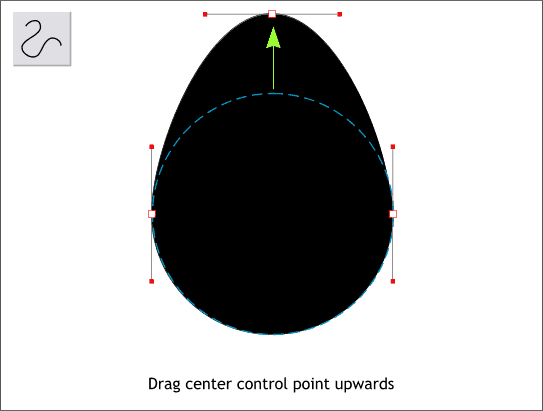
Step 2 With the circle selected, select the Shape Editor Tool. Select the top center control point and drag it upwards as shown.
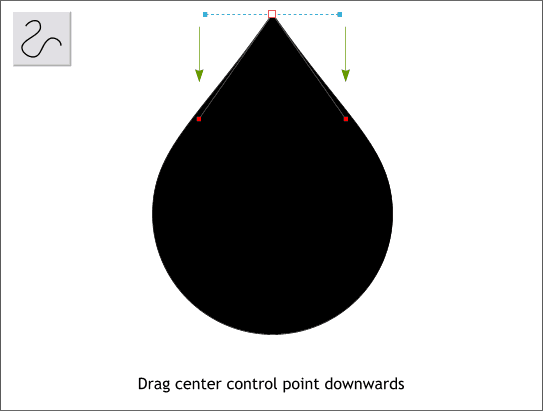
Step 3 When you selected the top control point you may have noticed the two lines with the tiny red boxes on the ends that extended on either side of the control point. These are Bezier control handles and they allow us to modify the shape. Click the left red box and drag it down and just slightly inside the shape. Now select the right red box and drag it down the same amount and just slightly inside the shape to create the teardrop shape shown.
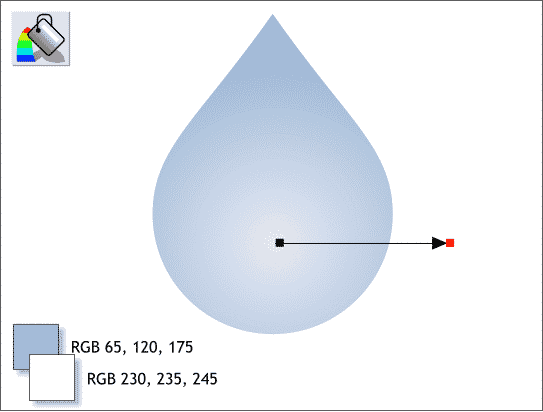
Step 4 Using the Fill Tool, select Circular from the drop down list of Fill Types on the Infobar and apply a two color Circular fill using the two colors shown with the lighter color in the center. Drag the center of fill so it is in the lower center of the shape.
Step 5 Select the shape with the Transparency Tool and select Elliptical from the drop down list of Transparency Shapes on the Infobar. Click the small square (control handle) where the two arrows come together, and change the slider setting on the Infobar to 100%. Select one of the outside control points and change the setting to 0%. (This is the opposite of the default setting).
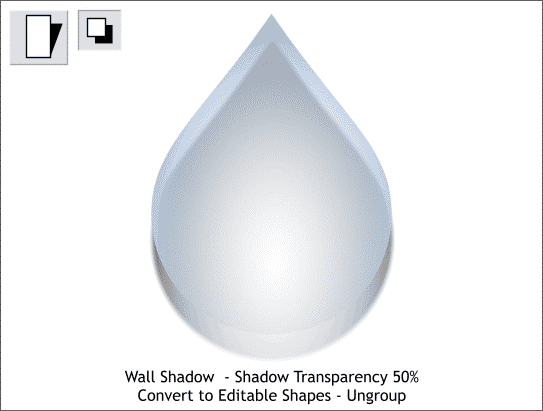
Step 6 Select the Shadow Tool and drag straight down on the teardrop shape to create a Wall Shadow. Change the Shadow Transparency slider setting on the Infobar to 50%. Convert the drop and shadow to editable shapes (Arrange > Convert to Editable Shapes) and then Ungroup (Arrange > Ungroup or Ctrl u).
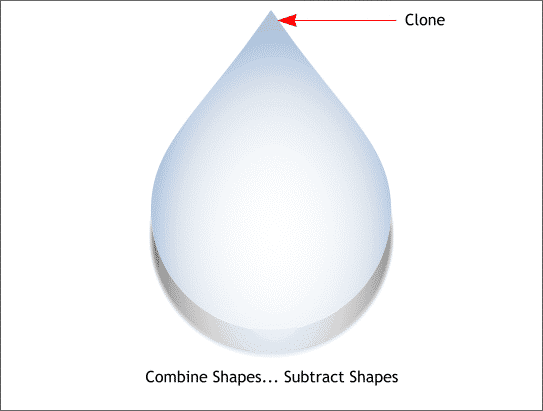
Step 7 Clone (Ctrl k) the teardrop shape. Select the teardrop clone and the shadow and Arrange > Combine Shapes... Subtract Shapes. This trims off the portion of the shadow that is under the transparent teardrop shape.
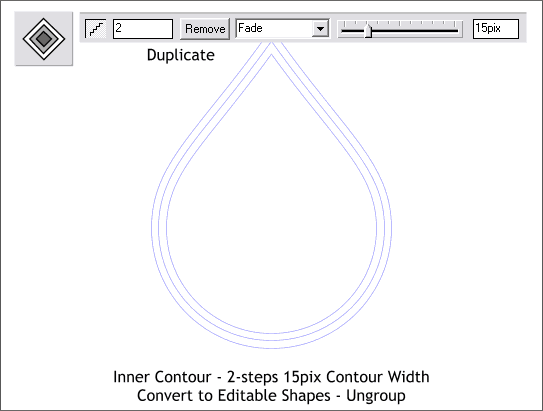
Step 8 Make another clone of the teardrop shape and set the fill to white and the outline to blue. Set the Transparency to None. Select the shape with the Contour Tool and apply an Inner Contour. Change the number of Contour Steps to 2 and press Enter to apply the change. Move the Contour Width slider to 15. Convert to editable shapes and Ungroup (Arrange menu).
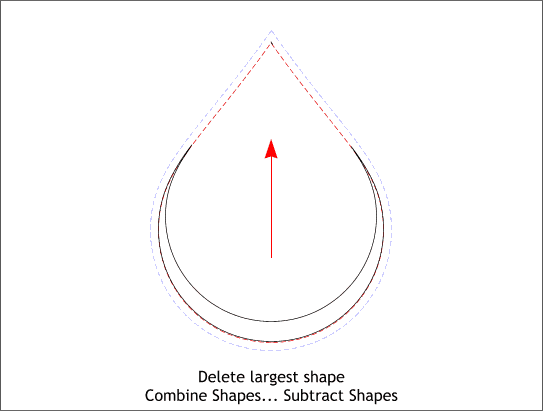
Step 9 Delete the largest of the three teardrop shapes. Select the smallest shape and center, top align it with the middle teardrop shape as shown. Select both shapes and Arrange > Combine Shapes... Subtract Shapes. This should leave a crescent shape as shown.
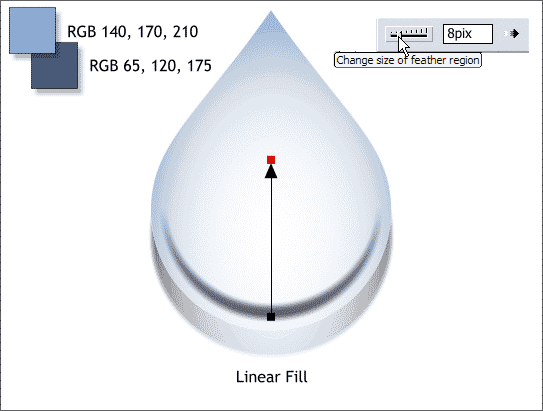
Step 10 Select the crescent shape and apply a two color Linear fill using the two colors shown and with the darker color in the center. Center the fill over the lower center part of the crescent shape. Apply about 8 pixels of feathering to soften the shape.
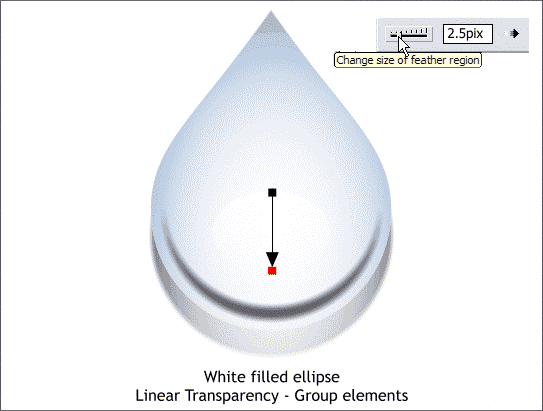
Step 11 Add a small white ellipse in the lower center portion of the teardrop and apply a Linear transparency by selecting the white ellipse with the Transparency Tool and dragging straight down as shown. Add a small amount of feathering.
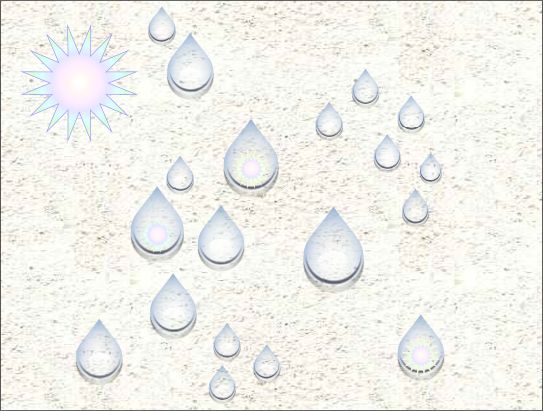
And here is the final image in which the teardrops have been duplicated and resized and a small highlight added to some drops to add a sparkle. Looking at the image now, I see the shadows should have been about twice as large as they now tend to get lost in the shapes. This is not an exact science! |

|