|
|
|
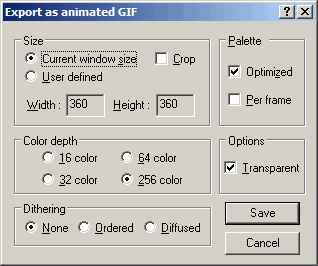
When you find yourself back on frame 1, turn off the cursor and reduce the line spacing back to 0%, and move the Timeline to frame 2. Now hold down the Page Down key and watch the animation as each object spins around its own axis and the little discs pass through the holes in the teardrops of the other objects. Save your Xara 3D file. Stage 5 Exporting the animation from Xara3D All the constructing is done, and we have our animation, but at the moment the only way to view it is within Xara 3D, and even then you have to hold down a key to see it in action. We really want to export an animated gif or a screen saver, but because of the convoluted method needed to get the objects in the right places, we used up the inbuilt animation, so we can't export the proper animation directly, so what we are going to do is export an animated gif from Xara 3D, which will contain all 48 frames, then import that gif into Xara Xtreme and delete all the unnecessary frames, to end up with just 12 (well, actually 13, but we'll come to that in a moment). Start by going back to Xara Xtreme, and click on the new animation button and open the frame gallery. Back in Xara 3D, select the frame button to put the X3D into frame mode, if it isn't already. Set it for 360 x 360 pixels. Frame 18 is where the objects are widest during movement, so that is the frame to check for fit, so select that frame from the Timeline bar. The default image size is set to Fit To Width, so the image will be resized to fit all of it into the width of the frame, and that will include the sizing pxels, which we don't want. To stop that, in the font size field, type 288pt (the maximum). The image will still be too small, but the font size field has another little-known trick up its sleeve. Type CTRL-A to select everything, and the font size field will now show a percentage size, defaulting to 100%. Type in 140% (max 400%) and everything will be resized, and the image should now fit comfortably in the frame, while excluding the sizing pixels. If it still doesn't, then try selecting a font like Times New Roman, and then it should fit. Turn off the cursor. Aside It is a bit complicated but Xara 3D takes some size settings from the selected font, and this informs its behaviour with regard to other settings like tracking and line sizing. This can be used to advantage for some purposes, even if you don't actually use any of the characters in the font, heh, heh. /Aside Move the Timeline to Frame 1, and open the animation options, and set the Frames per second box to 10, and then from the File Menu, select Export animation. Give it a suitable filename, and use the settings shown here.
Stage 6 Finishing up in XaraXtreme That should be us done with Xara 3D, so we move back to Xara Xtreme, which we left in animation mode. In the File menu, click on Import, and browse to the animated gif you just saved from Xara 3D. It will populate the frame gallery with 48 frames, most of which are redundant. We have lost our background because we needed to select transparency mode in the export, because if we didn't, we can't safely delete any frames because they depend on each other to make a consistent image. In transparency mode each gif frame is independent of any others, so we can delete the ones we don't want. Delete the following frames:
Now select frame 18, it should still be there! Copy the image there, to clipboard (CTRL-C), and then select frame 1. Delete the image in frame one, and type Shift-CTRL-V to place the frame-18 image in exactly the same position. Now draw a square over it, and put it to the back behind the image and adjust it so the image is centrally placed over it, with a decent margin all round, and give the square the colour the background had in Xara 3D. (Mine was black.) Then delete the frame-18 image from frame 1. In the frame gallery tick the B box for frame 1, and click on the property button. In the dialogue box that opens, un-check Show frame, and close the dialogue. Frame 1 is our 13th frame, and is just there to replace our lost background. And now you can preview the animation in Xara Xtreme, and if you are happy, you can export the finished animated gif from the File menu. That's all, folks, I expect it has been a brisk ride, I hope you enjoyed it, too!
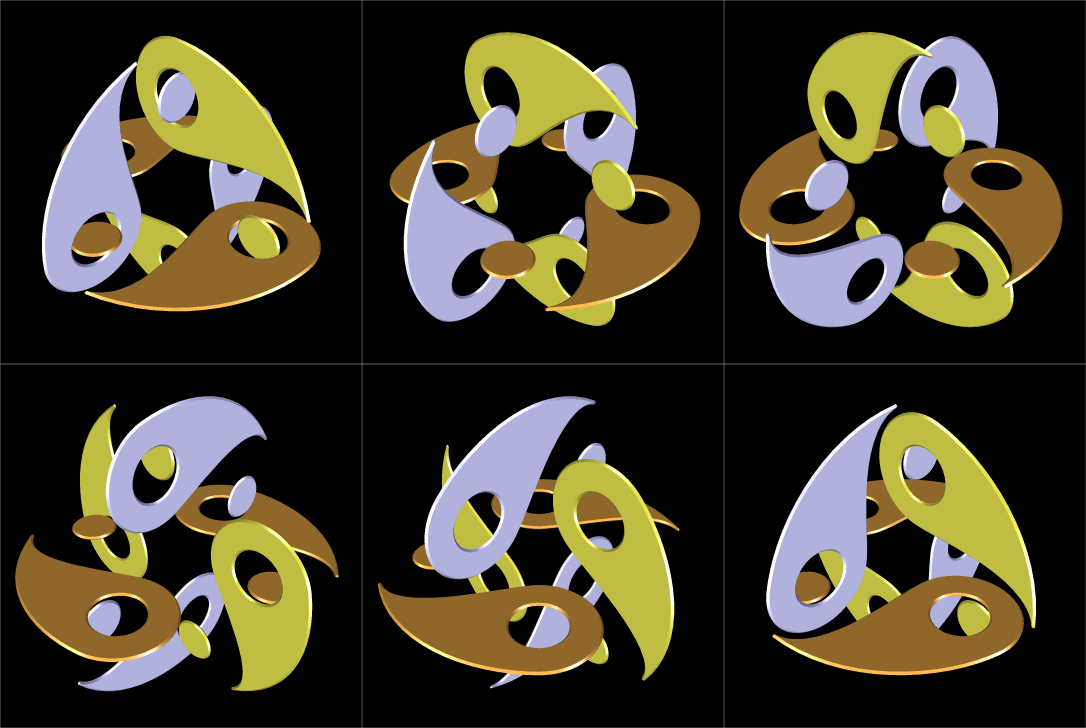
This is what the finished animation will look like. Click here to download the Xara 3D-6 file. If you have any questions of comments, I'd be happy to receive them. Use the Send e-mail link below to send me your comments. —Mike Sims |
|||||||
|
|||||||
|
Tutorial ©2007 Mike Sims - All rights reserved
|
|||||||


