|

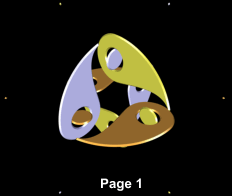
So this is Page 1. If you want to make any changes to the objects, like colour or bevel, etc, and especially if you want to apply textures, now is the time to
do so, because we are going to make a number of copies of this page and its objects, so that we can replace individual objects with versions that are rotated within their planes, in order to make the interlocking dynamic.
Stage 3 Creating 12 pages
It will be easier to do the next stages if we set the line spacing to something like 40%, so do that now, then open up the Text dialogue (ALT-T). Make sure
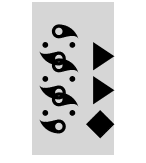
the red cursor is at the bottom right, then click on the diamond button to insert a Page Break, then hold down shift and keep hitting the left arrow key till you reach the top of the page.

Now, copy the selection to the clipboard (CTRL-C), and hit the down arrow key once to bring it back to the bottom of the page. Now type CTRL-V eleven times to paste the clipboard back. And lastly hit Backspace once
to remove the final diamond. Click on OK.
 The Timeline will now show 48 frames,
consisting of 12 pages of 4 frames each. You can move between each page with the PageUp and PageDown keys, but they all look the same at the moment, and we are just going to change that. The Timeline will now show 48 frames,
consisting of 12 pages of 4 frames each. You can move between each page with the PageUp and PageDown keys, but they all look the same at the moment, and we are just going to change that.
Stage 4 Replacing the original shapes for rotated ones
Let's go back to Xara Xtreme, and our main shape. Select it, and in the rotate field enter 15. The shape will move round 15 degrees anti-clockwise. Shift
-select the sizing pixels (you just need to click on one, as both are a single shape), and type CTRL-C, then go back to Xara 3D, and ensure the Timeline is
showing frame 1, then hit Page Down once. You are now in Page 2 (=frame 5).
Enable the cursor, and highlight the bottom object, then type CTRL-V. This will replace the original object with the newly-rotated one, while retaining all
the attributes of the original. Hit Up Arrow and select the next object up, and type CTRL-V again, then Up Arrow, highlight the top object and type CTRL-V.
Page 2 is now complete.
Go back to Xara Xtreme, and select the main shape once again, (not the sizing pixels!) and rotate it 15 degrees again. Shift-select the sizing pixels and type CTRL-C. Back in Xara 3D, and hit Page Down once. The Timeline should
show frame 9. Select each object in turn and replace it with CTRL-V exactly as we did with Page 2.
Page 3 is now complete.
|