|
|
|
1 Introduction One of the surprise new features in Xara Xtreme Pro is the ability to generate basic Flash animations. Flash is vector based animation and it is similar to creating animated gifs. Xara's implementation of Flash is slick, intuitive, and unique. In Xara, the process is to design the "key" frames (a key frame is like a snapshot in time of the animation sequence). Flash then generates the in-between stages of animation. So for example, in your first key frame you may draw a simple object, and you then copy that frame to generate a frame 2. In that second key frame, you may, say, move the object to a new position. The exported animation consisting of two drawn frames will then fully animate the shape moving from its start position in key frame 1 to the end position in key frame 2 without having to manually draw each in-between frame like you would in an animated gif. It is typically much faster to create animations in this way. Flash however is very limited in what it can do when it comes to generating these intermediate steps. It is by no means as versatile or advanced as Xara's blend tool, nor does it support most of Xara's advanced features, such as vector feathering. There are strict criteria that must be followed for successful "tweening" in the animation (tweening is the process when Flash automatically generates the in-beTWEEN steps between key frames). You are allowed to do the following for successful tweening between two key frames:
This is all Flash currently supports, and if you try to do anything else, you'll get errors and your animation won't be generated. As you can see, Flash is limited in what it can do, but what it lacks in animation features is made up for in low file size, higher animation frame rates, and reduced time to create the animation. 2 Creating a Flash animation To quote from Xara's Help file, the procedure for creating Flash animations is as follows:
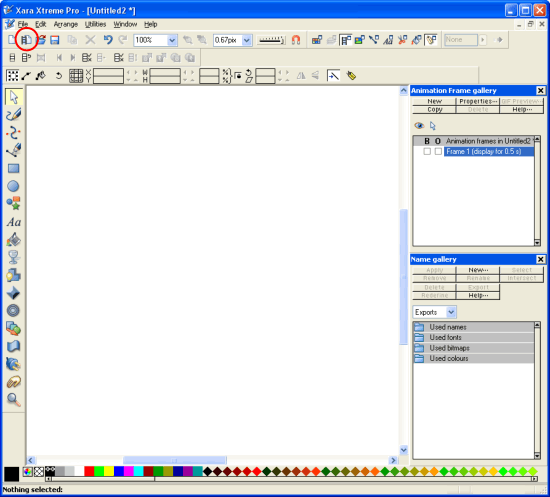
So let's now generate a simple Flash animation which highlights basic techniques. It's recommended that you have both the frame and name galleries open while creating Flash animations to make things easier. They can be docked at the right-hand side out of the way. 1. Click on the new animation button on the toolbar to start a new animation document.
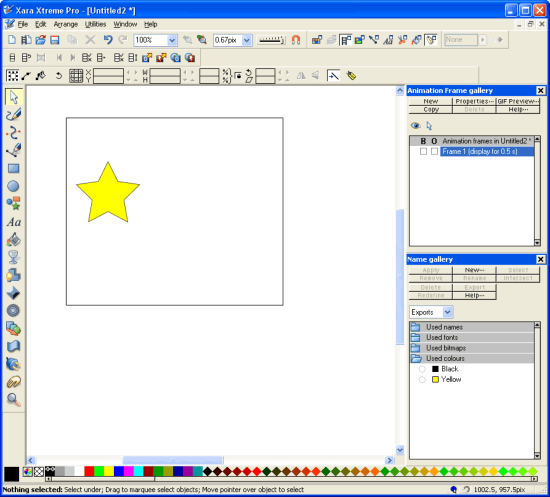
2. It is recommended that animations be drawn on top of a larger object that can be used as a board or frame to more easily allow you to determine the physical size of your animation. Create this frame and a basic shape as shown below.
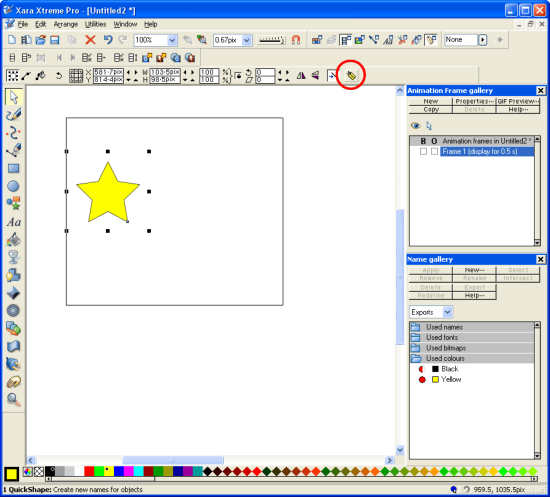
3. Select the star to be animated and then click the "create new names" button on the selector tool Infobar. Note that we don't want the border to animate and so it's not given a name.
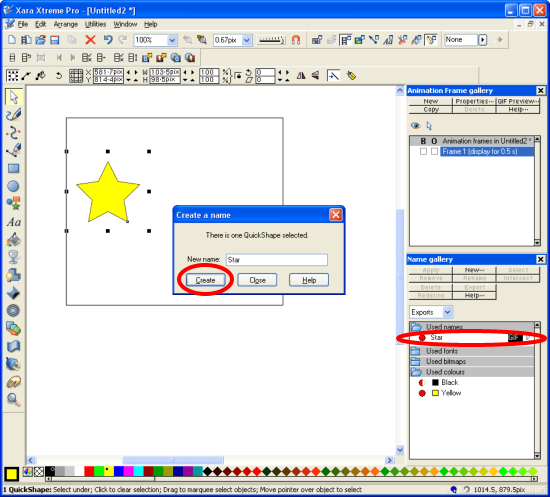
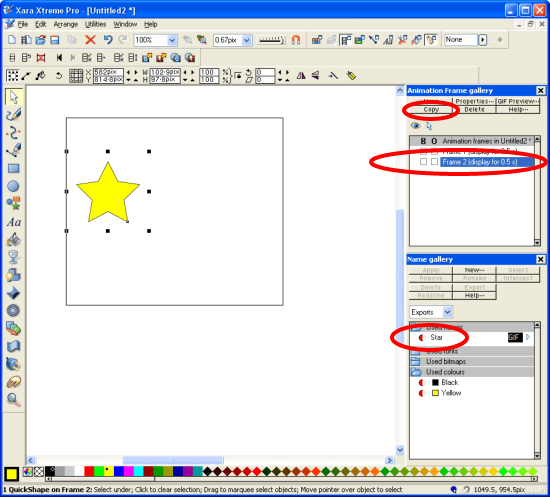
4. Enter an appropriate name in the dialogue box that appears, such as "Star", and click ok. The name now appears in the name gallery as shown below, and it is assigned to the object. The red circle denotes that the selected object(s) (our star in this case) has that name, and the full circle (instead of half-circle or empty circle) indicates that the object is the only object in the document to have that name. This completes the first key frame.
5. We now need to generate the next key frame. This example is just a simple two-frame animation, and so this frame should represent the final look of our object after we've animated it (making sure we follow all the Flash rules shown above). Click the copy button in the frame gallery as shown below. This copies Frame 1 and makes a new frame called Frame 2. Notice how the red circle next to the name "Star" is now a half-circle. This is because our yellow star now exists twice in the document, and each time (on each frame) has the name "Star".
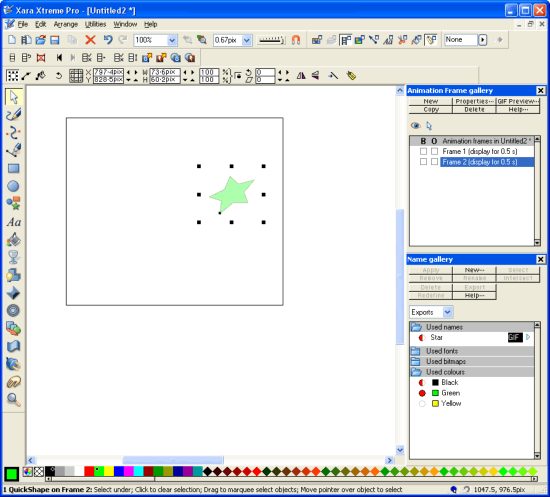
6. Apply the desired (allowable) transformations to the star that you want to be animated. For example, we will perform all 6 possible transformations listed above: move, scale, squash/skew, rotate, change colour, change (flat) transparency value, as shown below.
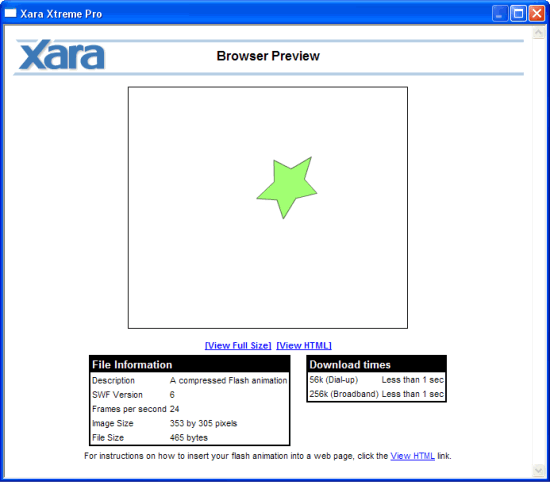
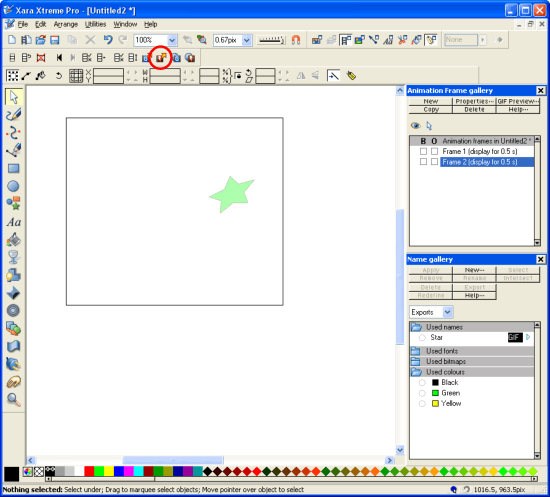
7. The animation is now complete. To preview the animation, press the "preview Flash animation in browser" button on the animation toolbar as shown below.
Pressing the preview button will display any errors that may exist in more complex animations. The Flash animation can now be exported by selecting the export button on the same toolbar.
|
|
|


