|
|
|
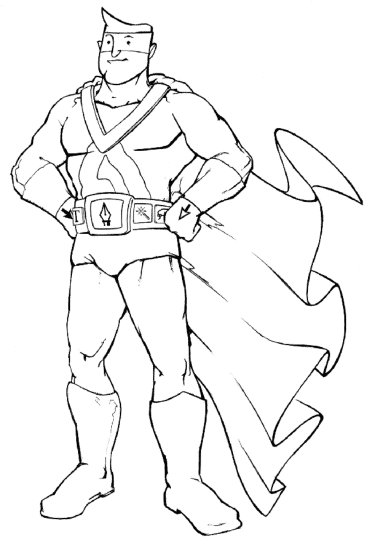
Experience helps in knowing which settings are likely to have the biggest effects on the traced result. The trick is to be able to have the least number of control points and shapes and still have a good trace of the original bitmap. In general, large bitmap images produce better traced results, but also produce more shapes and result in more CPU power to manipulate afterwards. Now lets compare Illustrators Live Trace with Xaras ten year old Bitmap Tracer. For the comparison, two types of image will be converted into vector shapes; the first is a simple black and white line sketch drawing, and the other is a full colour photo. Considering the first type of image the line drawing, Adobe Illustrator CS2 provides a sketch of AdobeMan to test the Live Trace feature with, so well use that here. Click here to download AdobeMan.
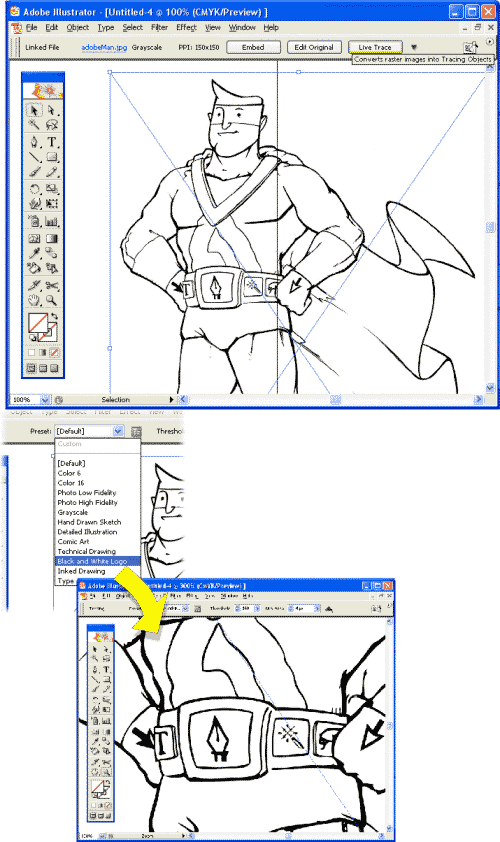
By selecting black and white logo from the preset menu in Illustrator, a suitable trace is performed and takes several seconds.
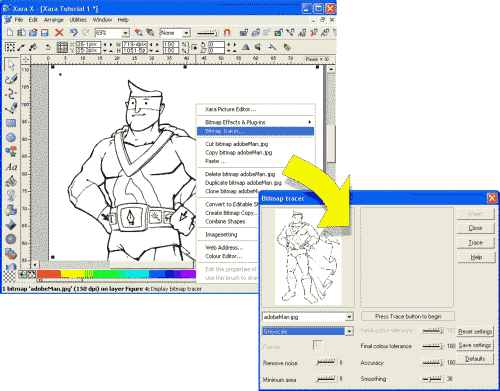
Further tweaking can be made using the options dialogue; however for our purposes the result is fine and can be seen above. But what about in Xara X or Xara Xtreme? Load the image into Xara, and right click. Select Bitmap Tracer to bring up the tracer options. This image is a grayscale image; it contains black, white, and shades of gray. This type of image is thus best traced by selecting Grayscale from the drop down box. The finest results are achieved by selecting the settings shown in the image below. For images like this, remove noise acts to remove detail in a similar fashion to minimum area, therefore its setting is set to low.
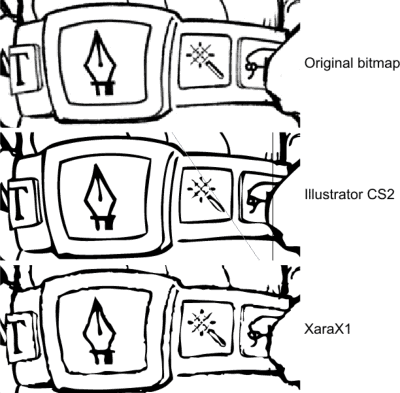
Initial colour tolerance is dimmed out because this is a gray scale image with a limited range of colours. Final Colour Tolerance should be set to maximum so that the fewest shades of grey are used to produce the cleanest result. Lower values will produce a messy result because the tracer will be more sensitive to the shades of gray at the edge of the lines. Accuracy should be set to its maximum value, as the result for these grayscale line images will have the fewest shapes that most closely match. Smoothing determines how closely the vector shapes match the size of the features in the bitmap image that are allowed by the minimum area value, by increasing the number of control points that make up the closed shapes. In this case the minimum area was set to its lowest, and thus low smoothing would produce pixel-like outlines. A maximum value however can result in loss of accuracy in the mapping of the curved edges of the shapes to the bitmap image. Thus, smoothing was set to a value of about 30. Click Trace and notice the blinding speed of tracing relative to the Live Trace of Illustrator it took my machine just over 1 second to trace. The trace can now be inserted into the document (Insert), and consists of just 208 shapes. The two traces are comparable in accuracy as can be seen below in the zoomed in region of the utility belt. Only when zoomed in significantly is it clear that the Xara tracer shows slightly lower edge accuracy for this type of image tracing. However, its likely that many years ago when Xaras tracer was first developed, the primary use was to trace the second type of image full colour photos which will be traced next.
|
|
The Xara Xone Guest Tutorials ©2005 Gary W. Priester All rights reserved
|


