|
|
|
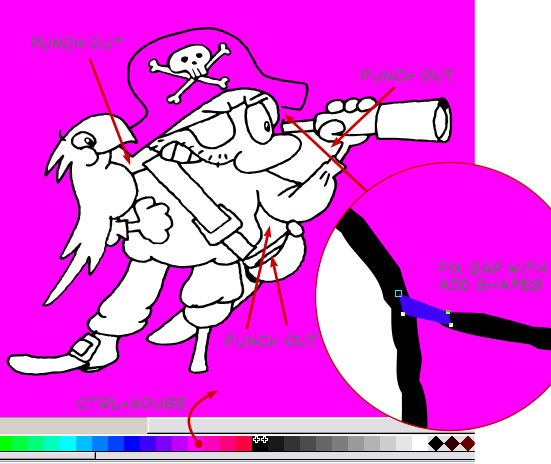
8. Open Xara X and paste (Ctrl+V, as Corel 32-bit Presentation Exchange format) and Ungroup (Ctrl+U). Change the background to a bright colour that will not be used in the image (Ctrl-drag a colour onto the workspace). This will show areas that should be "punched out" (removed) by selecting "the hole" shape and the "black outline" and applying Arrange > Combine Shapes > Subtract Shapes (Ctrl+2). NOTE: It looks like the drawing has a black outline, but in fact, there is a solid black shape over which white shapes are placed. Making the background a solid color will also show areas of the outline that are not "closed" (the pirates hat for example). To fix the un-closed line (which technically is an object with a black fill as explained in the previous NOTE:) draw an overlapping shape where the line should go, and then apply Arrange > Combine Shapes > Add Shapes (Ctrl+1) and follow-up with Arrange > Break Shapes and move the outline and the solid filled area to the back (Ctrl+B). Of course you better fix the lines before you start punching out areas, or you will have to do all punching out all over again. TIP: This can produce some unexpected results. It is always a good idea to make a copy of the bitmap trace in case things get so confusing you can start over again.
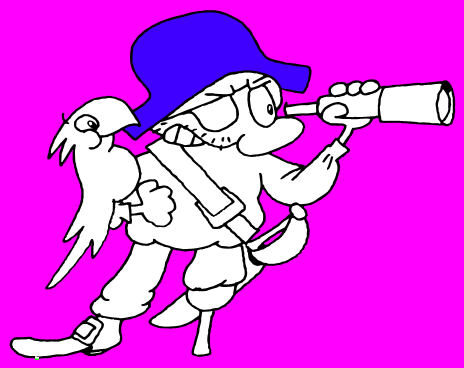
9. TIP! When you draw an object to close gaps, use another colour than black; After you break the shapes apart, click on the edge of the visible objects to select the "outline object" and change it to black. This way you can easily tell the different objects apart (as all objects will have the same colour when you use Break Shapes). NOTE: The skull in the pirate's hat (see next image) is actually behind the blue object - I somehow messed things up a bit when I was making screenshots for the tutorial.
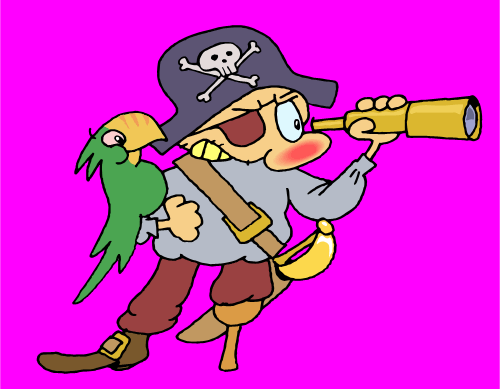
10. Add your preferred colours to the image (you can group or add objects that belong together, which will help if you later want to change colours). When completed, change background back to white (or you may get funny background colours when you start exporting to different bitmap formats) NOTE: I avoid using transparencies to guarantee that exported vector formats will remain 100% vector images. For example, the red nose is a 15 step blend, and the highlights are a lighter solid coloured object.
|
|
The Xara Xone Guest Tutorials ©2005 Gary W. Priester All rights reserved
|


