|
|


|
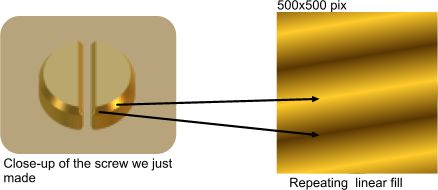
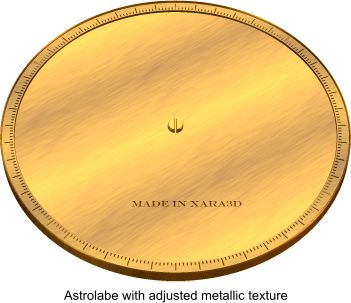
The astrolabe is supposed to be made up of metallic pieces, and the surfaces would not be as bland as Xara 3D-6 makes them appear. It is also not very interesting, so I decided to try making a texture to show a mild grain effect, as if the metal had been wire-brushed. I started off in Xara X with a square of 500 x 500 pixels, sized to match the bounding box of the astrolabe. Again, this is to allow the details of the texture to be sized and positioned correctly for the target Xara 3D-6 shapes, although this is perhaps less important here.
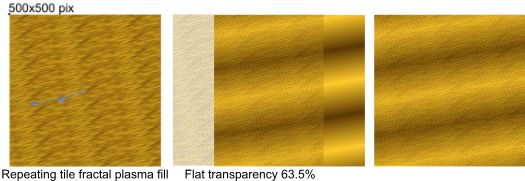
I gave the square a repeating linear fill, with the two colours sampled from the initial rendering of the Astrolabe in Xara 3D-6. That is, I exported a .png of the astrolabe and brought it into Xara X, and sampled the colours at a highlight and a low light, and used those to make the fill. This is intended to vary the lighting level over the astrolabe because Xara 3D-6 treats the lights as being infinitely distant, so that when a surface is reflecting a light, the whole of the surface reflects it evenly all the way across, which isn't realistic, so this is an attempt to correct that. I then made another 500x500 pixel square and gave it a repeating fractal plasma fill, using the same sampled colours, and distorted it to give the brushed effect. I then made it transparent, and centred it over the linear-filled square. I then exported it as a .png file, and applied it as a texture to the whole Xara 3D-6 image.
Create your own texture along the above lines, and apply it to your own astrolabe. You can then adjust the angle of view to bring out the best of both the texture and the beveling.
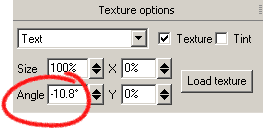
When you apply a texture without using the cursor tool to select a particular shape, the texture is applied identically to all of the shapes in the Xara 3D-6 file. This is OK, but in reality it would be fairly unlikely that the direction of the "grain" of the brush effect would be the same in all pieces, so now you can use the Cursor tool to select each piece in turn and click on the texture tool and make some adjustments to the angle of the texture, so that not all the pieces have the same angle of brush direction.
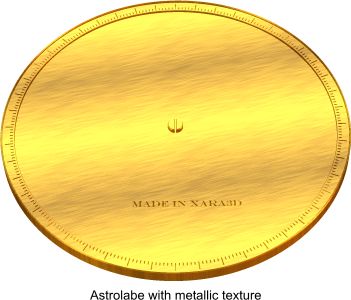
In addition, we had already applied colours to the pieces of the astrolabe, but the texture has now hidden them. It is still a good idea to keep the colours, because it helps the eye to separate and identify the shapes, so in the texture tool, you click on the Tint button to put a tick in it, and this will cause Xara 3D-6 to mix the colour of a shape with its texture.
On the next page, we will replace the base plate with a more interesting one.
|
|
The Xara Xone Guest Tutorials ©2005 Gary W. Priester All rights reserved
|