 |
 |
||||
| 0 1 2 3 4 5 6 Download Zipped Tutorial | |||||
|
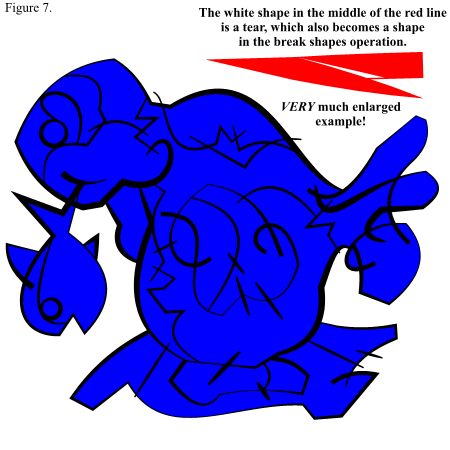
Remember! After the Break Shapes operation, your silhouette should be a solid shape (no visible lines, nor white areas) or you have missed a line segment that did not overlap, or touch other lines. Don't delete the top most shape; it's what will become the "lines" in the finished drawing To reveal all "fillable" shapes, make the top-most shape black (for now) and Put to Back (Ctrl+B) Very important! Select All shapes (minus the new background shape) and give them a color from the Color Line... You must choose a named color, as we will be using the Name Gallery and this chosen color, to clean up some junk (small left over) shapes in the image. All the blue cells have now been turned in to shapes that can be filled, but before we start doing that, I need to show you something vital (if you will be exporting the file to other vector file formats (Flash especially) as you might need to know all shapes that exist in your file)) It could also be important if you be printing your drawing really big! Perform Select All Whoa! Look at the infobar at the bottom-left corner of the interface - where the heck did all those shapes come from? Well they are little scrap pieces - a byproduct of the Convert Line to Shape - Break Shapes operation, using Miter join on lines with stroke shapes. On extremely angled corners, the lines will get small "tears", which also become (undesirable) shapes in the drawing after performing the Break Shapes operation. Not to worry... they will take a nanosecond to clean up later on. In contrast, the Beveled join creates much less (or no) leftover scrap pieces, because the Beveled join lines handle extreme angles better. So why use Miter join? Well it's a matter of taste... I like sharp, crisp corners... You might also get these tears when using your own complicated vector brush, and I want to show you how you can easily clean them up. These tears are only visible under a huge magnification so if you are using this technique for smaller raster images, it's up to you how obsessive you wish to be ;-)
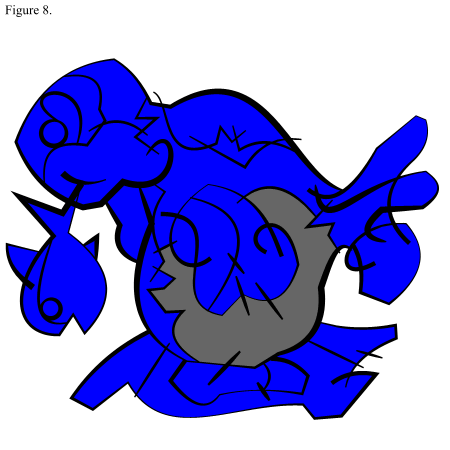
Before we continue... Open your Name Gallery and make sure you see two colors in there - in my case they are black and blue (the named colors I used.) The blue color in the Name Gallery will enable you to easily pick up (and delete) all those little scrap pieces spread around the drawing, in a step described later on in the tutorial. Now we will do one final check that we really didn't miss any breaks in the lines while the drawing was done. For an average drawing, this step only takes a minute or two and if you do find a problem, it will be easily corrected with the file you saved with that unique name - remember? So this is what we will do - select a blue shape - and give it a gray fill color (again a named color) from the color line. Why gray? Well, we will be coloring this pup in a minute, and a neutral gray color will not interfere with color choices, as much as a bright color would. Now select the gray square - and Copy (Ctrl+C.) Paste Attributes (Ctrl+Shift+A) to another shape. Yes, do this individually - one shape at a time... When you paste the gray color attribute to a shape, make sure only the shape (cell) you are pasting to changes color... If an adjacent shape also changes color you have a line break somewhere. If you zoom in on the area you will be able see where you have that break If you have problem shape, zoom in, identify the problem and remember the location - and continue checking the rest of the drawing (it's better finding all those breaks at once ) If you had a problem or two, exit the current file, and go back to your saved file. Move lines around to fix them, repeat the Break Shapes operation, and the steps to get back to this point. It might sound like a lot of work, but once you have actually tried it, you will realize that it just takes a minute or two. If all the shapes changed color the way they were supposed to - you are in business!
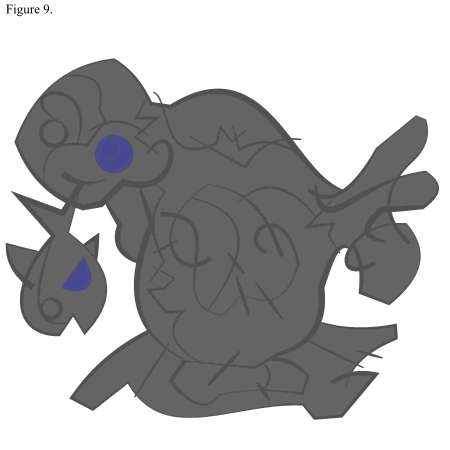
Bingo! All my cells/shapes were perfect... With very little experience drawing and manipulating lines in the drawing process - you will nail it 99% of the time, I promise. In general, if you create very small cells when drawing, it might be a lot more work selecting them. Try to keep them at a size that enables you to see them at a decent (or 100%) zoom level. Yes, you could always zoom in really close, and fill... but the point of this exercise is speed! I don't like to fiddle around too much... But hey, if you are more patient than I am, you could zoom in and fill as much as your heart desires. To continue, select all shapes and increase the transparency until you are able to see the shapes that were not touching other lines (if you have any.) In this drawing the shapes were, one of the eyes of the seal, and the fin and eye of the fish Carefully Marquee Select around one of those shapes and Bring to Front (Ctrl+F). Give the top-most shape a black color - and Move Backwards (Ctrl+Shift+B) until the underlying shape(s) are revealed and apply your gray fill color. Repeat until all "freestanding shapes" have the same colors as the rest of your drawing. Once I corrected the eyes, and the fin, I set the transparency back to 0%. When I open the Name Gallery I will still see the blue color listed... even though there doesn't seem to be any blue in the drawing these are the scrap pieces! All other shapes were given a neutral gray color - and the back-most shape was made black... In the Name Gallery select only the blue named color. .. this will select all shapes with the blue fill (scrap pieces) in the drawing - hit delete! Now you are left with only the shapes you see on-screen. Save the drawing, again with a unique file name (and keep it don't over-write it.) Having this file might come in handy if you wish to experiment further but for purpose of the tutorial, we don't need it anymore. Let's color!
|
|||||
|
|
|||||


