 |
 |
||||
| 0 1 2 3 4 5 6 Download Zipped Tutorial | |||||
|
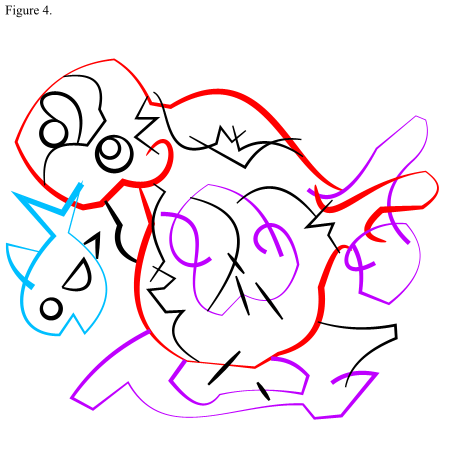
Here I add some variation to the original stroke shapes: Red line color – the original stroke is changed to Propeller. Purple line color – the original stroke is changed to Bow Tie. Blue line color – the original stroke is changed to Concave 2. When you are changing around your stroke shapes, and line widths – you can use them as a "design element", and highlight parts of the drawing that you think are more import. You can also use thinner line widths to emphasize objects, which are in the distance. Me, well, I just randomly changed them around, because I hope to make it to my little one's swim meet to night… and I really want to be there… as it's her first one… and she can't swim yet… and the starting pistol is going to freak her out! :-) To change the direction of how a stroke shape run - select a line - Choose the Curve Tool - and click the Reverse paths icon. It's also important to note that a line needs to be about one point in width, and that includes what the stroke shape does to the line... E.g. The propeller stroke thins a line in the middle... a one point line would become almost invisible in the middle part of the stroke, which would not work with this process. In converting such a fraction of a line into a shape, any vector application using a decent anti-aliasing engine will interpret the thin part as a "break" in the line. You must have solid lines all over the image! If you wish to work with thinner line widths, work on a page size larger than what your final image will be, and when the image is completed, scale it down to the required size.
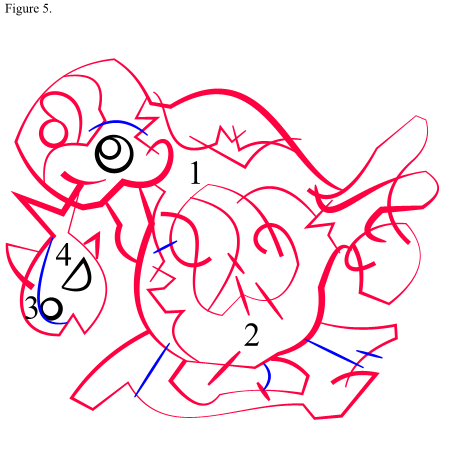
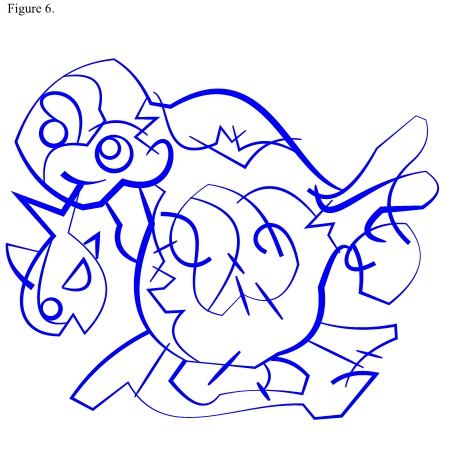
About 5 minutes later our drawing is ready... now we just need to "spiff" it up a bit. But before we do that you should zoom in a little bit, and verify that all the lines we have drawn, really overlap or touch other lines. Use the Push Tool to quickly navigate through your drawing. When you alter the line widths or stroke shapes etc. their relative position changes just a fraction - and the "spiffing" up portion of the tutorial depends on all the lines touching or overlapping, otherwise it will not work. At all! If you look at this drawing as it looks right now - you see that we have essentially created a coloring book page. It's a drawing that we will soon start coloring, and the parts of the drawing that will become "fillable" are the cells - areas blocked in by lines. Also notice that almost all lines in the drawing are inter-connected... all those lines will become cells – which will have the same line color when we are done. (Shown in red.) The cells with black lines will become their own "entities" when we are done, and can be assigned any line color. You could draw these shapes later on, the "normal" vector way, as they are very easy to do, but for tutorial purposes, we will leave them as is. Now it's the time to examine your drawing again. Do you really have all the lines where you want them to be? If they are not fixed now - you would have to go back to this point of the tutorial should you change your mind. I decided to further break up some of the cells in to smaller pieces (Shown in blue.) Do you see that small line in the body part of the seal pup? The addition of that small line actually creates two new cells - (1) and (2). In the same way, the blue line on the fish creates two cells in the body of the fish - (3) and (4).
Ok, let's turn all these lines in to some shapes we can fill! IMPORTANT! Before you proceed... Do save this stage of the drawing, with it's unique file name - and keep it! Be careful not to over-write it, because if you missed a line that doesn't (despite careful examination) overlap, or touch other lines - or perhaps you simply want to change something... you will have to go back to this stage of your drawing. Also, if someone has commissioned you to create a drawing for them, this would be one of the stages you should get approval on, before proceeding. Changing the shape, or the placement of the lines, is a piece of cake at this point, just drag and push them in to position! If you get an OK on this stage, it's will be smooth sailing all the way home! To turn these lines in to "fillalble" shapes: (1) Select All lines - Convert Line to shapes (Menu – Arrange – Convert Line to Shape.) (2) Select All - Add shapes (Menu - Arrange - Combine Shapes - Add shapes.) (3) Select the resulting shape - Break Shapes The result of the preceding operation turns your drawing into something that looks like a silhouette… What gives? Well, all the goodies are hidden under your topmost shape... [Click here for a Zipped XAR file of this step]
|
|||||
|
|
|||||


