|
|
|
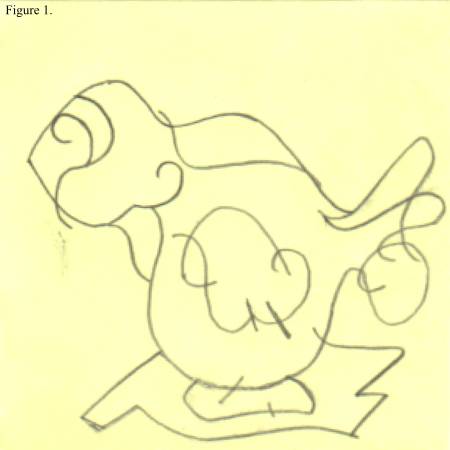
I set the Paper size to 550 by 550 pixels. I started by importing a low resolution scan of a small scribble on a post-it note. The quality of the scan doesn't really matter, as it will only be used as a rough guide anyway... Resize the scan to fit the page. HINT! If you follow the scan closely when doing the drawing/tracing part, you could incorporate some of the flaws in the original scan, which would add some interesting character. Instead of a scan you could also do a quick, messy sketch with the Freehand Tool - whatever makes your day. The post-it note, or your quick freehand sketch, will be the bottom-most layer in the Layer Gallery. Make sure the bottom layer is locked once you are done, to prevent it from accidentally being misaligned. Open the Layer Gallery and create a new layer, on which you will be doing the actual drawing. I really enjoy the Xara X1 Pen Tool as I find it to be the fastest drawing tool available, as it makes it really easy to create straight and curved line segments. So, in this tutorial I will be using the Pen Tool exclusively, but again you can pick the drawing tool you feel most comfortable with. With no objects selected - Click on the Freehand Tool - In the Stoke Shape drop down menu that appears, chose the Cigar 2 stroke. Next, set the line width to a 5 pt line width, and then open the Line Gallery, and choose Miter Join. On the Color Line (the screen color palette) - Left-click on the Set 'no color' icon, which will default all shapes we create to have no fill color (we are only interested in the lines.) Then Right-click a color swatch to choose your line color. The color you choose does not matter in the final drawing; just pick one that's easy for you to work with. Select the Pen Tool - and just draw, with your scan or sketch as a guide... My drawing will be some sort of seal pup, I hope...
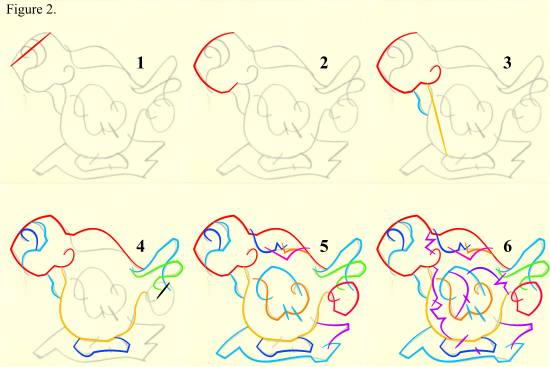
Before you start, you might want to lower the transparency of the scan, or your sketch, to make it easier to see what you are drawing. In the drawing part of the tutorial, I'm using different line colors, but only because I need to show you how I built up the image. The mixes of colored lines are the different line segments that I created. With the Pen Tool click the start, and then the end point of your first straight line segment. With the line still selected - move your cursor back to hover on top of the line, until an arrow cursor appears. Left-click and hold the line, and push the straight line in to a curved line segment. As your line is still selected you can just click, to place your third node in the line, and again push and drag the line in to your desired shape. If you push and drag, and then release your Left-Click hold on the line, you can hover to a different part of the line to shape the line further. With the Pen Tool, the last node you placed is where the tool will continue drawing. Once you have drawn three nodes, you can quickly choose which end point you wish to draw from. Click one of the middle nodes and then click the other end point if you prefer continue drawing from there. We are clicking one of middle nodes first, because clicking from one end point to another would close the shape, and you don't necessarily want to do that. When you are ready to start the next line segment, hit the Escape key to release the active line, and continue your drawing. What you are doing here is making lines touch or overlap other lines. Start a new line segment when one is needed in order to complete your image. If you look at the 6 step progress image you will see that I create the same type of "fillable" areas as you would have, when working in a bitmap drawing application.
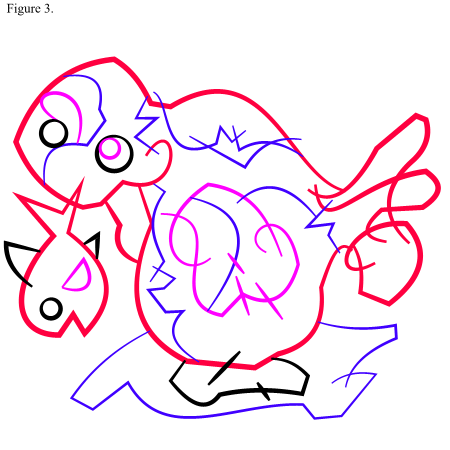
I added a small fish - and some eyes done with the Ellipse Tool... Here's the thing... Up to this point you could have mixed and matched line widths, and stroke shapes as you were drawing. I chose not to do so, because I like to get the lines down as fast as possible, and experiment doing so drawing fast sometimes creates happy little accidents (the small fish was one of those ) So in this step we will add some variation to the line widths... This is what I changed: Red line color line width thickened to 6 points. Blue line color line width thinned to 3 points. Magenta line color line width thinned to 4 points. Black line color - original line width kept at 5 points. You could also use your own vector-based brush in the drawing part of the image. In fact you could throw any kind of vectors in there (pieces of clip-art, fonts etc. ) as long as you have in mind what we are creating here lines. Everything on-screen will be converted to lines further on in this tutorial.
|
||||
|
|
||||


