 |
 |
||||
| 0 1 2 3 4 5 6 Download Zipped Tutorial | |||||
|
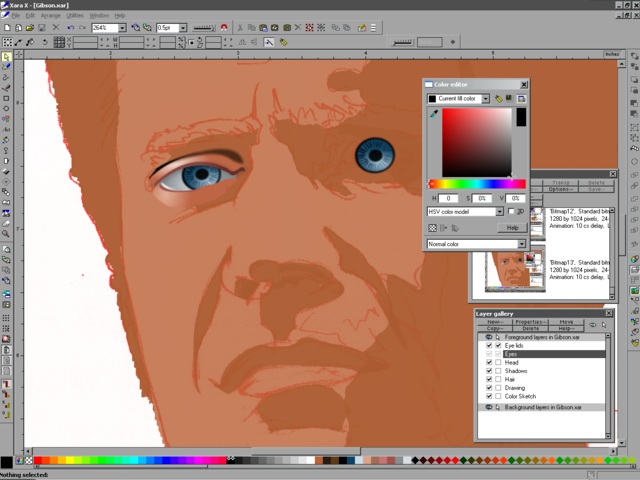
Now make the shapes for the eyelids and add the sclera(whites of the eyes). Most people don't have white scleras, but they are a little darker than white and have some hue to them. The eyelids are on a layer above the cornea and pupils and the sclera are behind the cornea on the same layer. Go ahead and alter the values of the objects you've created to make them look right. In this case, I convert the Mould envelope to a shape and ungroup it in order to edit the eye color.
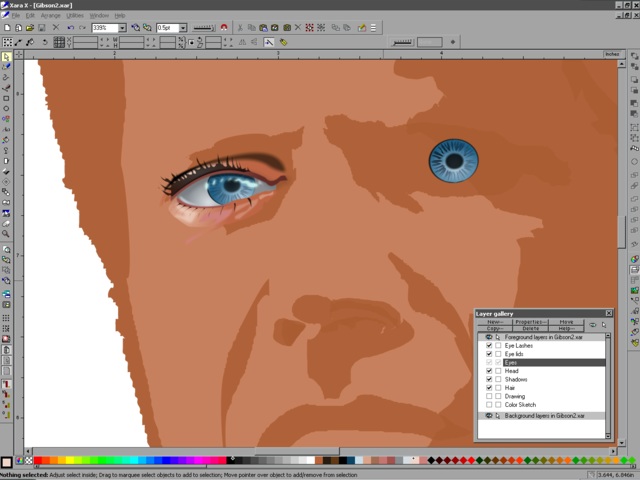
I took a dinner break just now and coincidentally, 'Braveheart' was on. I realize I need to adjust Mel's eyes as they are much lighter than I have made them and have more of a cornflower blue color to them. Also the dark like that surrounds the cornea is a lot less pronounced. Remember, when doing a likeness, it's really dependent on the quality of photo reference you have of your subject. If a client asks for something significantly different from your reference, or provides you with reference that is way off from what you need, don't take the assignment. I have also added eyelashes and a highlight. If I can't make his eye look right, then I know I won't be able to do a good likeness. Next I will work on the other eye. I have made the highlights a little blue in color as opposed to yellow window pane patterns. In my reference, the photo was taken outdoors and the highlight is a reflection of the sky as opposed to indoor spot studio lighting. The upper eyelash is a shape drawn with the freehand tool and drawn on top of again with the same freehand tool after I completed it. I also used the contour tool with inset path on to mess with the overall size. Don't use this tool too much as it can radically alter your shapes from what you started with. The lower eyelash is a blend of two eyelashes placed on a curve and I played with the distances using the position profile slider. The same goes for the highlights on the eye except that I added the shapes when I was done with them. Pretty much everything you see has some amount of feathering and or transparency applied. This helps the shapes blend into each other better and aids in turning form. Transparencies help the colors and values feel more consistent and 'together'.
|
|||||
|
|
|||||

