
 Fill for Shape 1:
Linear fill with RGB values as R-42%, G-44%, B-45% (I used the color picker to get these values from the bitmap reference image.
Select the end of Linear fill and set color to R-20%, G-20%, B-20%.
Choose the Bevel Tool (Ctrl F3) and apply an Inner, Rounded bevel, Round Join, Size 4pix, and set the Contrast to 50%.
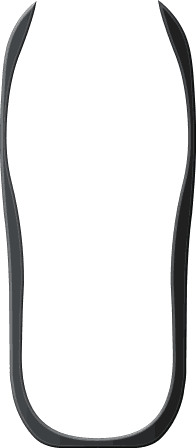
 Put Shape 1 and Shape 2 together as shown.
We are making great progress!
 Draw a rectangle with the Rectangle Tool
(Shift F3
). Convert to the rectangle to editable shapes (Ctrl Shift S) and fit the outline with border of the LCD panel as shown using the Shape Editor Tool.
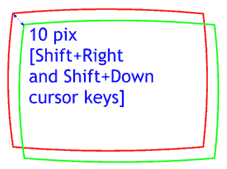
Set the fill color to none and make the outline color green. Clone the shape (Ctrl k) and change the outline to red. Move the cloned shape down and to the right 10 pixels in each direction.
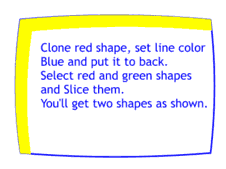 Clone the red outlined shape, change the outline to blue, and send it to the back (Ctrl k
).
Clone the red outlined shape, change the outline to blue, and send it to the back (Ctrl k
).
Select the red and green outlined shapes and Slice them (Ctrl 4) Delete the middle part. You should be left with the shape shown in yellow and the blue outlined shape under it.
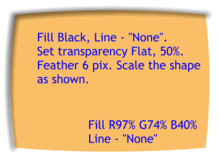 Fill the yellow shape black and set the line weight to none. Set the Transparency to Flat
, 50%. Set Feathering slider (on the top right area of the Infobar) to 6pix. Then scale the shape up as shown.
Fill the yellow shape black and set the line weight to none. Set the Transparency to Flat
, 50%. Set Feathering slider (on the top right area of the Infobar) to 6pix. Then scale the shape up as shown.
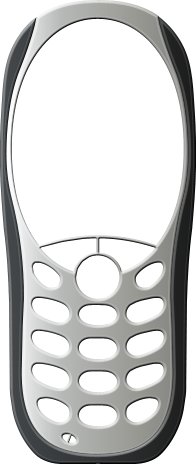
Fill the LCD "display" with R-97%, G-74%, B-40%.