 |
 |
| 0 1 2 3 4 5 6 7 DOWNLOAD ZIPPED TUTORIAL |
|
|
|
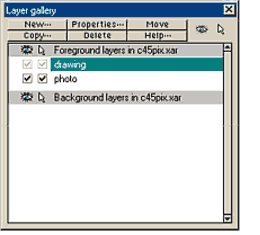
Drawings settings Units: pixels Go to the Layer Gallery, select "Layer 1", click Properties..., change name to "Photo". Make the layer visible, and non-editable Click on the Drawing layer's title bar to select this layer and close the Layer Gallery window. Set Zoom factor to 200% on the Infobar. |
|||
|
Set outline color to Red. Set the outline weight 0.25pt. Create 6-12 points on the edge of phone's outline (left) and close the shape by placing the last anchor point on top of the first. Set Fill color to none. NOTE: Create the outline around the entire phone. |
|||
|
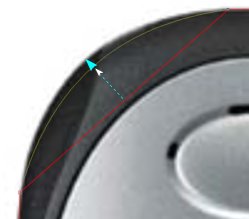
Drag the red outline like a rubber band to match the shape of the phone.
|
|||
|
Go to the next section of the outline and repeat until you'll get smooth outline around the entire shape of the phone. Call this shape Shape 1. |
|||
|
Choose the Selector Tool [F2] and select the Shape 1. Hold down the Shift key and press the right arrow key until Shape 1 is moved to the right side of the bitmap template. Using the same technique used to create Shape 1, create Shape 2 and Shape 3 (shown in blue outline and green outline). To get Shape 3, choose the Ellipse Tool [Shift F4] and draw the ellipse. Set the Fill to no color. Convert the ellipse to editable shape (Arrange menu > Convert to Editable Shapes). Adjust the curves to fit as shown. |
|||
|
Move the line to the position shown. Select both the line and the ellipse and Slice shapes (Arrange > Combine Shapes... Slice (Cut) Shapes or press Ctrl 4). This breaks the ellipse into two shapes. Using the Shape Editor Tool fit both shapes as shown in Shape 1. Create a vertical line, center it to the middle bottom part of ellipse as shown. Then Slice Shapes and edit the shapes to fit with phone's buttons as shown in the previous illustration (Shape 1).
|
|||
|
|
|||
|
|
|||
 STEP 1. Settings
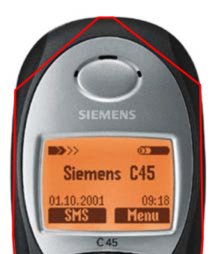 Choose the Shape Editor Tool (F4). Set the parameters on the Infobar to Make Line and Cusp Join.
 Place the Shape Editor Tool cursor over the line between two points. The cursor
will change to an arrow.
Place the Shape Editor Tool cursor over the line between two points. The cursor
will change to an arrow.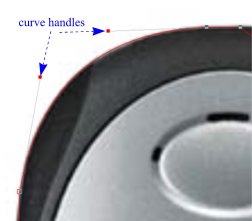 You can fine tune the curve by using the Bezier curve handles. Place the cursor
over a control point and click. Drag the small red square at the end of the extending line until the curve matches the phone's border. (Zoom in closer for more control).
You can fine tune the curve by using the Bezier curve handles. Place the cursor
over a control point and click. Drag the small red square at the end of the extending line until the curve matches the phone's border. (Zoom in closer for more control).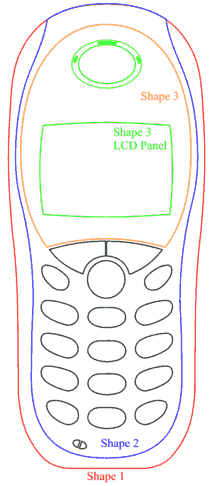 STEP 3. Re-create outlines - II
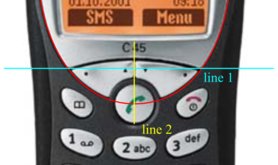 Using the Pen Tool or the Shape Editor Tool, draw a horizontal line
[F4] (click to set first point, then hold Ctrl and set the end point).
Using the Pen Tool or the Shape Editor Tool, draw a horizontal line
[F4] (click to set first point, then hold Ctrl and set the end point). 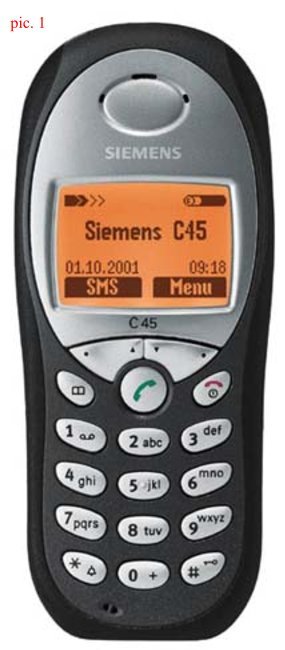