
|
||
|
|
|
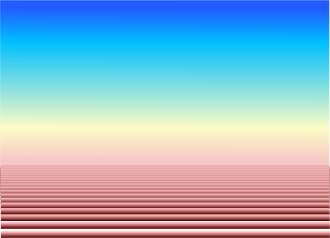
You may notice that in between the furrows in the extreme foreground there are (depending on how you created the furrows) gaps between the furrows through which you can see the background. If that's so, make a background rectangle the size of the furrow area, add a colour you like, and send the rectangle to the back. This is the basic landscape completed.
|
|
Once that is done you can EXPERIMENT with the Light Angle and Light Elevation sliders until you get the best effect. This makes a somewhat primitive hill, but it'll get you there! You can change the colours with the colour editor once you have the hill about right. Ain't Xara great! |
|
 Now ... using the Blend Tool
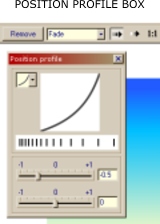
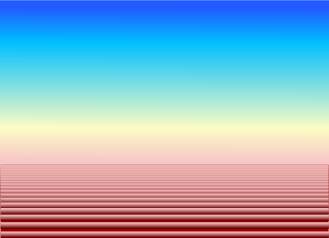
, blend the top and bottom furrows. Use around 20 steps, plus or minus a few. Now open the Position Profile dialog and play with the profile settings until you get the perspective effect you like. TIP
: you will need a different one depending from where you started blending.
Now ... using the Blend Tool
, blend the top and bottom furrows. Use around 20 steps, plus or minus a few. Now open the Position Profile dialog and play with the profile settings until you get the perspective effect you like. TIP
: you will need a different one depending from where you started blending.
 TAKE AN EYE BREAK (if you haven't already), and then we need to start on the hills.
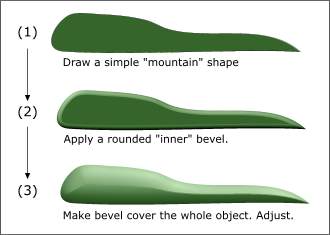
 Draw a hill-like shape. You can EXPERIMENT with this.
When you have apply the rounded inner bevel make sure you drag the slider until the entire hill is covered by the bevel. The guide line will disappear - this is a little hard to describe, so I hope I have been clear enough.
Draw a hill-like shape. You can EXPERIMENT with this.
When you have apply the rounded inner bevel make sure you drag the slider until the entire hill is covered by the bevel. The guide line will disappear - this is a little hard to describe, so I hope I have been clear enough.