Page 2
0
1
2
3
4
5
6
7


Make a Linear fill. Time to EXPERIMENT! With the sky selected click on the Fill Tool icon. Drag the fill tool from the bottom to the top of the sky. Click on the bottom 'fill handle' (shown left) to select it and then click on a yellow fill colour from the colour bar at the bottom, and you will end up with...


...with this!

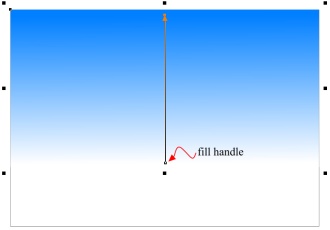
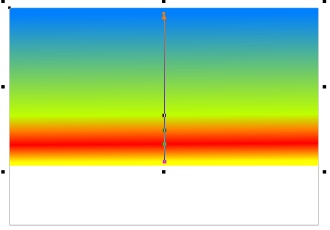
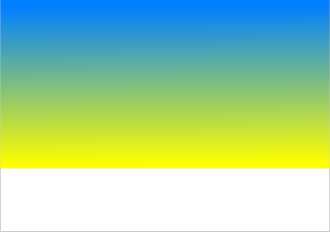
Now EXPERIMENT some more. With the sky selected so that fill handle shows, drag some colours (you choose: yellow?, green?, red?) up from the colour palette and drop them on the fill path arrow (not just the little square, at the bottom, but anywhere on the fill path) in the positions you think best. Release the mouse button when the little icon changes from a tiny square with an arrow above it to a slightly larger square. (Once a color has been placed on the fill path, you can reposition it as you wish).


It may look pretty awful, but don't worry!

When you have maybe four or five colours on there, you can change them. You can slide them up and down the fill handle to move them. Or you can open the Colour Editor ( Ctrl e) and edit each colour separately, it's colour will appear in the editing box. You can change it as you want. Don't like it at all? Right click on the colour station box on the fill path arrow and that colour will vanish.