|
|
|
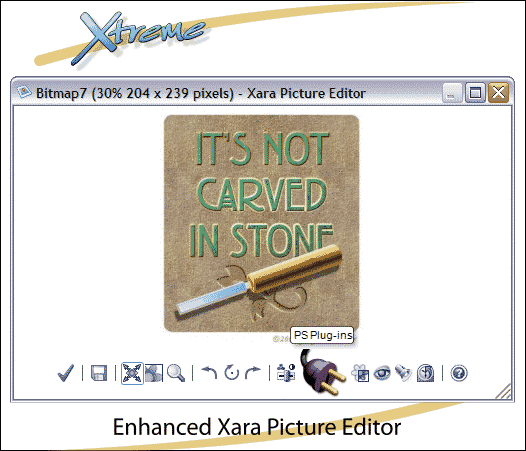
XPE. Xara Picture Editor added a welcome amount of bitmap control to Xara X1. The new and improved version offers many new features not available in the Xara X1 model. The new Xara Picture Editor works inside Xara Xtreme but you can also use it as a stand alone image editor. Click on the PS Plug-ins button and you can use and apply all your Photoshop compatible filters either in Xtreme or in the stand-alone version. But that is just the beginning.
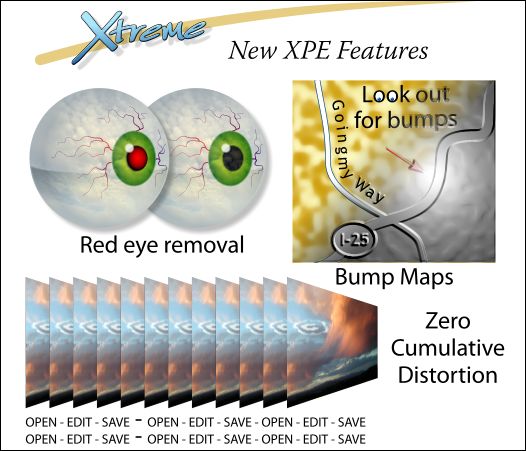
New additions to XPE include a Red Eye Removal tool to get the red out (You knew I would get an eyeball in here didn't you—can worms be far behind?). We have already seen the Bump Map filter. It too works in XPE. Zero Cumulative Distortion is a fancy way of saying that you can edit and save an image as many times as you want without image degradation. One reason for this is your edits are stored with the image (not unlike Photoshop's *.psd file format) and all applied at one time.
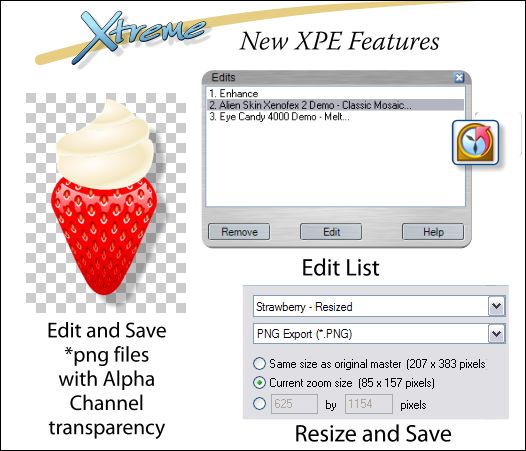
You can open a transparent *.png file in XPE and the edit the image. When you Accept or Save (a new capability in the stand-alone version) an image, you can save the image with the True Color + Alpha option to preserve the transparency. When you make several edits to an image, the Edit List feature lets you select and modify your previous edits as well as remove a previous edit. You can resize an image using the XPE Zoom Tool, and then Save the image to the current zoom size. You can also enter a specific size in the text entry box or use the scaling slider.
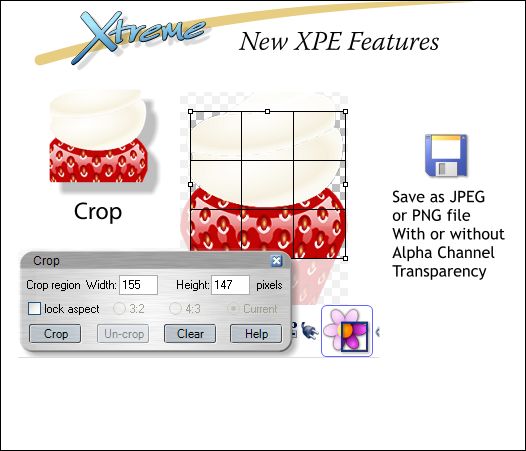
And while we are on the subject of feature requests, a most welcome addition is the Crop Tool. You can crop by dragging a selection marquee to indicate the crop (with and without the Lock Aspect Ratio option), or you can specify a ratio of 3:2 (for slides) and 4:3 (screen ratio).
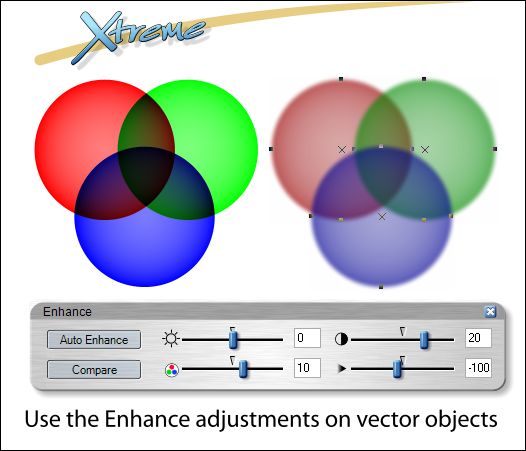
Current Xara X1 users know how terrific the Enhance dialog is in XPE. Well in Xtreme, it can be applied to vector objects as well using the new Live Effects Tool . The 3 circles on the left are vector objects with circular transparencies. The 3 circles on the right have been edited using the Enhance option in the Live Effects Tool. You can increase or decrease the amount of Brightness, Contrast, Color Saturation, and Blur/Sharpen. And if you decide at a later date, you don't like these effects, you can edit the effects or remove them. This is why they call it the Live Effects Tool.
|
||
|
|


