 |
 |
 |
 |
 |
 |
 |
|
|||||||||
|
||
 |
||
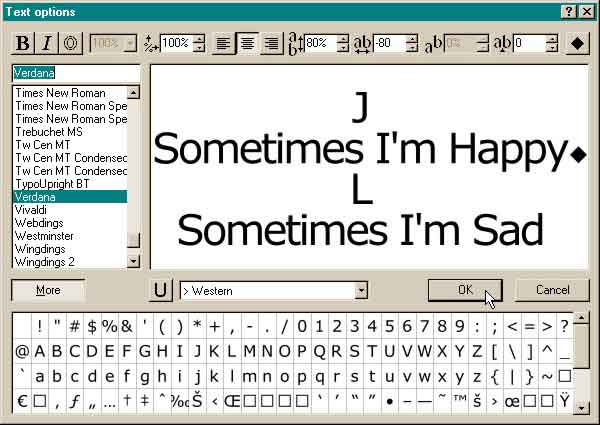
Open Xara 3D 4. (That was the hard part :-) Press the T icon to open the Text Options
window (shown above). Key in the text as shown using a font like Verdana. Press Enter to start a new line. Center align the text. After the text Sometimes I'm Happy
, press the Diamond button (top right) to Insert Page Break. Page breaks indicate where a step is placed. Notice the More button under the Fonts
list. When this button is pressed a chart of all the available characters drops down. Double click any of these characters to insert the character in the text. (You don't need to do this now). |
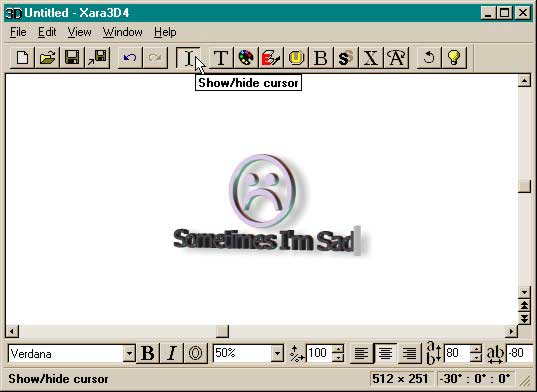 |
Press OK to close the Text Options window. Press the Show/Hide Cursor button (to the left of the Text Options T). Drag the gray rectangle
cursor over the text to highlight it, and change the Font Size to 50%. Deselect and then re-select the Show/Hide Cursor. Highlight the L. Change the font to Windings. Change the Font Size
to 200%. To step between the text, open the Animation Options dialog (the A with the elliptical arrow icon). Select Rotate 2 from the drop down list. Press the Start/Stop Animation
button. (The circular arrow icon next to the Animation Options icon). When the animation steps to the other text, stop the animation by pressing the Start/Stop Animation
button again. Repeat the last step and change the J to Windings. And change the Font Size to 200% using the Show/Hide Cursor. Using the Show/Hide Cursor
, highlight the "Happy" text and change the Font Size to 50%. |
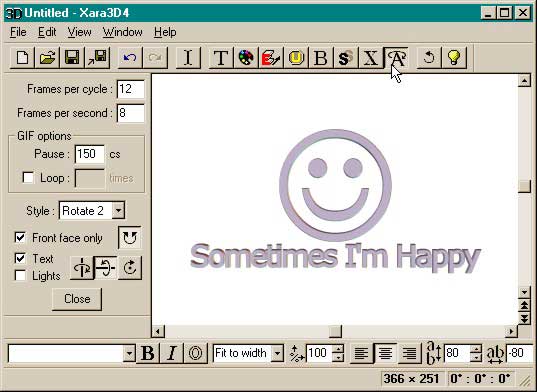 |
Open the Animation Options dialog. Select Rotate 2. Check Front Face Only, and select the Vertical Rotation Axis
(the vertical elliptical arrow). Add a Pause of 150. This adds a brief pause between steps. Change the Frames Per Cycle to 12 and the Frames Per Second to 8. (The more Frames per cycle,
the larger the file size). Press Close to close the Animation Options dialog. Then press Start/Stop Animation to play your animation. To export your animation, select File > Export Animation
. Name your animation and press Save. In the Export Animated Gif
dialog, experiment with the settings to get the best mix of image quality to file size. I find that selecting 32 or 64 colors with no dithering often works well. |
|
|||||||
|
|
|
 One of the very cool new features in Xara 3D 4
is Step animation. As you can see in this simple example, step animation steps through a sequence of text and/or images. And as you can also see, each character can have a different font, color, bevel
and more. Here is a step-by-step tutorial for creating a Happy - Sad animation.
One of the very cool new features in Xara 3D 4
is Step animation. As you can see in this simple example, step animation steps through a sequence of text and/or images. And as you can also see, each character can have a different font, color, bevel
and more. Here is a step-by-step tutorial for creating a Happy - Sad animation.