


 Drawing Tips
Filling an Open Path In Xara, only a closed path can be filled. Or so we
are led to believe. An closed path is one in which the are no open ends.
But here is a trick that gets around this requirement.
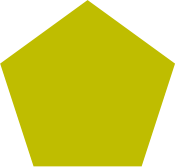
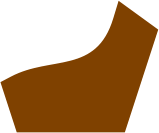
Select the open path and a filled shape such as square. From the
Arrange menu select Join Shapes. The open shape is filled with the
same attributes as the square. Now Arrange > Break Shapes. You can
delete the square.
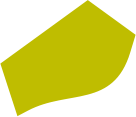
The path is still open. If you wish to have the path closed as well,
select the shape, switch to the Shape Tool (F4), select the first or last
control point, and press Enter. You can change the fill if you wish as
well as edit the outline.
Drawing Tips
Filling an Open Path In Xara, only a closed path can be filled. Or so we
are led to believe. An closed path is one in which the are no open ends.
But here is a trick that gets around this requirement.
Select the open path and a filled shape such as square. From the
Arrange menu select Join Shapes. The open shape is filled with the
same attributes as the square. Now Arrange > Break Shapes. You can
delete the square.
The path is still open. If you wish to have the path closed as well,
select the shape, switch to the Shape Tool (F4), select the first or last
control point, and press Enter. You can change the fill if you wish as
well as edit the outline.
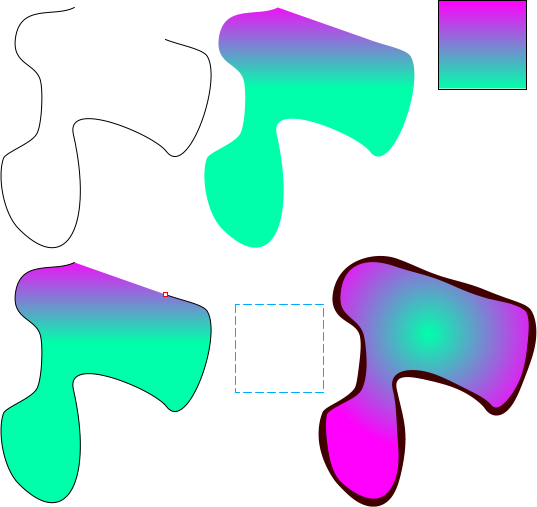 Join Shapes
Break Shapes
Select open end
of path - Enter
Open path
Filled shape
+
Combine Shapes > Add Shapes
Break Shapes
Join Shapes
Break Shapes
Select open end
of path - Enter
Open path
Filled shape
+
Combine Shapes > Add Shapes
Break Shapes


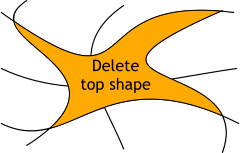
 Related Tip Overlap some lines. Select the lines and Arrange >
Combine Shapes > Add Shapes or press Ctrl 1. Then Arrange > Break
Shapes. Select the solid shape and delete it.
Related Tip Overlap some lines. Select the lines and Arrange >
Combine Shapes > Add Shapes or press Ctrl 1. Then Arrange > Break
Shapes. Select the solid shape and delete it.

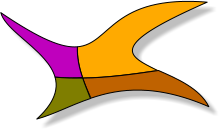
 One More Related Tip Overlap a line and a shape. Select both and
Arrange > Combine Shapes > Slice Shapes or press Ctrl 4. Like a
fracture in a piece of glass the slice extends creating two shapes.
One More Related Tip Overlap a line and a shape. Select both and
Arrange > Combine Shapes > Slice Shapes or press Ctrl 4. Like a
fracture in a piece of glass the slice extends creating two shapes.
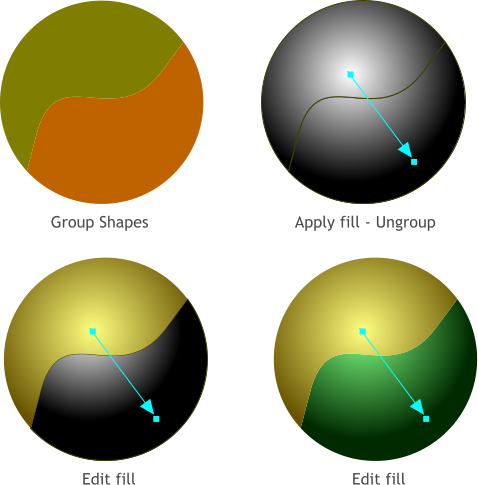 Matching Fills If you apply a fill to a group of objects, when you
ungroup the objects the fill remains intact. In the example above, I
have applied a Circular fill to the two halves of the grouped circle.
After un-grouping, I edited each fill separately. You can do this with any
fill including bitmap fills.
Matching Fills If you apply a fill to a group of objects, when you
ungroup the objects the fill remains intact. In the example above, I
have applied a Circular fill to the two halves of the grouped circle.
After un-grouping, I edited each fill separately. You can do this with any
fill including bitmap fills.
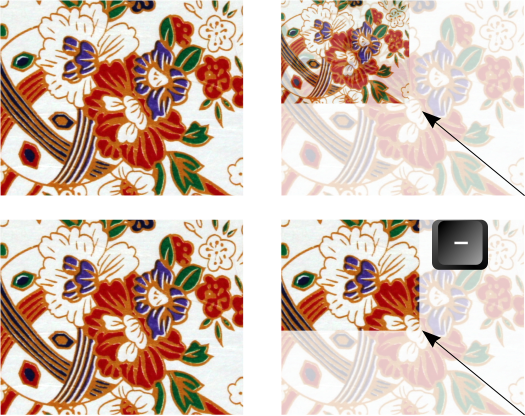 Maintaining a Bitmap Fill Aspect Ratio When Resizing an Object In
the two top examples, the bitmap filled rectangle has been scaled
downward and the bitmap has been scaled as well. If you want the
object to scale but not the fill, hold down the minus key (-) on the
Numeric keypad, as you resize. The results are shown bottom right.
Maintaining a Bitmap Fill Aspect Ratio When Resizing an Object In
the two top examples, the bitmap filled rectangle has been scaled
downward and the bitmap has been scaled as well. If you want the
object to scale but not the fill, hold down the minus key (-) on the
Numeric keypad, as you resize. The results are shown bottom right.
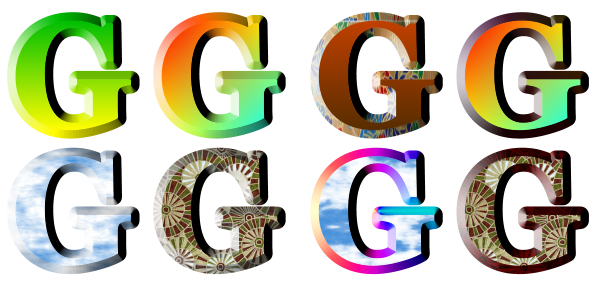 Changing the Fill for a Beveled Object By default, the bevel of a
beveled object inherits the fill from the object itself. But it does not
have to be such. You can select the object or the bevel independently
by holding down the Ctrl key then clicking either the object or the
bevel. As you can see from the modified objects on the right side
above, you can apply any of Xara’s fills independently.
Changing the Fill for a Beveled Object By default, the bevel of a
beveled object inherits the fill from the object itself. But it does not
have to be such. You can select the object or the bevel independently
by holding down the Ctrl key then clicking either the object or the
bevel. As you can see from the modified objects on the right side
above, you can apply any of Xara’s fills independently.
 Changing Shadow Fills In a similar manner to the bevel fills, you can
alter a shadow’s fill but I’m afraid, not to the same dramatic effect.
But it may well be that I am missing something. Ctrl click on the
shadow and then change the fill type as desired. This used to be easier
in previous versions. For example, when you apply any sort of gradient
fill such as the R, the fill path arrows do not appear for editing. So it is
more of a leap of faith. I applied an interactive Linear fill by Ctrl
clicking on the shadow with the Fill Tool, then dragging upwards. Then
I dragged and dropped colors onto each end of the shadow to achieve
the two different colors. Not exactly interactive or intuitive, but it did
work. You also need to experiment with the Shadow Transparency and
Blur sliders to get the best effect.
Changing Shadow Fills In a similar manner to the bevel fills, you can
alter a shadow’s fill but I’m afraid, not to the same dramatic effect.
But it may well be that I am missing something. Ctrl click on the
shadow and then change the fill type as desired. This used to be easier
in previous versions. For example, when you apply any sort of gradient
fill such as the R, the fill path arrows do not appear for editing. So it is
more of a leap of faith. I applied an interactive Linear fill by Ctrl
clicking on the shadow with the Fill Tool, then dragging upwards. Then
I dragged and dropped colors onto each end of the shadow to achieve
the two different colors. Not exactly interactive or intuitive, but it did
work. You also need to experiment with the Shadow Transparency and
Blur sliders to get the best effect.
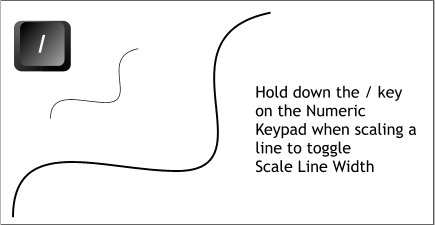 Selective Scaling of Line Widths I prefer to disable the Scale Line
Widths option. But there are times when I would rather the width did
scale when I resize a selection. In this case I hold down the divide (/)
key on the Numeric keypad when I resize the selection and the line
widths scale proportionately.
Selective Scaling of Line Widths I prefer to disable the Scale Line
Widths option. But there are times when I would rather the width did
scale when I resize a selection. In this case I hold down the divide (/)
key on the Numeric keypad when I resize the selection and the line
widths scale proportionately.
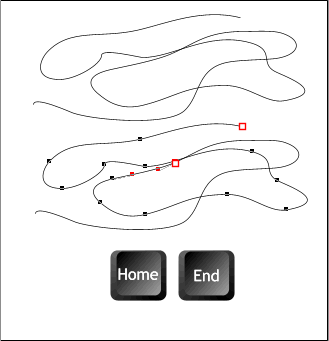 Finding the Ends of a Path Sometimes an open path or paths can
overlap to the point where you loose track of the beginning or ending
control point. An easy way to identify these obscure points is to select
any point on the path, and then press the Home or End keys on your
keyboard. The start or end control point will be highlighted in red.
Double Click Anything If you double click any object with the Selector
Tool, more often than not the tool will change to one appropriate to
the task. Double click on a text object or text area for example and the
cursor changes to the Text Tool. Double click on a bitmap and you get
the Photo Tool > Clipping tool. Double click on a path enables the
Shape Tool. Double click an extrusion the 3D Extrusion Tool cursor
appears. Go ahead and try it. You can’t break anything. Honest.
Finding the Ends of a Path Sometimes an open path or paths can
overlap to the point where you loose track of the beginning or ending
control point. An easy way to identify these obscure points is to select
any point on the path, and then press the Home or End keys on your
keyboard. The start or end control point will be highlighted in red.
Double Click Anything If you double click any object with the Selector
Tool, more often than not the tool will change to one appropriate to
the task. Double click on a text object or text area for example and the
cursor changes to the Text Tool. Double click on a bitmap and you get
the Photo Tool > Clipping tool. Double click on a path enables the
Shape Tool. Double click an extrusion the 3D Extrusion Tool cursor
appears. Go ahead and try it. You can’t break anything. Honest.


