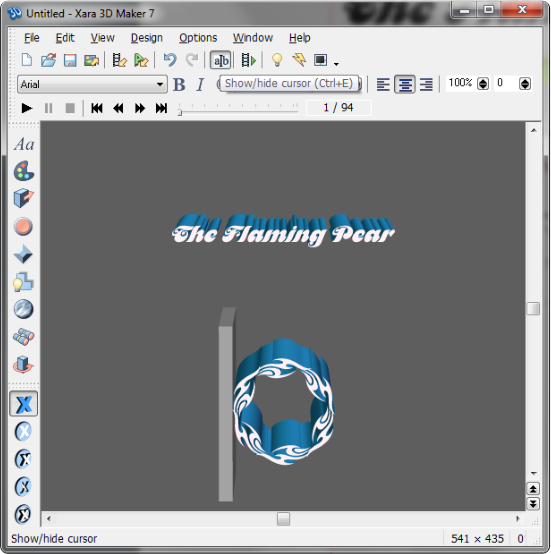
 Click the Show/Hide Cursor icon. Copy and paste the text and then the
flame circle.
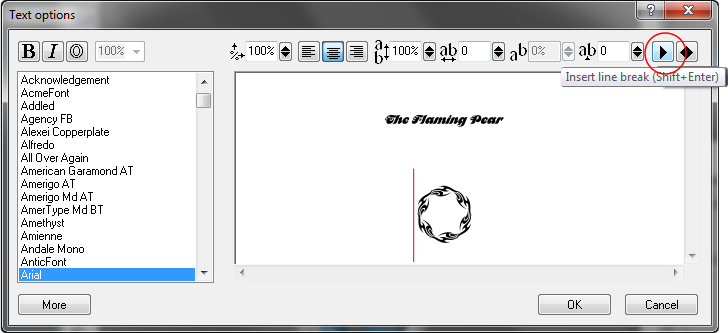
Select the Text Tool again. Remove the diamond after the text and
then press the Insert Line Break button.
Click the Show/Hide Cursor icon. Copy and paste the text and then the
flame circle.
Select the Text Tool again. Remove the diamond after the text and
then press the Insert Line Break button.
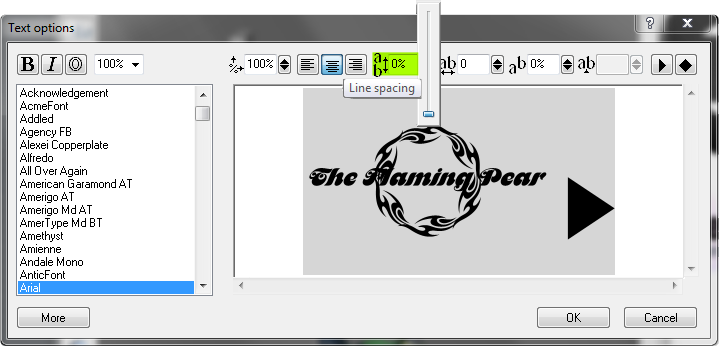 Switch back to the Text Tool. Highlight both the text and then flame
circle. Click the Line Spacing up/down arrows and drag the slider all
the way to the bottom (0%). This centers the text and the flame circle.
Close Text Options and switch back to the Show/Hide Cursor. Hold
down the Shift and use the arrow keys on your keyboard the highlight
the flame cirle. Open Color Options, select Text and change the color
to orange. Click the Show/Hide Cursor again and use the arrow keys to
move the cursor to the line of text and highlight it. Change the color of
the text to a pear green. It’s a bit awkward but it works. Be patient.
Switch back to the Text Tool. Highlight both the text and then flame
circle. Click the Line Spacing up/down arrows and drag the slider all
the way to the bottom (0%). This centers the text and the flame circle.
Close Text Options and switch back to the Show/Hide Cursor. Hold
down the Shift and use the arrow keys on your keyboard the highlight
the flame cirle. Open Color Options, select Text and change the color
to orange. Click the Show/Hide Cursor again and use the arrow keys to
move the cursor to the line of text and highlight it. Change the color of
the text to a pear green. It’s a bit awkward but it works. Be patient.
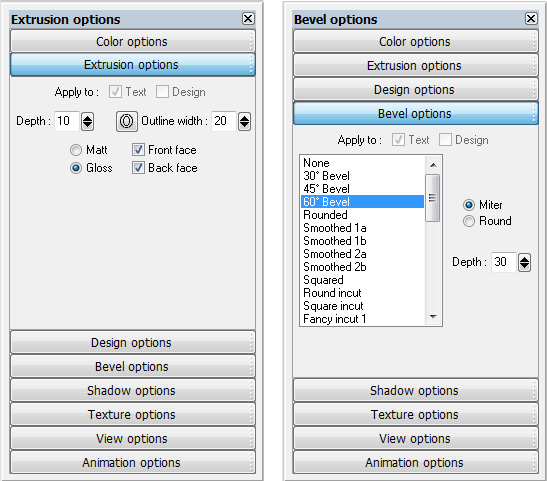
 Highlight the flame circle with the Show/Hide Cursor. Open Extrusion
Options and change the Depth: to 30. Open Bevel Options and select
60° Bevel. Change the Depth: to 30.
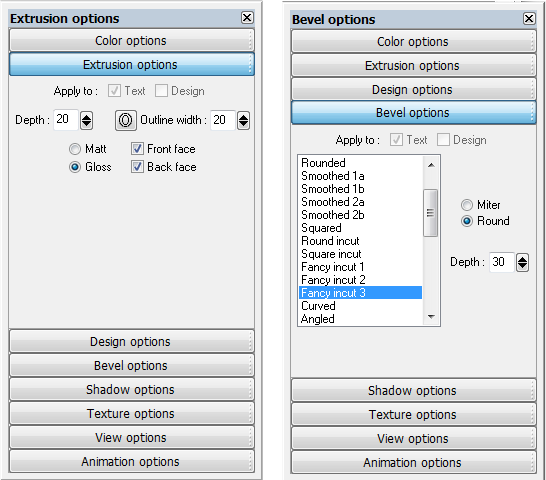
Now highlight the text (you may need to click the Show/Hide Cursor
once or twice to re-enable it). Change the Extrusion Depth: to 45. In
Bevel Options, change the bevel type to Fancy Incut 3 and increase
the Depth: to 30 and the type to Round.
Highlight the flame circle with the Show/Hide Cursor. Open Extrusion
Options and change the Depth: to 30. Open Bevel Options and select
60° Bevel. Change the Depth: to 30.
Now highlight the text (you may need to click the Show/Hide Cursor
once or twice to re-enable it). Change the Extrusion Depth: to 45. In
Bevel Options, change the bevel type to Fancy Incut 3 and increase
the Depth: to 30 and the type to Round.
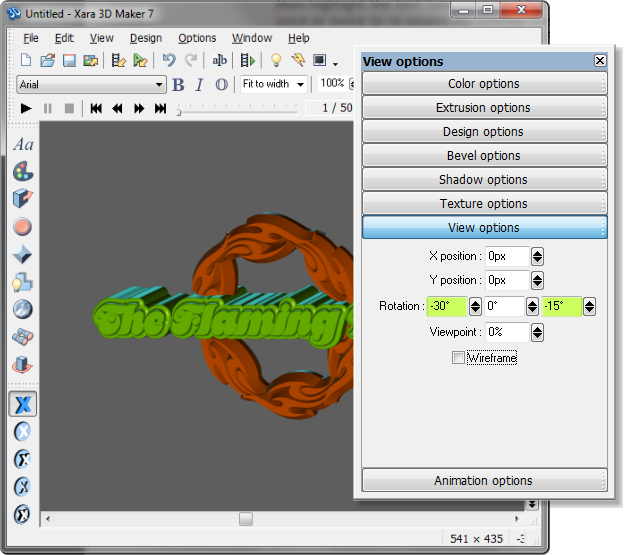
 Edit the View Options > Rotation: settings as shown.
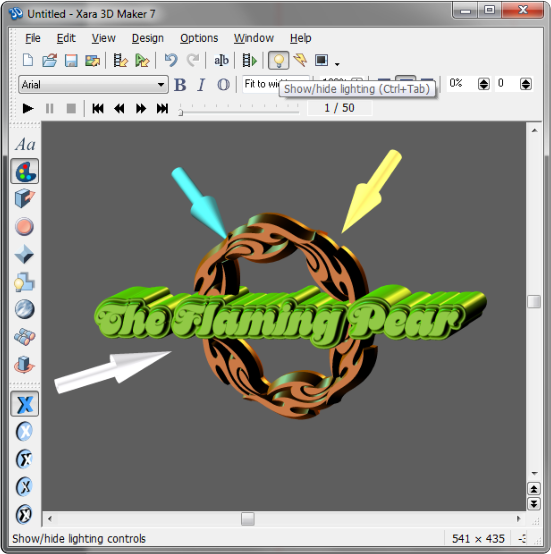 Finally, click Show/Hide Lighting and drag the light arrows to add
highlights. Double click on a light to open the Color Options if you
want to change the light color.
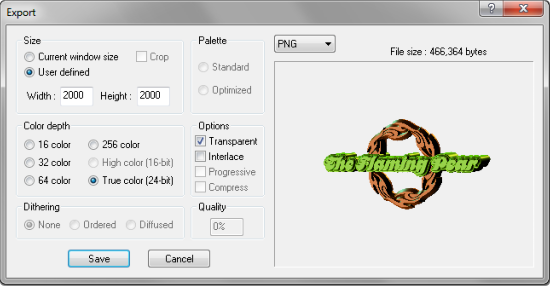
Export the logo.
Finally, click Show/Hide Lighting and drag the light arrows to add
highlights. Double click on a light to open the Color Options if you
want to change the light color.
Export the logo.
 I changed the background color before exporting to the same color as
this page and then exported checking the User Defined Size. 2000 x
2000 is the maximum export size. I selected True Color and
Transparency. This created a PNG image with a transparent
background that at a size of 6” has a resolution of 300dpi, which is
sharp enough for high quality printing.
And did I mention you can create screen savers? And cool 3D buttons?
The best way to see all the cool things you can do with Xara 3D Maker 7
download your free trial copy.
Your comments, questions are always welcome. Use the send e-mail
link to send me your feedback.
Gary W. Priester
Your Editor
Send e-mail
I changed the background color before exporting to the same color as
this page and then exported checking the User Defined Size. 2000 x
2000 is the maximum export size. I selected True Color and
Transparency. This created a PNG image with a transparent
background that at a size of 6” has a resolution of 300dpi, which is
sharp enough for high quality printing.
And did I mention you can create screen savers? And cool 3D buttons?
The best way to see all the cool things you can do with Xara 3D Maker 7
download your free trial copy.
Your comments, questions are always welcome. Use the send e-mail
link to send me your feedback.
Gary W. Priester
Your Editor
Send e-mail