


 WEBSITE AND WEBSITE GRAPHICS CREATED WITH XARA DESIGNER PRO 6
DOWNLOAD ZIPPED TUTORIAL
I have used this spherical mould technique in quite a number of
tutorials over the years but it is always fun to do it again.
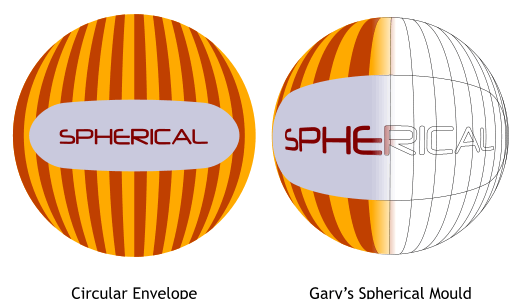
Xara’s Circular Envelope does not create a true spherical effect as you
can see in my side-by-side comparison. Xara’s effect is one click. Mine
is more involved, but my results are more convincing. And as you can
see, my spherical mould is also vector, which means it is editable.
WEBSITE AND WEBSITE GRAPHICS CREATED WITH XARA DESIGNER PRO 6
DOWNLOAD ZIPPED TUTORIAL
I have used this spherical mould technique in quite a number of
tutorials over the years but it is always fun to do it again.
Xara’s Circular Envelope does not create a true spherical effect as you
can see in my side-by-side comparison. Xara’s effect is one click. Mine
is more involved, but my results are more convincing. And as you can
see, my spherical mould is also vector, which means it is editable.
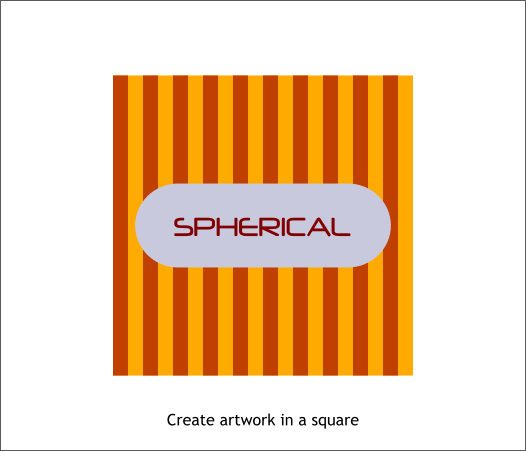
 Create your art in a square. You can use gradient fills as I will show at
the end of this tutorial. In this example I will use flat fills.
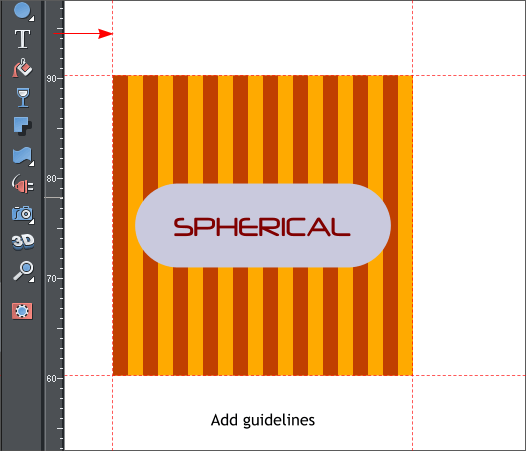
Display the screen rulers (Ctrl L). Drag and snap guidelines to the four
corners of your square image.
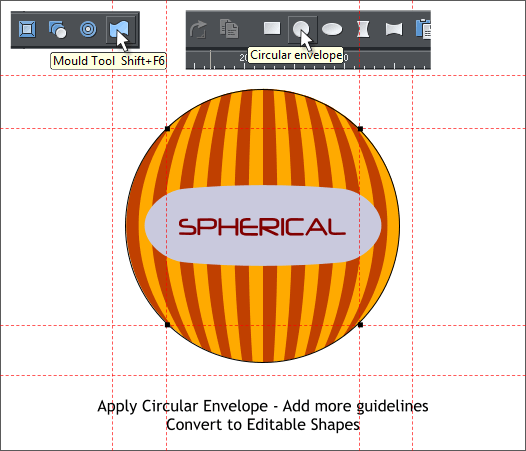
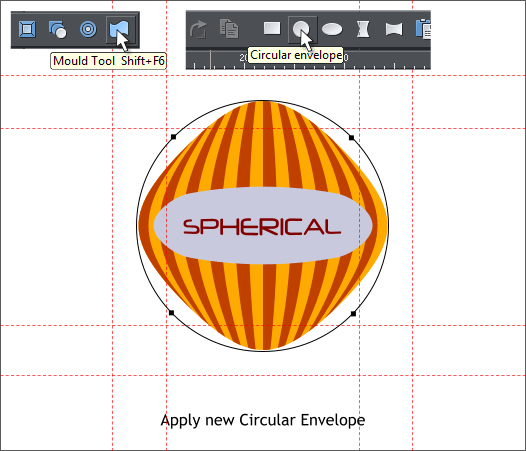
With all of your square design selected, switch to the Mould Tool (Shift
F6). Click the Circular Envelope icon on the Infobar. Drag four new
guidelines and snap them to the four control points on the envelope.
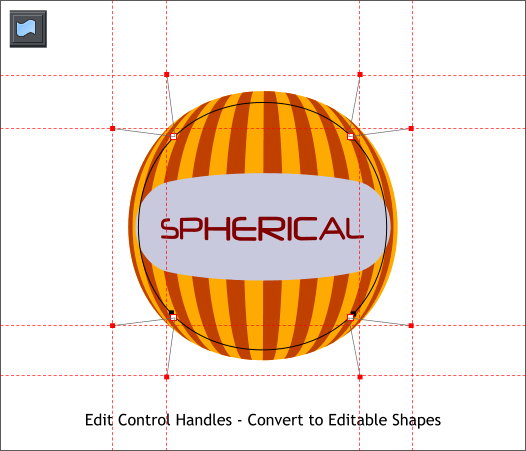
From the Arrange menu, select Convert to Editable Shapes.
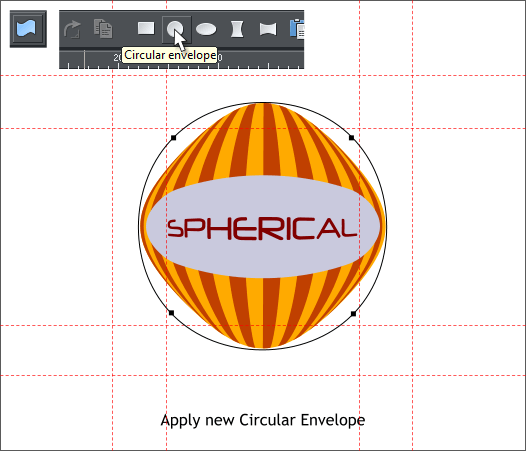
Apply a second Circular Envelope. Doesn’t look very spherical. Yet.
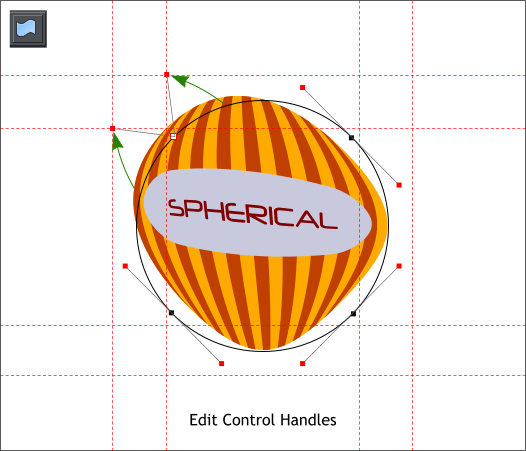
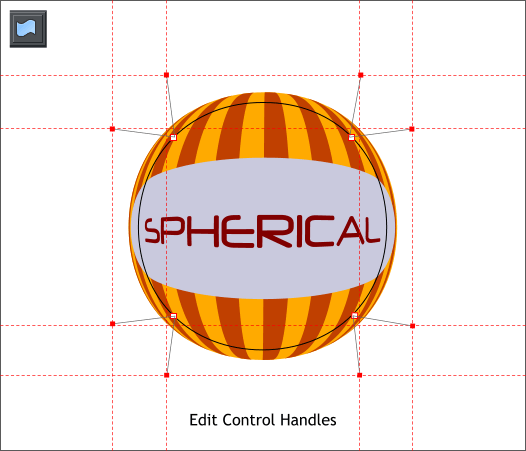
Click the top left control point (with the Mould Tool). A pair of Bezier
control handles with small red squares will appear. Drag the red squares
to the intersection of the guidelines as shown above left.
Edit the other three sides. Now this is better. But still not really
spherical. We can do better.
We’ll repeat the process and the results will be more spherical. Trust
me. I’m a doctor! Well, I just play one. Sometimes. Just trust me. OK?
Apply another Circular Envelope.
Edit the control handles and drag the red squares to the intersection of
the guidelines. Now that looks like a sphere!
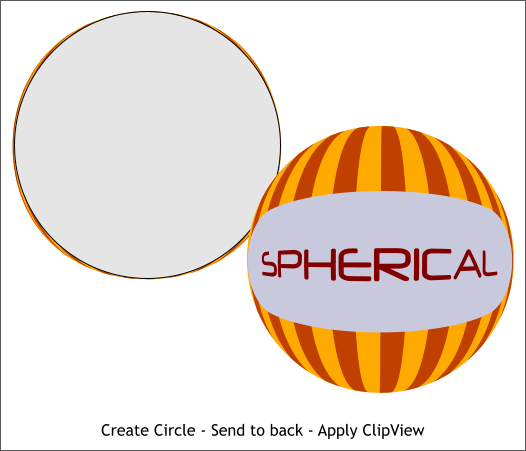
Create a circle just a tad smaller than the spherical shape. Ack! Our
mould is not quite a perfect circle. Well you can’t have everything!
Send the circle behind the spherical shape. Set the outline to none.
Select both circle and mould and Arrange > Apply ClipView. Better.
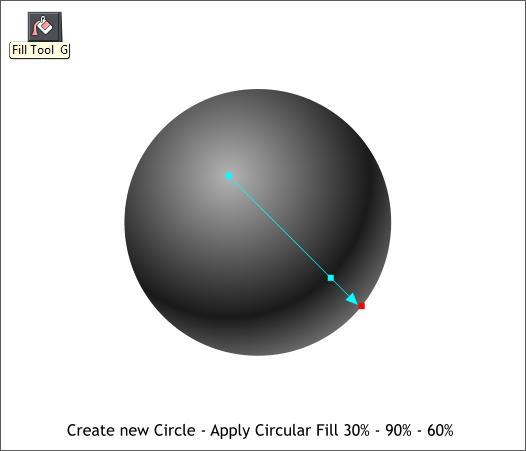
Create a new circle the same size as the last one. Select the Fill Tool (G
or F5). From the Fill Type drop down list on the Infobar, select
Circular. Move the center of the fill up and left as shown.
Drag the end of the fill path arrow down and right to the edge of the
circle. Double click to add an additional color. Drag the new color to the
position shown above. Click the center of the fill and change the fill
color to 30% Black. Click the new color square and change the fill to 90%
Black. Apply a 60% Black fill to the outside color square.
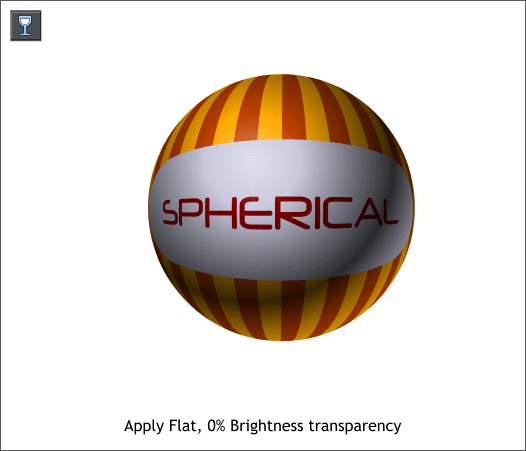
Select the circle with the Transparency Tool (F6). From the drop down
list of Transparency Types on the Infobar, select Brightness. The
shading make it look more spherical.
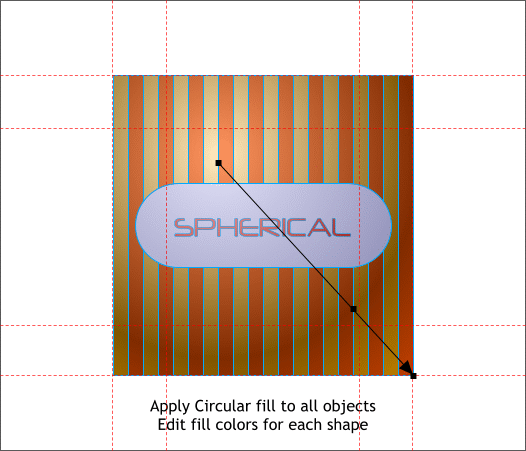
Here is a variation of my spherical mould. Group all the objects and
give them an outline. Apply a Circular fill. The same kind of fill you
applied to the circle.
Ungroup the objects (Ctrl u). Group all objects that will have the same
colors, in this case the orange stripes (the gold background is the
square). Edit the colors for each set of objects. The stripes, the square,
the capsule shape and the text. All of the fills should now match in
terms of position of the colors.
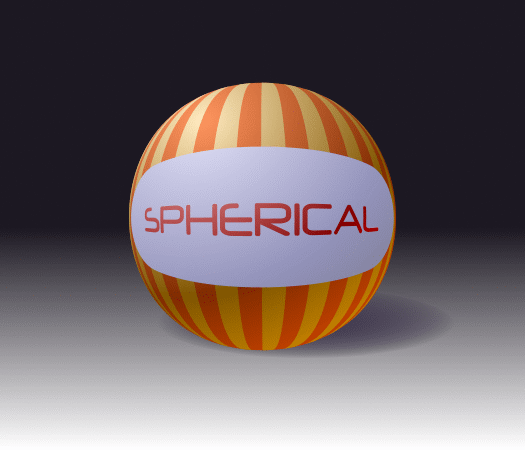
Now repeat the steps to make the spherical mould.
And here is the result. More work but more convincing. (And I added
and edited one more Circular Envelope). I could not resist the urge.
Comments? Questions? Corrections? Suggestions? I welcome your
feedback. Use the Send email link below to forward your comments.
Gary W. Priester
(Your Editor)
Send email
Create your art in a square. You can use gradient fills as I will show at
the end of this tutorial. In this example I will use flat fills.
Display the screen rulers (Ctrl L). Drag and snap guidelines to the four
corners of your square image.
With all of your square design selected, switch to the Mould Tool (Shift
F6). Click the Circular Envelope icon on the Infobar. Drag four new
guidelines and snap them to the four control points on the envelope.
From the Arrange menu, select Convert to Editable Shapes.
Apply a second Circular Envelope. Doesn’t look very spherical. Yet.
Click the top left control point (with the Mould Tool). A pair of Bezier
control handles with small red squares will appear. Drag the red squares
to the intersection of the guidelines as shown above left.
Edit the other three sides. Now this is better. But still not really
spherical. We can do better.
We’ll repeat the process and the results will be more spherical. Trust
me. I’m a doctor! Well, I just play one. Sometimes. Just trust me. OK?
Apply another Circular Envelope.
Edit the control handles and drag the red squares to the intersection of
the guidelines. Now that looks like a sphere!
Create a circle just a tad smaller than the spherical shape. Ack! Our
mould is not quite a perfect circle. Well you can’t have everything!
Send the circle behind the spherical shape. Set the outline to none.
Select both circle and mould and Arrange > Apply ClipView. Better.
Create a new circle the same size as the last one. Select the Fill Tool (G
or F5). From the Fill Type drop down list on the Infobar, select
Circular. Move the center of the fill up and left as shown.
Drag the end of the fill path arrow down and right to the edge of the
circle. Double click to add an additional color. Drag the new color to the
position shown above. Click the center of the fill and change the fill
color to 30% Black. Click the new color square and change the fill to 90%
Black. Apply a 60% Black fill to the outside color square.
Select the circle with the Transparency Tool (F6). From the drop down
list of Transparency Types on the Infobar, select Brightness. The
shading make it look more spherical.
Here is a variation of my spherical mould. Group all the objects and
give them an outline. Apply a Circular fill. The same kind of fill you
applied to the circle.
Ungroup the objects (Ctrl u). Group all objects that will have the same
colors, in this case the orange stripes (the gold background is the
square). Edit the colors for each set of objects. The stripes, the square,
the capsule shape and the text. All of the fills should now match in
terms of position of the colors.
Now repeat the steps to make the spherical mould.
And here is the result. More work but more convincing. (And I added
and edited one more Circular Envelope). I could not resist the urge.
Comments? Questions? Corrections? Suggestions? I welcome your
feedback. Use the Send email link below to forward your comments.
Gary W. Priester
(Your Editor)
Send email


