WEBSITE AND WEBSITE GRAPHICS CREATED WITH XARA DESIGNER PRO 6
DOWNLOAD ZIPPED TUTORIAL
A new TalkGraphics member, haksor, recently wanted to know if it was
possible to have several thumbnail images that could have both mouse
over effects and trigger individual slide shows. (Click here for the
thread). Your editor had no idea how to do this.
So when in doubt, consult the all-knowing oracle, Steve Ledger. Steve
said sure, and provided a simple script. Thanks, Steve.
Impatient haksor never returned so we have no idea if he ever saw the
solution to his challenge. But his loss is your gain!
Here’s a quick tutorial and a sample how this can be done.
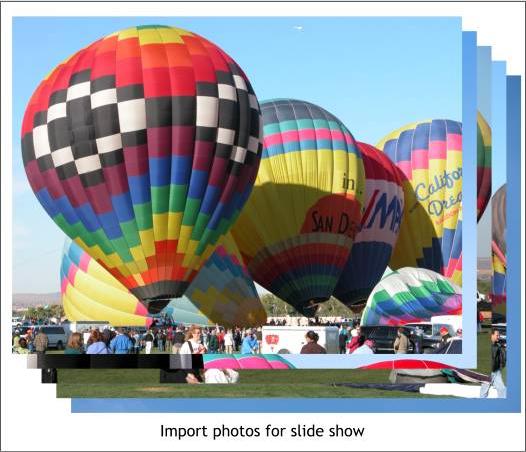

 First, create your slide show. Import all photos for your slide show.
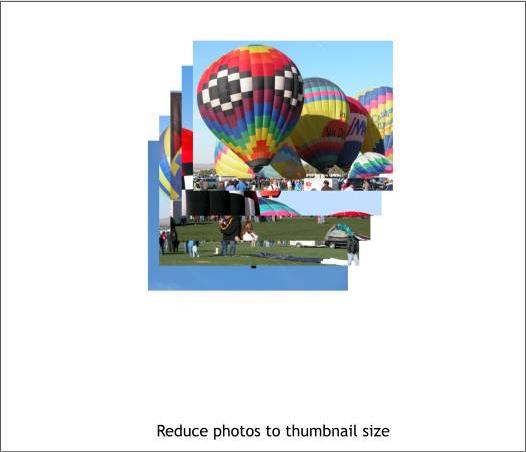 Reduce the size of the images to thumbnail size.
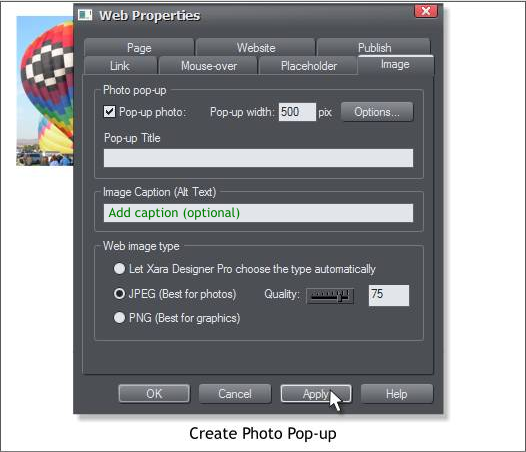
Select one or more thumbnails. In the Web Properties > Image tabbed
section, check the Pop-up Photo: check box. Key in the desired Width
for the pop up photo, add a caption, and determine the image type (or
let Xara make the decision for you). Press Apply. (None of the changes
will be made if you do not Apply them). Do not close the dialog yet.
Reduce the size of the images to thumbnail size.
Select one or more thumbnails. In the Web Properties > Image tabbed
section, check the Pop-up Photo: check box. Key in the desired Width
for the pop up photo, add a caption, and determine the image type (or
let Xara make the decision for you). Press Apply. (None of the changes
will be made if you do not Apply them). Do not close the dialog yet.
 Click Options... Set your slide show options. Click OK to apply the
changes and to close the dialog. Experiment with different options to
see which ones you want to use. Preview your changes in Xara.
Put the slide show thumbnails to one side for the moment. Duplicate
one of the images. You will use the image to create the mouse over
linked image to the actual slide show.
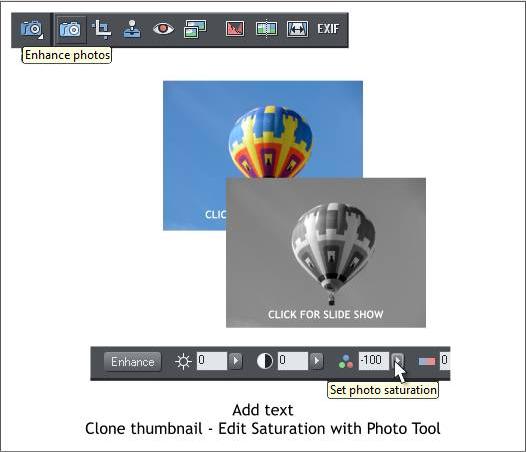
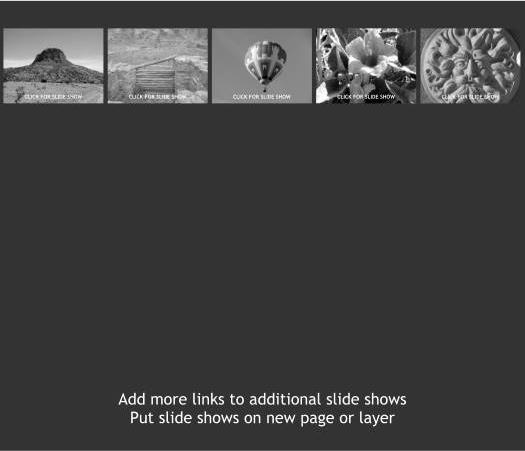
Add a caption to the photo, CLICK FOR SLIDE SHOW. Group both.
Clone the image (Ctrl k). Hold down the Ctrl key and click on the
cloned photo to select just the photo.
Select the Photo Tool > Enhance Photos. Set the Saturation slider
setting to -100%. Center both groups. Cut the color image to the
clipboard (Ctrl x or Edit > Cut).
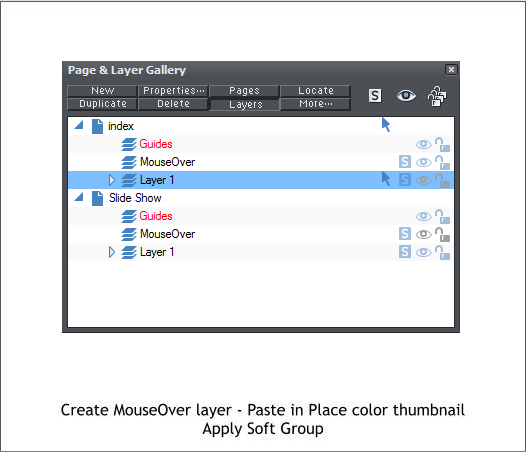
Open the Page & Layer Gallery (F10). Select Layer 1, then click New.
Name the new layer MouseOver. With the MouseOver layer selected,
from the Edit menu, select Paste in Place.
Select Layer 1. Using the Selector Tool (the arrow pointer) drag a
selection rectangle around the two centered thumbnail images.
From the Arrange menu, select Apply Soft Group.
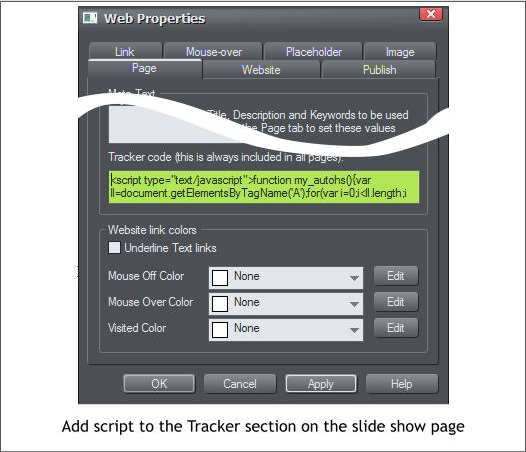
Select the current page. Click New. Name the new page Slide Show.
Go to the Slide Show page. Open the Website Properties > Page
tabbed section. Copy the script below and paste it into the Tracker
Code box.
<script type="text/javascript">function my_autohs(){var
ll=document.getElementsByTagName('A');for(var
i=0;i<ll.length;i++){if(ll[i].className.indexOf("highslide")!=-
1){hs.expand(ll[i]);break;};};};my_autohs();</script>
Click Apply.
Click Options... Set your slide show options. Click OK to apply the
changes and to close the dialog. Experiment with different options to
see which ones you want to use. Preview your changes in Xara.
Put the slide show thumbnails to one side for the moment. Duplicate
one of the images. You will use the image to create the mouse over
linked image to the actual slide show.
Add a caption to the photo, CLICK FOR SLIDE SHOW. Group both.
Clone the image (Ctrl k). Hold down the Ctrl key and click on the
cloned photo to select just the photo.
Select the Photo Tool > Enhance Photos. Set the Saturation slider
setting to -100%. Center both groups. Cut the color image to the
clipboard (Ctrl x or Edit > Cut).
Open the Page & Layer Gallery (F10). Select Layer 1, then click New.
Name the new layer MouseOver. With the MouseOver layer selected,
from the Edit menu, select Paste in Place.
Select Layer 1. Using the Selector Tool (the arrow pointer) drag a
selection rectangle around the two centered thumbnail images.
From the Arrange menu, select Apply Soft Group.
Select the current page. Click New. Name the new page Slide Show.
Go to the Slide Show page. Open the Website Properties > Page
tabbed section. Copy the script below and paste it into the Tracker
Code box.
<script type="text/javascript">function my_autohs(){var
ll=document.getElementsByTagName('A');for(var
i=0;i<ll.length;i++){if(ll[i].className.indexOf("highslide")!=-
1){hs.expand(ll[i]);break;};};};my_autohs();</script>
Click Apply.
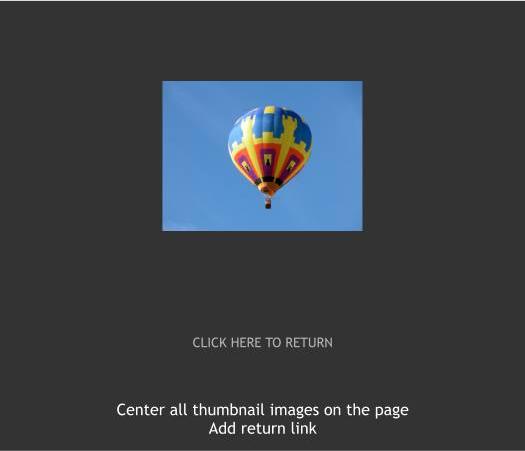
 Go to the Slide Show page.
Center all the thumbnail images for the slide show in the upper center
area of the page.
Add a Return link back to the home page so your visitor can return to
the slide show menu after viewing the slide show.
Add more slide show links, if you want to have multiple slide shows. Put
each slide show on a new page or layer.
Click here for an example of the balloon slide show.
Go to the Slide Show page.
Center all the thumbnail images for the slide show in the upper center
area of the page.
Add a Return link back to the home page so your visitor can return to
the slide show menu after viewing the slide show.
Add more slide show links, if you want to have multiple slide shows. Put
each slide show on a new page or layer.
Click here for an example of the balloon slide show.