 WEBSITE AND WEBSITE GRAPHICS CREATED WITH XARA DESIGNER PRO 6
DOWNLOAD ZIPPED TUTORIAL
Rosemary, a new TalkGraphics member, recently posted this question:
“I'd like to know how to get a round image to show without its
surrounding rectangle of white background?”
The usual recommendation is to use Xara’s drawing tools to create a
mask over the part of the image you wish to preserve, then select the
mask and the bitmap image and from the Arrange menu, select
Combine Shapes > Intersect Shapes (or press Ctrl 3). This creates a
vector dropout mask that can be edited. And this is often the best
method.
But if you have a high resolution image, there is an easier and just as
effective a method. It involves the Live Effects Tool (Ctrl F5) and the
Mehdi Eraser Classic filter, which is found in the Live Effects Tool >
New > drop down list can be used. But there is an even better option.
Mehdi offers a large number of free down-loadable filters on their
website. One of the free filters, and the one I prefer for this job is
Mehdi Eraser Genuine. This filter provides a little more control. This
tutorial will demonstrate how effective it is at dropping out a solid
background color from a bitmap image. It does not have to be white.
WEBSITE AND WEBSITE GRAPHICS CREATED WITH XARA DESIGNER PRO 6
DOWNLOAD ZIPPED TUTORIAL
Rosemary, a new TalkGraphics member, recently posted this question:
“I'd like to know how to get a round image to show without its
surrounding rectangle of white background?”
The usual recommendation is to use Xara’s drawing tools to create a
mask over the part of the image you wish to preserve, then select the
mask and the bitmap image and from the Arrange menu, select
Combine Shapes > Intersect Shapes (or press Ctrl 3). This creates a
vector dropout mask that can be edited. And this is often the best
method.
But if you have a high resolution image, there is an easier and just as
effective a method. It involves the Live Effects Tool (Ctrl F5) and the
Mehdi Eraser Classic filter, which is found in the Live Effects Tool >
New > drop down list can be used. But there is an even better option.
Mehdi offers a large number of free down-loadable filters on their
website. One of the free filters, and the one I prefer for this job is
Mehdi Eraser Genuine. This filter provides a little more control. This
tutorial will demonstrate how effective it is at dropping out a solid
background color from a bitmap image. It does not have to be white.
 I have created a sample image on a white background and placed the
image over a medium gray background. The original image is the size
shown here but 300dpi. If the image you are working with is low
resolution, create a bitmap copy (Arrange menu), True Color and
300dpi. The increased resolution does not make the image sharper but
it gives you more pixels to work with and hence a smoother edge.
Download the Mehdi Eraser Genuine filter and install it in the Plug-ins
folder (C:/Program Files x86 > Xara > Xara Designer Pro 6 > Xara Picture
Editor > PSplug-ins). Once you place the filter in this folder it will be
available in the Live Effects Tool menu.
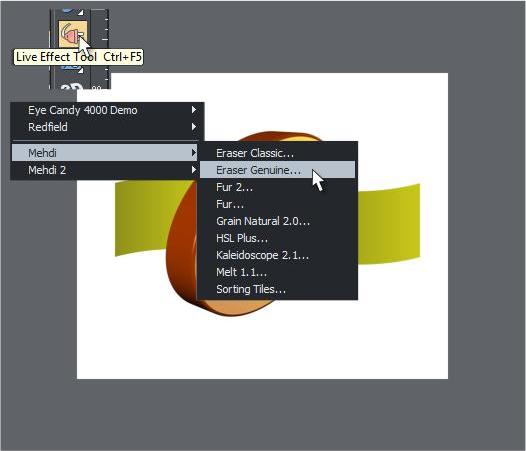
Select your bitmap, then open the Live Effects Tool. Click New > on
the Infobar. From the drop down list, select Mehdi > Eraser Genuine.
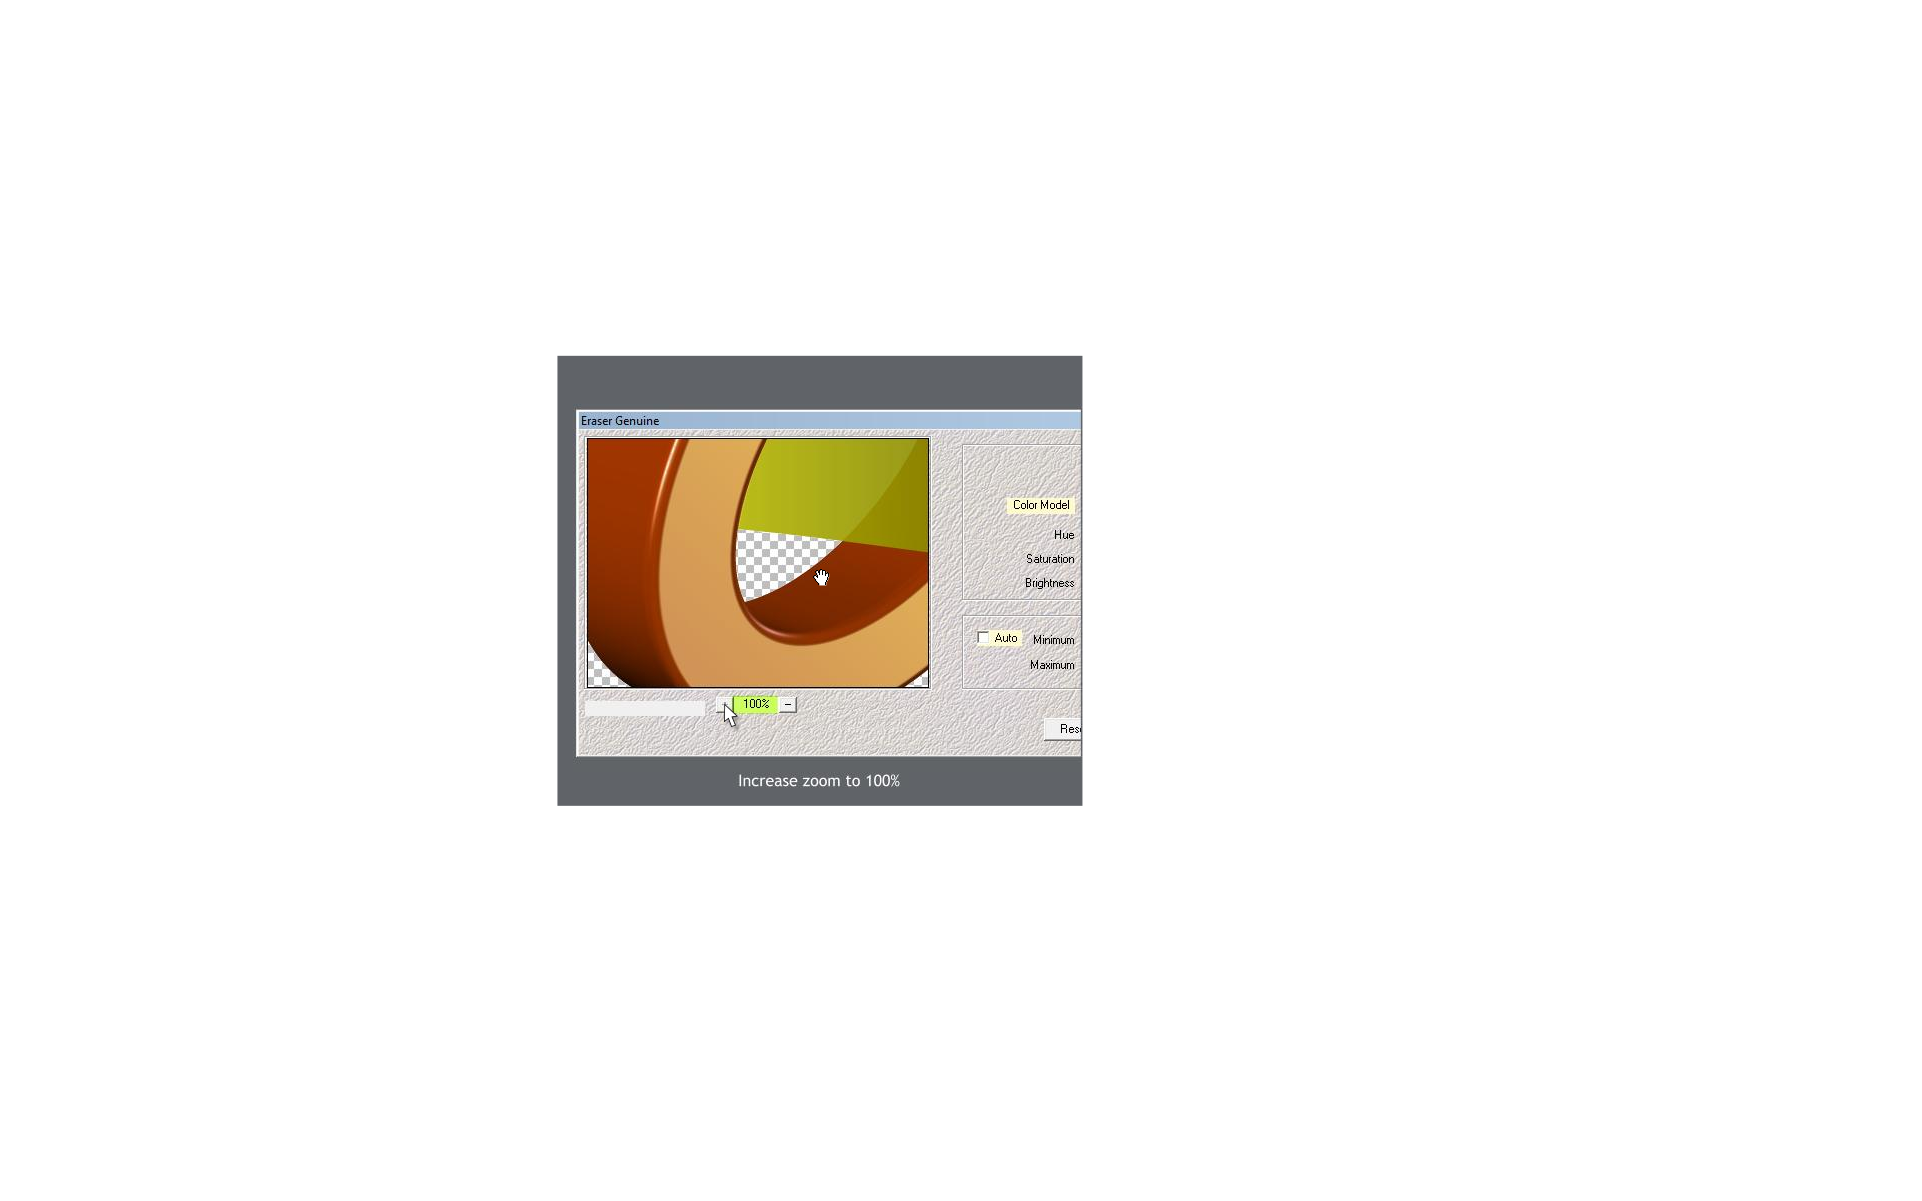
Increase the Zoom to 100%. Drag the image if necessary so you can see
the edge to determine the optimal setting to preserve the edge.
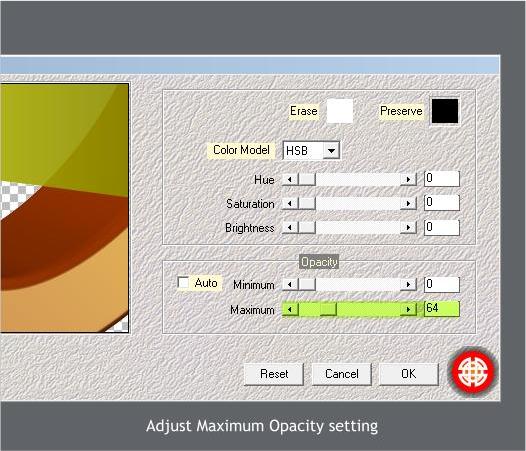
Make sure the Erase color is set to white, or if your image has a
different color background, edit the color by clicking on the white
square and editing the color values as needed.
Adjust the Maximum slider until the background drops out and the edge
is sharp. In this example, 64 works perfectly.
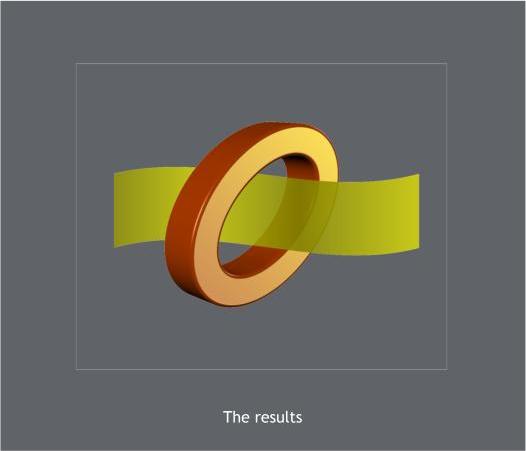
Here are the results. Almost perfect. Except the light gray outline
around the bitmap. Not a problem. Here’s how we can eliminate it.
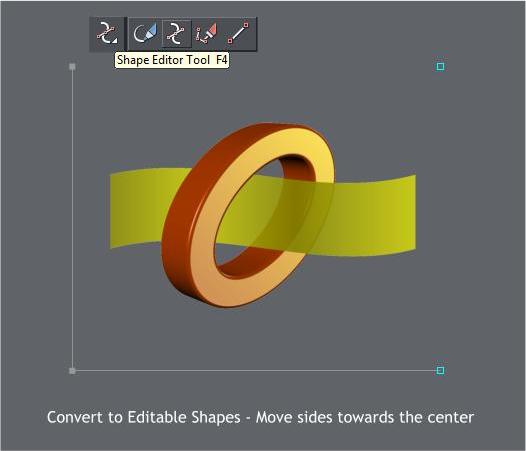
Select the bitmap, from the Arrange menu, select Convert to Editable
Shapes. Switch to the Shape Editor Tool (F4). Select two adjoining
corner control points and use the arrow keys on your keyboard to nudge
the side towards the center. Repeat for the other three sides.
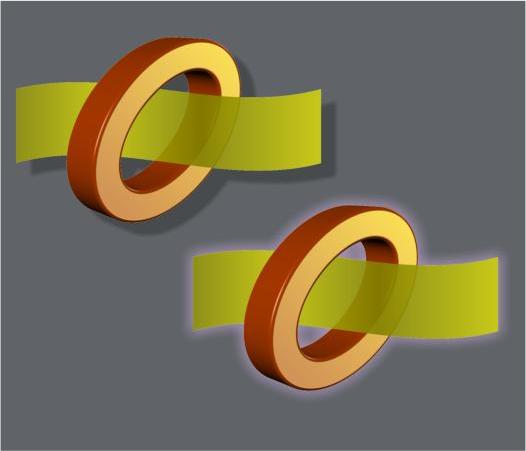
This process creates a bitmap with Alpha channel transparency, and the
edges are very sharp. You can apply a wall shadow or a glow shadow
just as you could with a vector mask as shown above.
I have created a sample image on a white background and placed the
image over a medium gray background. The original image is the size
shown here but 300dpi. If the image you are working with is low
resolution, create a bitmap copy (Arrange menu), True Color and
300dpi. The increased resolution does not make the image sharper but
it gives you more pixels to work with and hence a smoother edge.
Download the Mehdi Eraser Genuine filter and install it in the Plug-ins
folder (C:/Program Files x86 > Xara > Xara Designer Pro 6 > Xara Picture
Editor > PSplug-ins). Once you place the filter in this folder it will be
available in the Live Effects Tool menu.
Select your bitmap, then open the Live Effects Tool. Click New > on
the Infobar. From the drop down list, select Mehdi > Eraser Genuine.
Increase the Zoom to 100%. Drag the image if necessary so you can see
the edge to determine the optimal setting to preserve the edge.
Make sure the Erase color is set to white, or if your image has a
different color background, edit the color by clicking on the white
square and editing the color values as needed.
Adjust the Maximum slider until the background drops out and the edge
is sharp. In this example, 64 works perfectly.
Here are the results. Almost perfect. Except the light gray outline
around the bitmap. Not a problem. Here’s how we can eliminate it.
Select the bitmap, from the Arrange menu, select Convert to Editable
Shapes. Switch to the Shape Editor Tool (F4). Select two adjoining
corner control points and use the arrow keys on your keyboard to nudge
the side towards the center. Repeat for the other three sides.
This process creates a bitmap with Alpha channel transparency, and the
edges are very sharp. You can apply a wall shadow or a glow shadow
just as you could with a vector mask as shown above.