WEBSITE AND WEBSITE GRAPHICS CREATED WITH XARA XTREME PRO

 H 1 2 3 4 5 Download Zipped Tutorial
 One of my favorite new Web Designer 6 features is the ability to
generate a preview of placeholder images. For example, if we generate
a script for a Google map, which is what we will do in this tutorial, Web
Designer 6 will automatically generate a preview image of exactly how
the map will look on the published page.
Let’s start by generating a Google map. Go to the Google Maps page and
enter in a street address, city, state, and ZIP or area code. For this
exercise we’ll generate a map for the New Mexico State Capitol, 490 Old
Santa Fe Trail, Santa Fe, NM.
One of my favorite new Web Designer 6 features is the ability to
generate a preview of placeholder images. For example, if we generate
a script for a Google map, which is what we will do in this tutorial, Web
Designer 6 will automatically generate a preview image of exactly how
the map will look on the published page.
Let’s start by generating a Google map. Go to the Google Maps page and
enter in a street address, city, state, and ZIP or area code. For this
exercise we’ll generate a map for the New Mexico State Capitol, 490 Old
Santa Fe Trail, Santa Fe, NM.
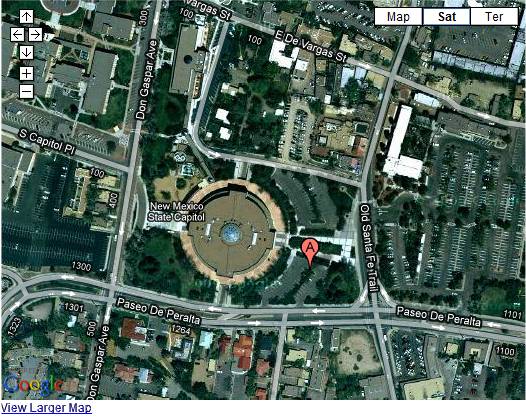
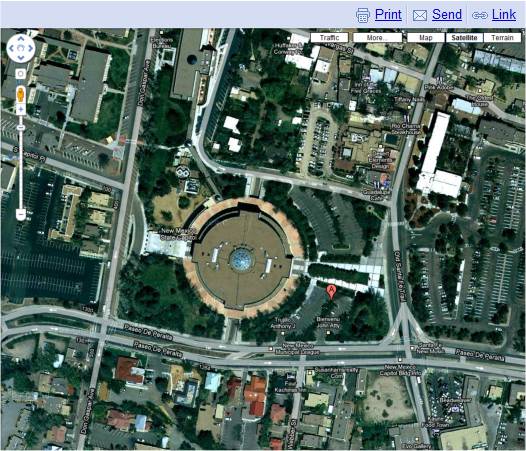 Key in the address and press Search Maps. In the screen capture below I
have zoomed in a few clicks. The round building is the New Mexico State
Capitol, appropriately called, The Round House.
Key in the address and press Search Maps. In the screen capture below I
have zoomed in a few clicks. The round building is the New Mexico State
Capitol, appropriately called, The Round House.
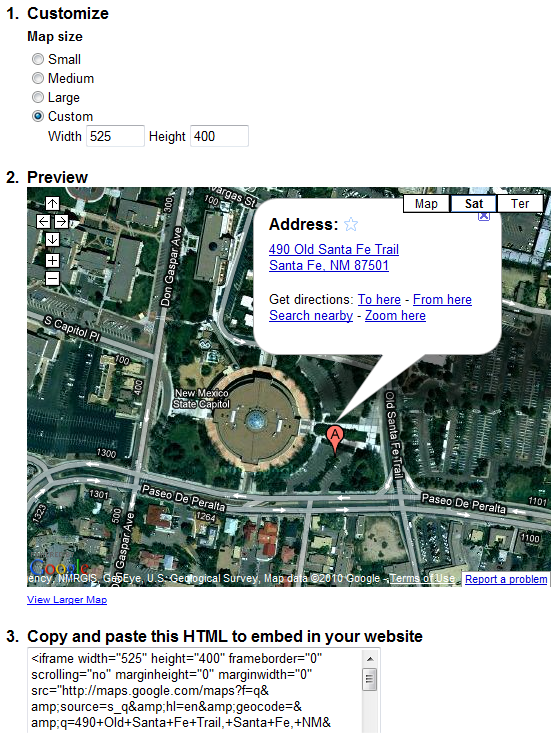

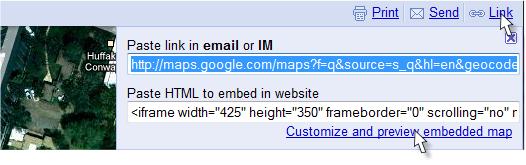 Click the Link button, then click Customize and Preview Embedded
Map.
Zoom in and get the map just the way you want it. I have changed the
map size to fit my format of 525 pixels wide. And I have arbitrarily
changed the height to 400 pixels.
Select the code shown in item 3> above, Copy and paste the code to the
pasteboard (Ctrl c).
Click the Link button, then click Customize and Preview Embedded
Map.
Zoom in and get the map just the way you want it. I have changed the
map size to fit my format of 525 pixels wide. And I have arbitrarily
changed the height to 400 pixels.
Select the code shown in item 3> above, Copy and paste the code to the
pasteboard (Ctrl c).
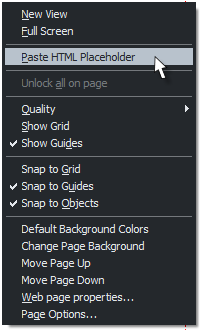 In Web Designer 6, right click on the page and select Paste HTML
Placeholder.
And after a few moments, the actual map appears on your page to the
custom size indicated. And directly below is the actual embedded fully
functional map.
In Web Designer 6, right click on the page and select Paste HTML
Placeholder.
And after a few moments, the actual map appears on your page to the
custom size indicated. And directly below is the actual embedded fully
functional map.
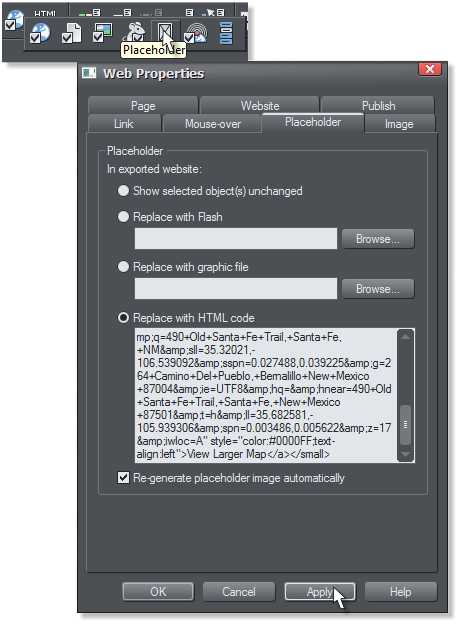
 Alternatively, you can open the Web Properties > Placeholder dialog,
and paste the code into the Replace with HTML Code text entry box.
Check Re-generate Placeholder Image Automatically and press Apply.
This also works with Flash movies, forms scripts, widgets, and anything
that generates a script.
TIP: This tip is courtesy of Steve Ledger (sledger). Some users have
asked why a bitmap image name cannot be retained when the website is
published. As you may be aware, Web Designer and Xtreme assign
numbers to each exported bitmap. So an imported bitmap named
myphoto.jpg when published may become 3.jpg, or some other number.
Alternatively, you can open the Web Properties > Placeholder dialog,
and paste the code into the Replace with HTML Code text entry box.
Check Re-generate Placeholder Image Automatically and press Apply.
This also works with Flash movies, forms scripts, widgets, and anything
that generates a script.
TIP: This tip is courtesy of Steve Ledger (sledger). Some users have
asked why a bitmap image name cannot be retained when the website is
published. As you may be aware, Web Designer and Xtreme assign
numbers to each exported bitmap. So an imported bitmap named
myphoto.jpg when published may become 3.jpg, or some other number.
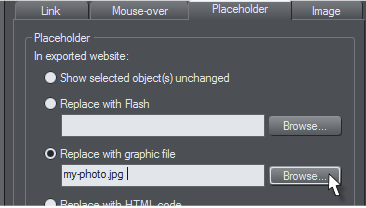
 So, here is Steve’s trick. Locate the bitmap file. It can be anywhere on
your hard drive. Rename the photo, for example, myphoto.jpg. Open
the Website Properties > Placeholder dialog, press Browse in the
Replace with Graphic File text entry box, locate the renamed bitmap
image, and press Apply.
Now when you publish your website, the image will export with the
actual image name and not an arbitrary number. Great Tip. Steve.
So, here is Steve’s trick. Locate the bitmap file. It can be anywhere on
your hard drive. Rename the photo, for example, myphoto.jpg. Open
the Website Properties > Placeholder dialog, press Browse in the
Replace with Graphic File text entry box, locate the renamed bitmap
image, and press Apply.
Now when you publish your website, the image will export with the
actual image name and not an arbitrary number. Great Tip. Steve.