


When you enter text or create a text area, the screen ruler (Window >
Bars > Rulers) changes to display the text width and the Tabs icon, as
well as the First Line Indent and Left Margin triangle icons. If you are
working with a text area (paragraph text) the text portion of the screen
ruler changes to width of the text area.
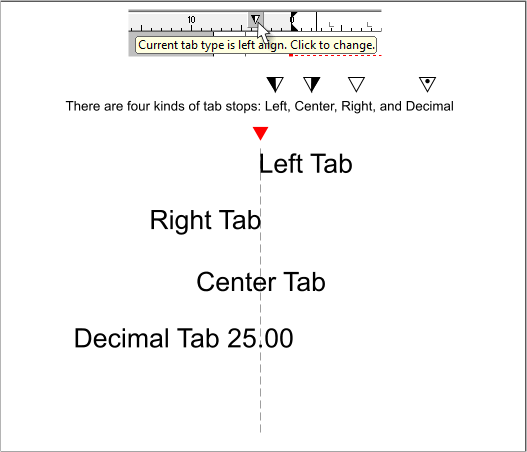
Xara offers four Tab options shown above. To select a different Tab type,
click on the Tab icon. The default is Left, followed by right, center, and
decimal. Each Tab state is indicated by one of the four icons shown
above. You can apply Tabs to either a text area or a line of text.
The illustration above shows the text portion of the screen ruler with
the default tab stops (the L shapes). If you add a Tab to the ruler, all
default tabs before the new tab are deleted.
To add a custom tab, click the Tab icon until it display the tab type you
wish to add. Then click on the text area of the ruler. Tabs can be
dragged to a new position if desired. To remove a custom tab, simply
drag it off the top of the ruler.
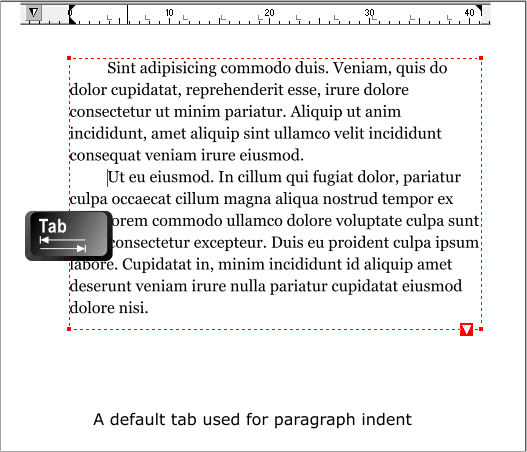
You can press the Tab key on your keyboard to indent a line of text as
shown above, though as we will see, there are other options.
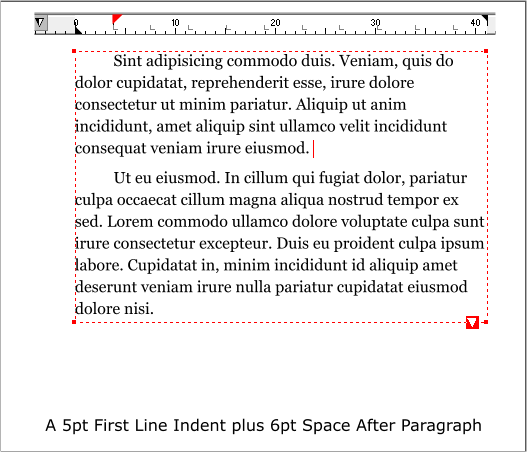
In addition to the Tab icon, there are two triangle icons, normally
aligned at the 0 position on the text ruler. The top triangle is First Line
Indent. This determines the indent of the first line of each paragraph
and works automatically each time you hit Enter. This is a more
efficient way to add a first line indent. The triangle below it sets the
left margin. Reverse these two triangles to create a hanging indent.
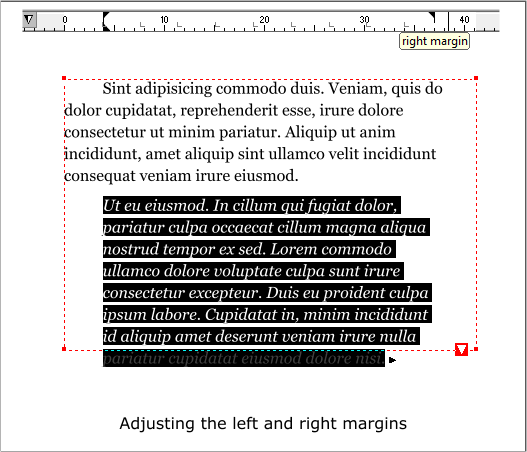
You can adjust the left and right margins as shown in this example. This
is useful if you are including a long quote in your text.
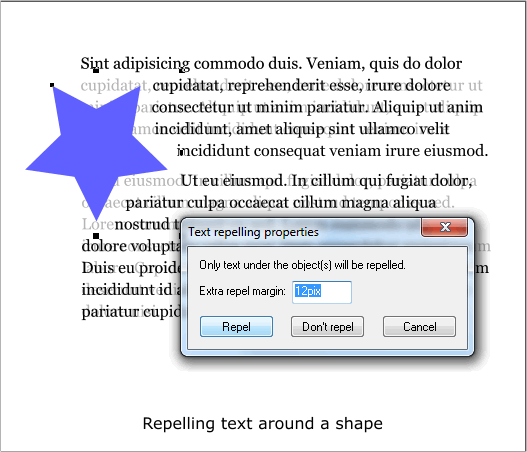
You can flow paragraph text around an object. Xara calls this Repel as
the selected object repels the text. In either case the text is offset from
the object’s outline as shown above.
Bring the repellent object to the front (Ctrl f), right click, determine a
margin (distance), and press Repel. (Selecting Don’t Repel, returns the
text to its previous state. If the text area is resized and/or the repelling
object moves, the text re-wraps automatically. Sometimes it is a good
idea to move the repelling object around a bit to get the best looking
text wrap.
Xara also lets you “embed” an object in text. To be honest, I do not
think this feature is quite there yet. The embedded object travels along
with the text and remains anchored to the text at the point in which it
was embedded. But in your editor’s humble opinion, until it is possible
to embed a rectangular illustration in a paragraph of text, such as with
these tutorials, this is not a viable feature.
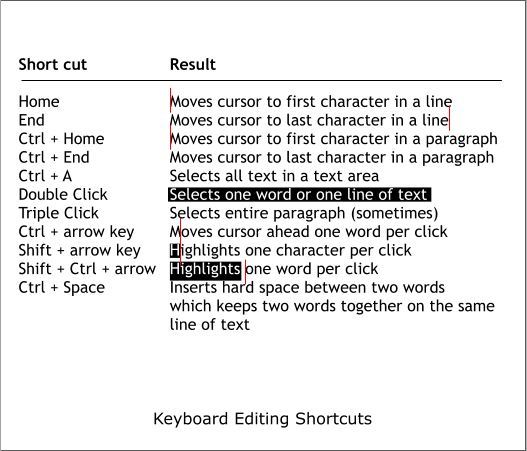
If you work with a lot of text, such as a newsletter, or brochure, Xara
(and Microsoft) offer several keyboard shortcuts that make getting
around the text more efficient. These are shown above and are pretty
self explanatory (with the exception of double and triple clicking). If
you place the text cursor inside a word and double click, just that word
is selected. Sometimes but not always. If you place the text cursor after
a word and double click, the previous word is often selected. But not
always. Double click again and the entire line will be selected. But then
again, sometimes the entire paragraph will be selected. At any rate, try
some of these shortcuts out. They can make editing text very efficient.
If not sometimes a tad surprising.
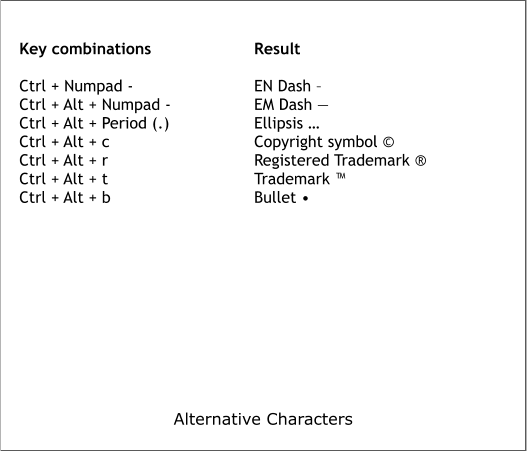
Shown above are some of the keystroke shortcuts for creating symbols
such as EN and EM dashes, ellipses, bullets and other symbols.
EN dashes are more typographically correct than the minus sign. An EM
dash, a longer dash—is used to indicate a break in the flow of a
sentence. Never use an ellipsis (…) as punctuation, for example, I’ll just
leave it to your imagination… Ellipses are used to indicate an omission,
such as “…fabulous, …and entertaining!” What is omitted may well have
been something like, “This tutorial is neither fabulous nor is it very
entertaining! Three periods is not a proper ellipsis .... …this is. See the
difference? An end ellipsis has four dots…. and ends a sentence.
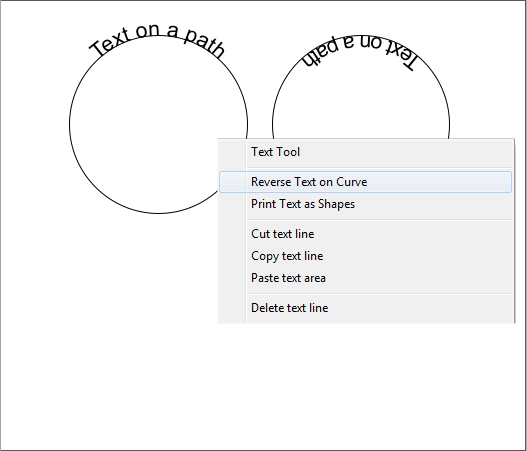
To add text to an ellipse (not an …), first convert the ellipse or circle to
editable shapes (Arrange > Convert to Editable Shapes). Click on the
circle to select it, and start entering text. To place the text on the
inside of the circle, right click and select Reverse Text on Curve.
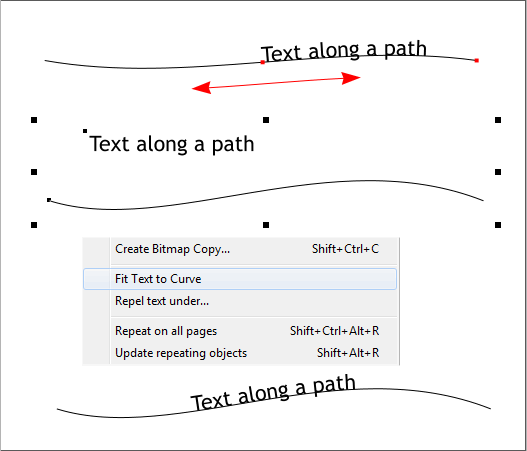
There are two ways to place text along a path. The first way is to select
the path, switch to the Text Tool, click on the path and enter your text.
A small red square will appear at the point at which you first clicked the
Text Tool. Drag this square to move the text around on the path. The
second method is select the text, select the path, and from the Arrange
menu, select Fit Text to Curve. If you use the second method, the red
insertion dot does not appear and your only options are to select the
text and change the justification; left, center, or right.
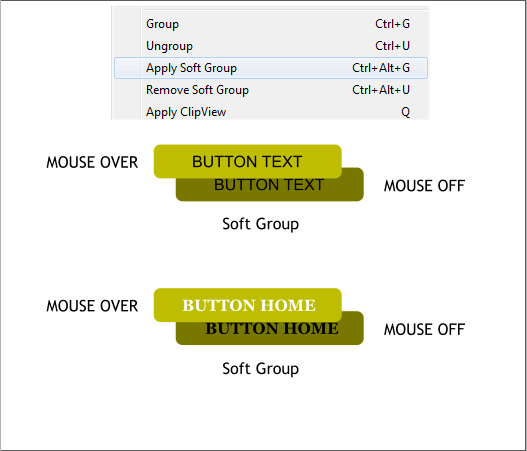
Finally this. A web-related new feature is called Soft Group and allows
you to edit text on different layers.
Imagine the above button examples are centered and not offset. Each
button state is on a different layer, Layer 1 (MouseOff), or MouseOver
and each rectangle is grouped to its text. The two button states are
then “Soft Grouped” (Arrange > Apply Soft Group). Now, if you alter
the font, size, or style on one of the buttons, the other button changes
accordingly. How cool is that?
And that wraps up this special Text Tool Workbook. Did I miss anything?
Was this Workbook helpful? Confusing? Questions? Comments?
Suggestions? Send me an e-mail and let me know what you think.