


In this section we’ll look at the Website Toolbar.
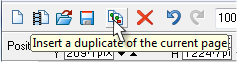
Insert a Duplicate of the Current Page This
creates a new page with all objects, text,
buttons, banners in the same position as on the
page you have duplicated. This is very useful for applying a site template with all the
common objects that appear on each page to all the site’s pages. If you have a colored
background or a repeating bitmap pattern, this is also copied onto all duplicated pages.
The Website Toolbar There are 7 website-specific buttons at the top of the screen on the
Infobar:
1. Export & Preview Website This button publishes the website to your computer and opens
a browser preview window in which you can preview your site.
2. Export Website This button creates all the files and folders needed to publish your
website to your website host. You do this step just before you publish your website to your
web host’s servers.
3. Link This button opens the Website Properties menu but to the Links tabbed section.
From the Links tabbed section you can add a variety of links both internal and external. You
can link to a page on your website, an external website, a web image, an anchor, or a popup
object. A picture is worth a thousand words. Click these links to see what they do.
Link to Web Address This opens the linked website in a new window
Link to Page Links to a specific page on your website.
Link to Anchor (usually a specific object or text object anywhere on your site)
Popup Layer Notice how the shadow is transparent over the type on the page.
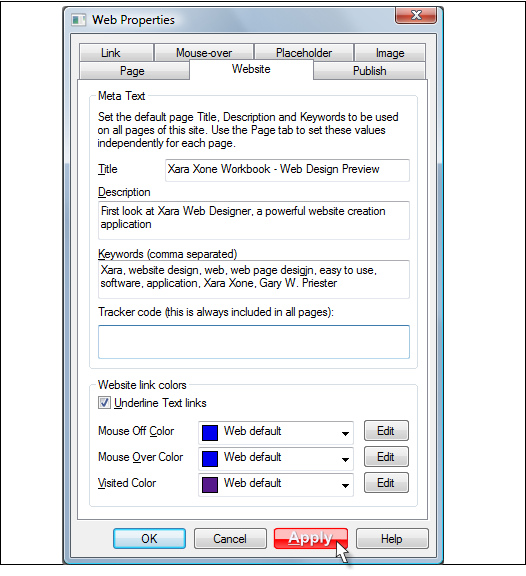
4. Website Properties
Most work is done in the Website Properties menu. I have exaggerated the Apply button
because almost everything you do in this dialog does not take effect until you press Apply. So
the quicker you discover this the better you and Website Designer will get along.
Briefly (I’ll cover all the menus in depth in coming workbooks), here is what the different
tabbed dialogs do.
Website tabbed section allows you to enter the site description which is published
along with the website, although the information is only visible to search engines. This
is perhaps the most important part of a successful website. The right Title,
Description and Keywords will help the search engines discover your website. The
Tracker Code input is for insterting tracking code for tracking traffic on your website.
You can change the link colors. For example, if your website has a dark background,
you will want to use lighter colors.
Page is where you assign a page file name for identifying and linking to pages in your
website. For example the buttons at the bottom of this page link to Page 3 (the
previous page), Page 4 (current page) and Page 5 (the next page). You can also add
additional page Titles, Description and Keywords that are appropriate for each page.
Toolbar image at the top of the page).
Mouse-Over provides options for what happens when the visitor mouses over
linked objects. For example, you can provide pop up instructions or
clarifications for a certain word. You can also link to a pop up layer or image.
Place your cursor over the red question mark to see this in action.
Placeholder This dialog is for linking a placeholder object to a Flash movie, a graphic
file, or HTML Code. You can use Replace with HTML Code to add some scripts to your
website. I’ll cover this as soon. For example, when you include an e-mail address on
your website, the address is frequently picked up by web bots that roam the web
gathering e-mail addresses to add to SPAM lists. There are scripts that encode your e-
mail address and make it invisible from these bots.
Image Is where you give Web Designer the option to automatically determine what
image type to convert your graphics to, or say, no thanks, I’ll do it myself. You can
determine JPEG quality (compression amount), or opt for PNG file format. And you can
add Alt text. This is text that appears when a visitor mouses over an image on your
site. Let your mouse hover over the menu graphic above and you’ll see the Alt text
appear. Alt text is good for describing a visual that search engines only see as a bitmap
image. You can also use Alt text to let people know an image is copyrighted.
Publish This is where you upload your website from your computer to your website
host’s servers. You need to have certain bits of information which your web host can
provide to enable you to transfer your files via FTP (file transfer protocol) to the web
host. This information is FTP Host Address usually something link ftp.domain-
name.com. You also need your User Name and your Password and optional directory.
5. & 6. Export Selection as JPEG or PNG These icons are for exporting parts of your website
as an image. For example, you may want to design a block of text using a specific font which
you know will not be installed on many of your visitor’s computers. So instead of using a web
safe font, you can convert the text to a PNG graphic. It will look the same on your visitor’s
screen, is just won’t be HTML text. Also you may want to convert a section of your site that
contains a variety of images and text to a single JPEG file. This can cut down on the size of
the code and make your page load faster.
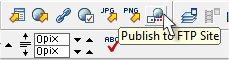
7. Publish to FTP Site This is the final step. It is
really easy. When your site is ready and you’re
ready to upload your site, press the Export Site
button. Xara Web Designer creates all the files and
folders you need for your website. You must do this
first and you must have filled out the FTP information in the Publish tabbed section. Then
press Publish to FTP Site (shown above) and if all goes well, you will see a green progress
meter to the top right hand side of the page as your fies make their way through the ether to
your web host’s computer.

This entire
Workbook has
been created
with Xara
Web Designer.
Click icon
for more
information


You can also link to a
pop up layer or image.
This text needs to be
added to a new layer
and the new layer is
linked to the
highlighted text.