|
Xtreme’s ability to create a custom brush with the Freehand and Brush Tool is a very powerful feature. Let’s look at all the settings and options.
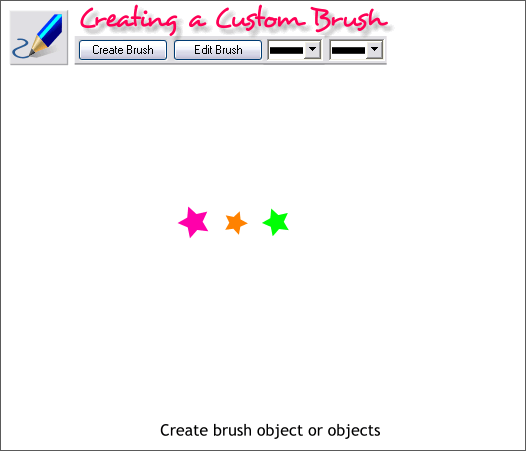
You can create a custom brush from any objects, text, groups of objects. You can create a brush from beveled objects, shadowed objects, objects with
transparency, or groups and combinations of all the above, but only if you create your brush from a bitmap with alpha transparency made from these
objects. For this exploration we’ll use the three vector colored stars shown.
Creating a Custom Brush
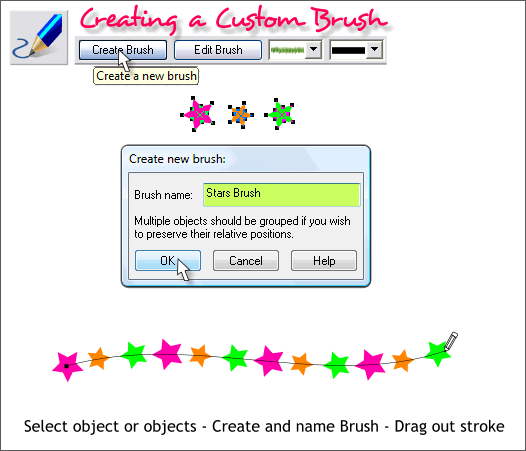
Select the object of objects which you want to use for a brush stroke, in this case the three stars. Select the Freehand and Brush Tool (F3 or N). Press Create Brush.
Give your brush a name and press OK.
Draw a line with the Freehand and Brush Tool. Because the three stars were not grouped, the stars are applied in sequence as you can see above.
And that is how to create a simple brush.
Editing the Custom Brush
Once you have created your custom brush you have a variety of editing options that we will look at next.
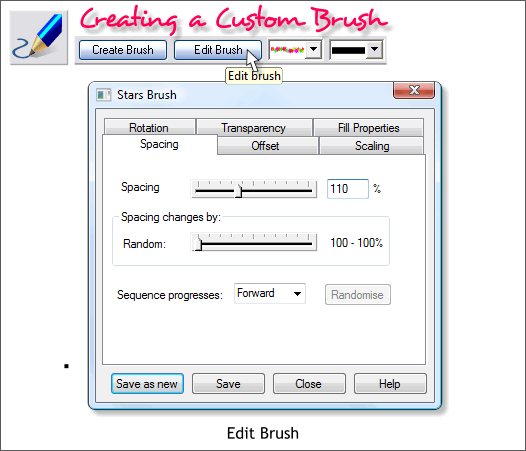
With the Freehand and Brush Tool and the brush stroked line selected, press Edit Brush. This opens the Edit Brush dialog. Each tabbed section provides a
different set of controls. The first is Spacing in which you can adjust the amount of space between each object in the brush.
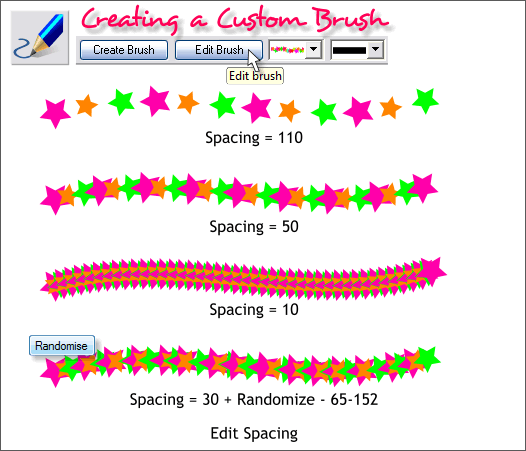
Reducing the Spacing slider setting reduces the space between each brush object. In addition there is a Randomize button that spaces the brush objects randomly. Each time you press the Randomize
button the brush objects reorder themselves in a different configuration. The higher your Random slider setting is, the more exaggerated the spacing difference are.
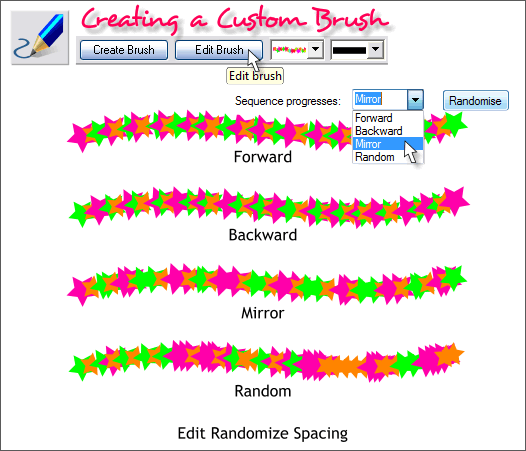
You can fine tune the order of the spacing in terms of Forward, Backward, Mirror and Random as shown above.
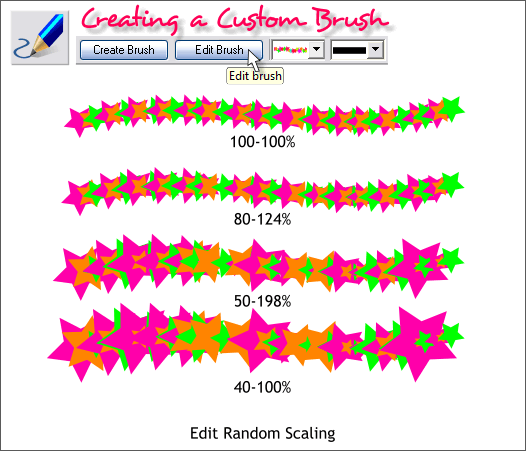
The size of the brush objects is determined by the Width of the line. You can also scale the brush objects randomly as shown above. If you enable Scale Line Widths the objects in the brush will scale in the same order. If Scale Line
Widths is disabled, the objects stay the same size even though the object or path to which the brush is applied is scaled up or down.
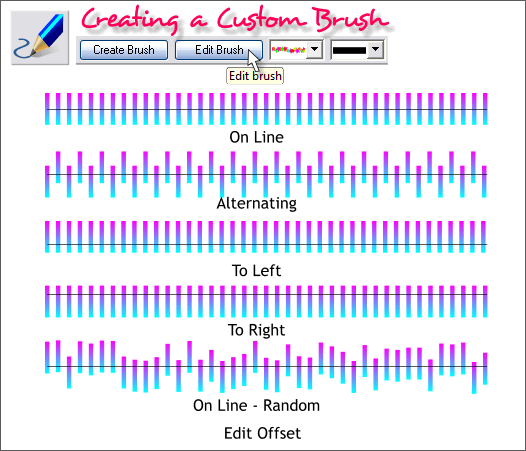
Edit Offset adjusts the brush in relation to the original path. For sake of illustration I have included the path with each example. Normally, the brush objects are aligned to the center of the path. Use
Offset to alter this default offset distance.
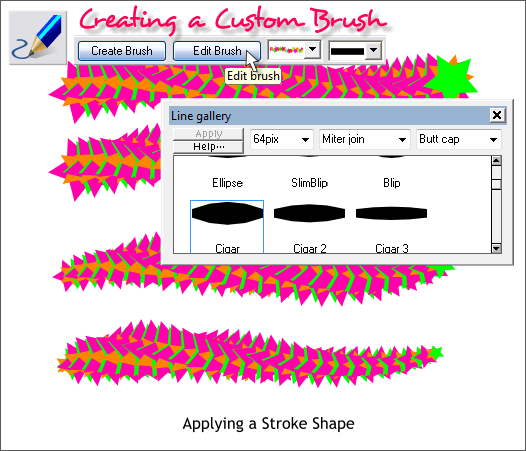
You can combine a custom brush stroke with any of Xtreme’s Stroke Shapes / Pressure Profiles found in the Line Gallery (F12). All the line widths above have been increased to 64pix
. Several different stroke shapes have been applied. The slider setting for Pressure has been increased to the maximum.
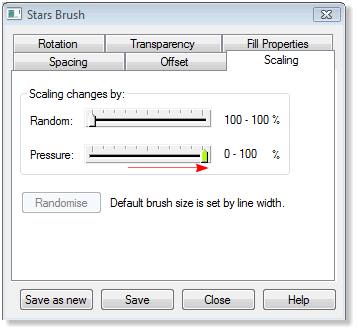
In the Edit Brush > Scaling dialog, the Pressure slider setting has been increased to the maximum setting. The higher the slider setting the more the brush stroke conforms to the selected
Stroke Shape.
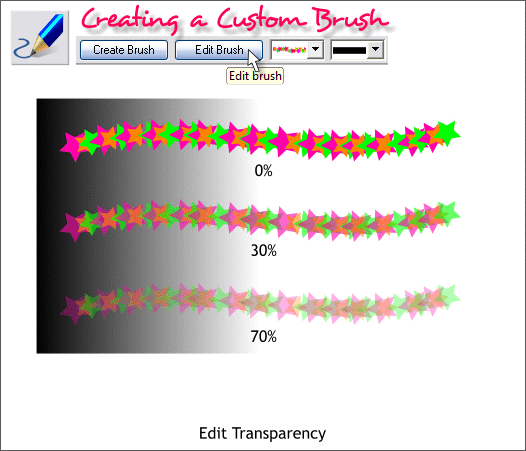
You can edit the Transparency of the objects in the brush. This effects each object in the brush separately.
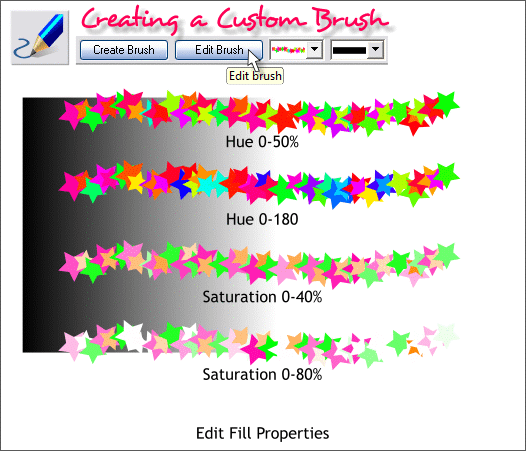
Edit Fill Properties > Hue acts like the Alt Rainbow fill effect. It introduces more colors to the brush. If you have a single color brush object or objects, increasing the Hue
slider setting creates a rainbow of colors. The higher the setting the more rainbow colors are added.
Increasing the Saturation setting actually reduces the amount of color saturation to the brush.
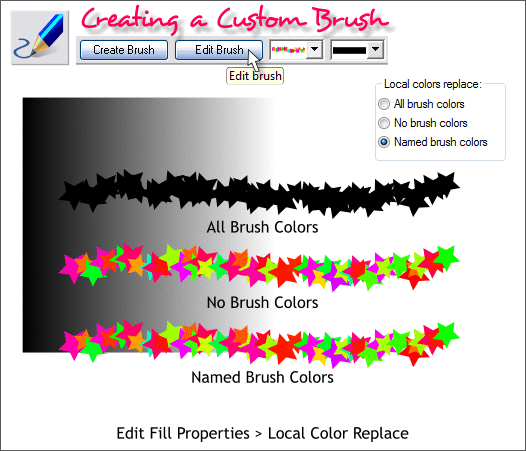
One of the most obscure settings is the Local Colors Replace options. The Help menu does not of much help. So, your guess about what is happening is as good as mine.
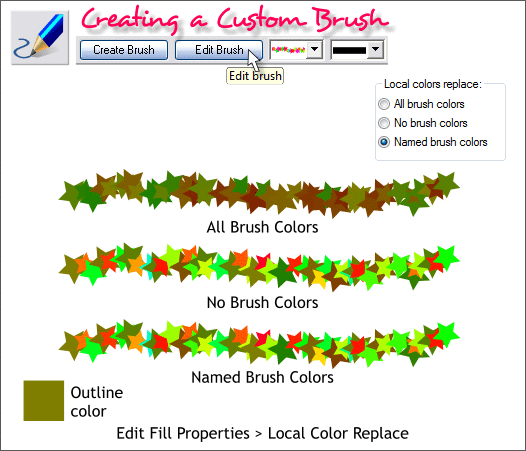
In the example above I changed the outline color, which has the effect you can see. But why? This has to be one of life’s greater mysteries.
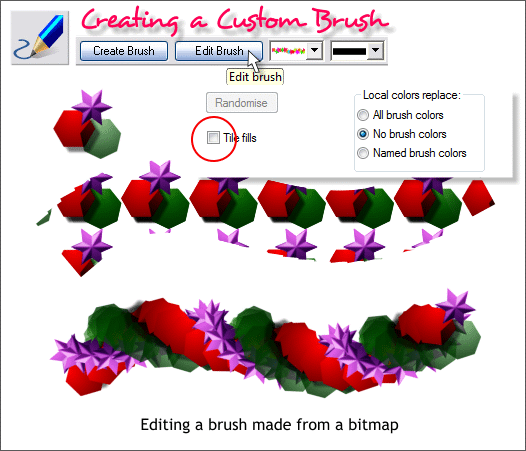
You can create a custom brush from a True Color + Alpha bitmap as shown above. The bitmap was made from the three objects in the upper left including
a beveled shape, an object with a soft shadow and a object with Stained Glass transparency. When you first drag out your brushed line it looks like the top example. Uncheck Tile Fills
and the brush acts as you would expect it to. I’ve applied a Rotation effect in the bottom example which I will cover next.
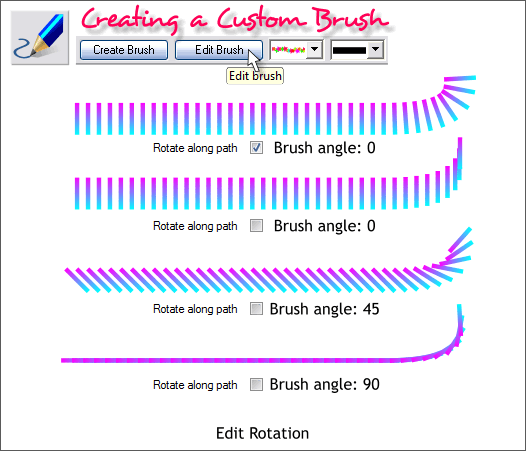
The Edit Rotation tabbed section gives you the option of rotating the objects along a path or not (first and second examples). And you can change the
rotation angle of the brush object as shown in the bottom two examples. As this brush is made from a vertical rectangle, rotating the brush 90 degrees places the brush on its side as shown in the bottom example.
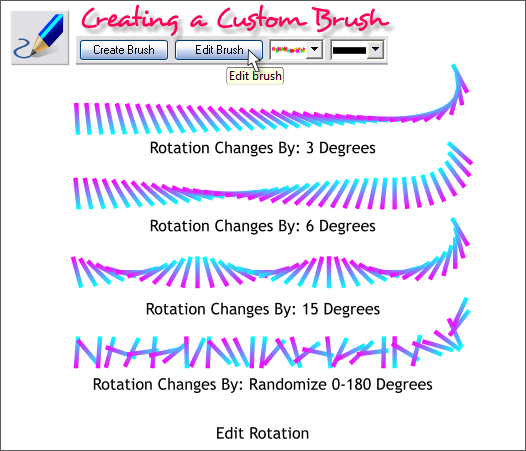
The Rotation Changes By: settings rotate the brush object or object around the path as I did with the bitmap brush. Usually a small amount goes a long
way. Spacing also influences the amount of rotation. The brush strokes above have a lot of spacing. As the spacing is reduced, the amount of rotation is increases.
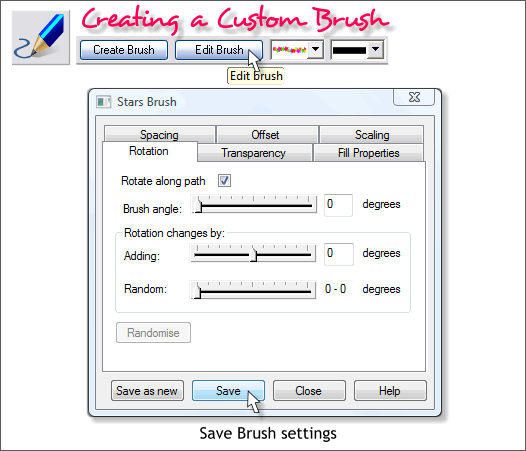
If you want to save your brush edits for future use, press Save. This saves all your brush edits. However this just saves the edits in the current document.
If you want create a custom brush or a series of custom brushes that will be available every time you create a new document, put your brush or brushes on a page and save your page as a *.XAR document in
Program Files > Xara > Xtreme (or Pro) 4 > Templates > ENG > Brushes. Boy that’s a long path.
But at any rate, if you save your brush XAR document to this directory, your brushes will be available in the Line Gallery (F12) in the New Brush Strokes folder.
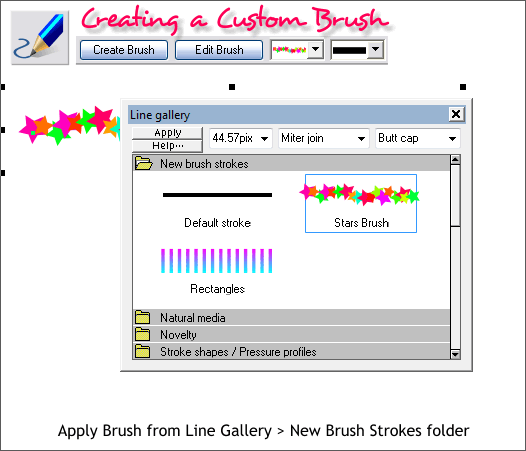
Pressing Save makes the new brush available in the current document in the New Brush Strokes folder. You can apply this brush to any path and all your modifications will be applied too.
TIP: You can also copy the modified brush stroke to the clipboard (Edit > Copy) and use Edit > Paste Attributes to apply the brush stroke to a new path.
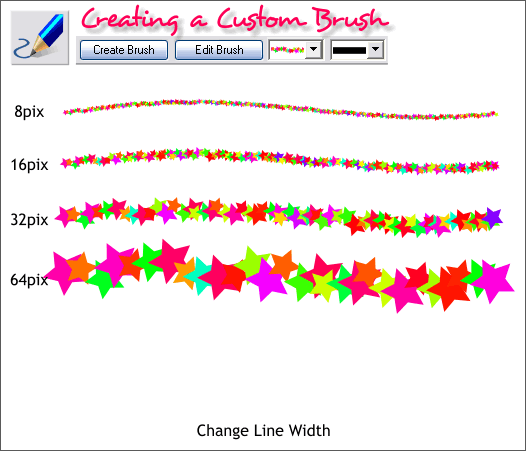
Changing the line Width changes the brush stroke size as shown above.
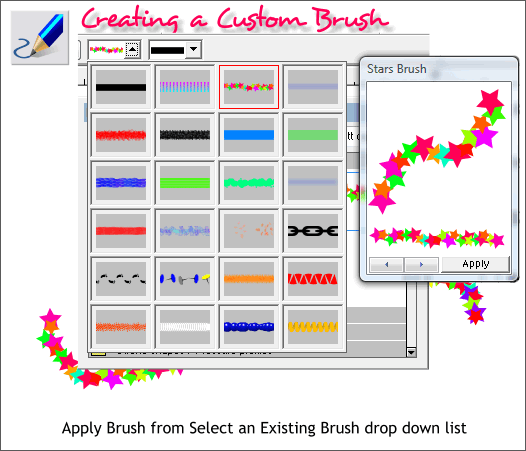
You can also apply your brush from the Select an Existing Brush drop down list. Newly created brushes are placed in this drop down list. But only are
available with the current document or a document that contains an existing brush.
In the next tutorial, we’ll create and edit an actual brush.
|