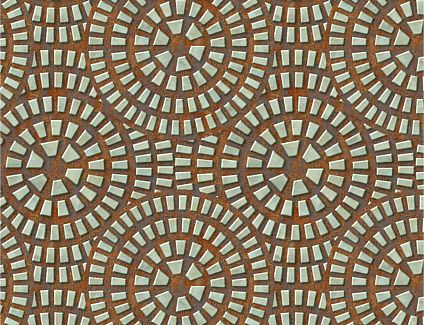
The image below was posted in the Xtreme Conference. The image was from a tutorial for another drawing software product. The member who posted asked how to evenly distribute the tiles in a circle. In this tutorial I’ll shown you not only how to distributes the stones in a circle but how to recreate the repeating tiling pattern. For what it’s worth, I did not look at the competitor’s tutorial. I actually figured it out all on my own.
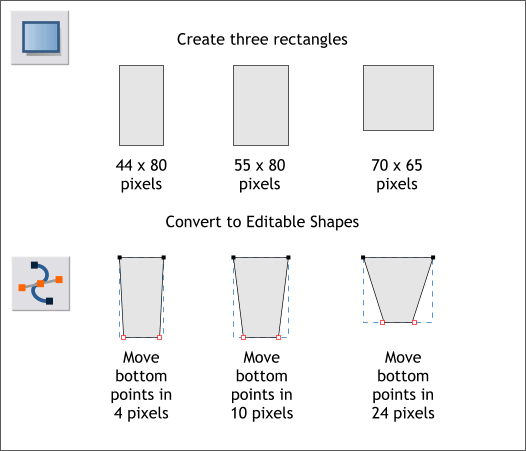
Create three rectangles to the sizes shown above. Select all three rectangles and Convert them to Editable Shapes (Arrange menu).
Switch to the Shape Editor Tool (F4). Move the bottom control points towards the center as shown above.
NOTE: I set my Nudge distance (Page Options > General > Nudge Size to 1pix. So I just press the left or right arrow key one time for each pixel I want the selection to move.
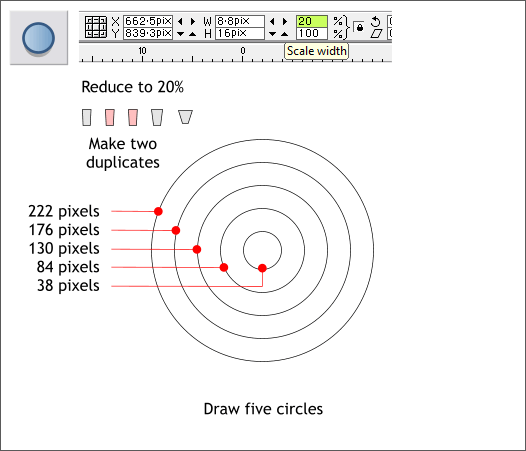
Select the modified rectangles. And reduce them to 20% their current size. (Enter 20 in the Scale Width or Scale Height text entry boxes on the Infobar and press Enter to apply the change.)
Make two duplicates of the smallest modified rectangle (shown in pink).
Select the Ellipse Tool (L). Hold down the Ctrl key to constrain the ellipse to a circle and draw an ellipse to 222 pixels. The easiest way to create a circle to an exact size is draw any size circle, then enter the Height and Width in the text entry boxes on the Infobar, then press Enter.
Clone the circle and change the size to 176 pixels. Clone again and change the size. Repeat until you have all five circles.
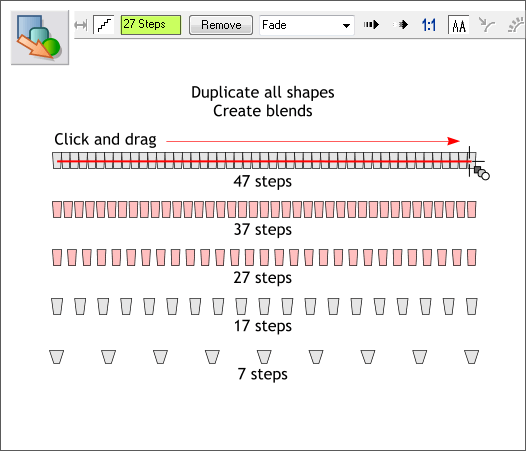
Arrange the five shapes in a vertical column. Clone the shapes and move them off to the right or left about the distance shown above.
Select the Blend Tool (W). Drag from one shape to it’s opposite to create a blend. Change the number of Blend Steps on the Infobar to 47 and press Enter to apply the change.
Create four more blends using the number of blend steps shown above.
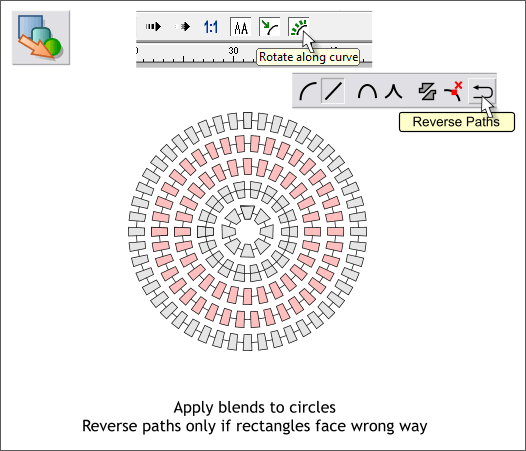
Select the first blend (47 steps). Hold down the Shift key and click on the largest circle. Press the Blend Along a Curve icon (to the left of Rotate Along a Curve). Then press Rotate Along Curve (you may have to press this icon twice ).
NOTE: The narrow end of the rectangle should be point to the center of the circles. If it points outwards, switch to the Shape Editor Tool (F4) and press the Reverse Paths icon. But only do this if the shorter side is facing outwards.
Repeat this step to attach the rest of the blends to the appropriate circles.
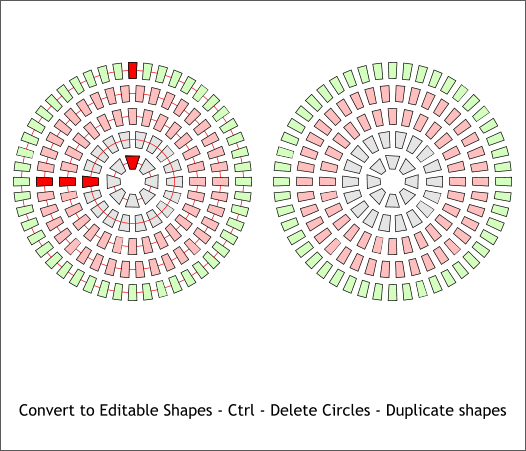
Select all the blends and Arrange > Convert to Editable Shapes.
Zoom in close (press 2 or 3 to increase the Zoom Factor to 200% or 300%).
Hold down the Ctrl key and click on each of the circles then press the Delete key on your keyboard to delete the circle(s).
When Xtreme blends on an ellipse, it places the last shape on top of the first. We don’t need or even want these duplicates. So, hold down the Ctrl key and click the shapes shown above in red and one at a time delete them.
If you are curious (curious is good), and wonder why two of the shapes are in the center and three are on the left, here’s part of the answer. When Xtreme creates a blend of a closed shape such as a circle, the inside and outside paths go one direction while the in between paths go in the opposite direction. Why the in between shapes are on the left (or maybe right) instead at the bottom of the circle is anybody’s guess. It’s a programmer thing.
Select all the shapes and make a duplicate (press Ctrl d or Edit > Duplicate).
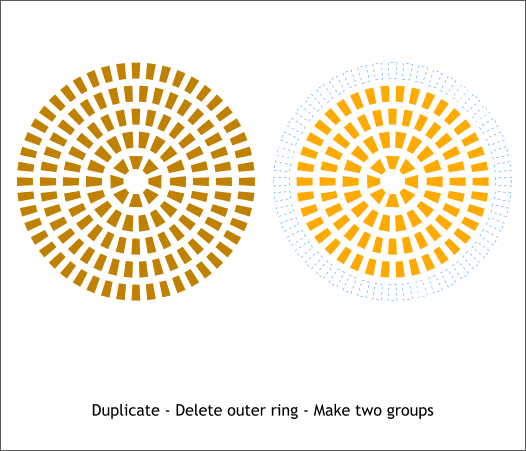
Delete the outer ring on the duplicate (shown in pale orange).
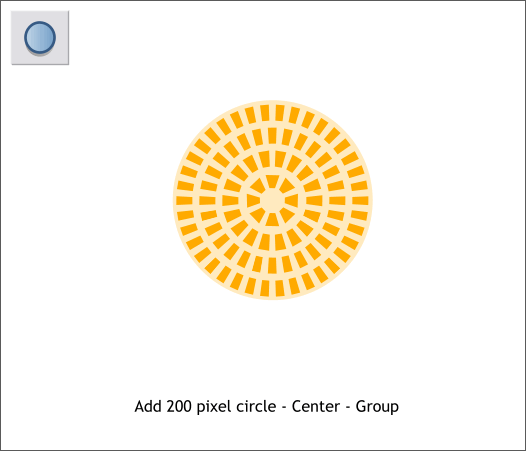
Add and center a 200 pixel circle behind the duplicates.
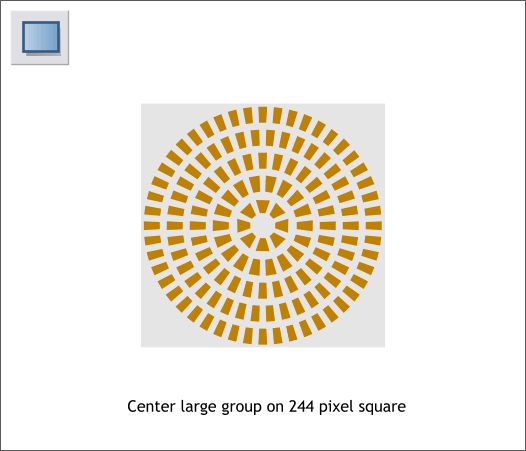
Select the Rectangle Tool (M). Create a 244 pixel square (Hold down the Ctrl key to constrain the rectangle to a square). Center the larger group over the square.
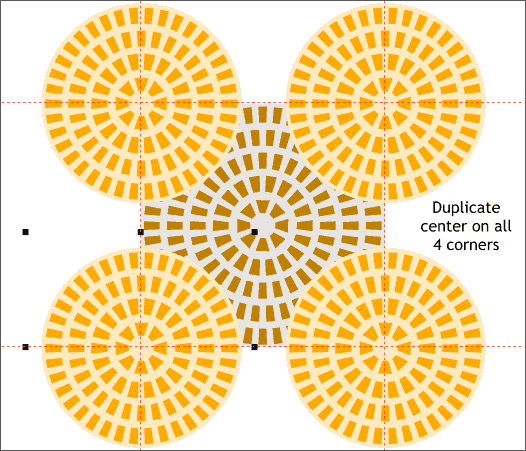
Make three duplicates of the smaller group and circle (pale orange). Position the center of the circles/shapes over the corners of the square.
TIP: Drag guide lines from the screen rulers (Ctrl L to display rulers) tangent with the outside edges of the square. Select one of the circles and the shapes. Use the arrow keys to move the selection until the center bounding box handles (the small black squares) are in the center of the guidelines.
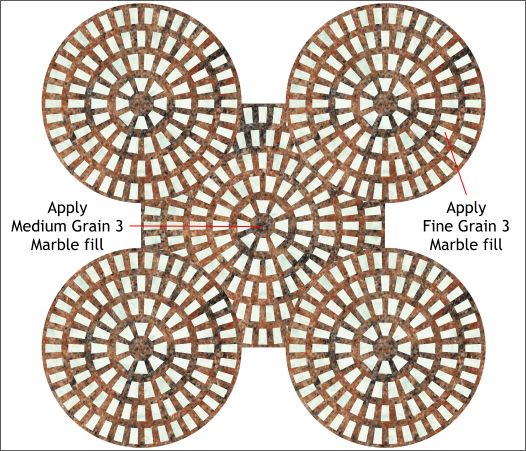
Select all four circles (but not the rectangle shapes) and the square in the center. Open the Fill Gallery (Shift F11). From the Marble Fills folder select Medium Grain 3. Press Fill.
Switch to the Fill Tool (F5). Click one of the outside boxes at the end of the fill path arrows. Press the left arrow key to reduce the size of the fill until the fill looks like above.
Select all the groups of rectangle shapes and apply a Fine Grain 3 fill. Resize the fill in the same manner.
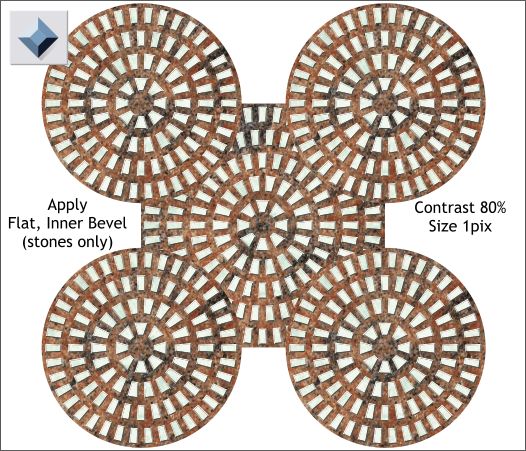
Select all the rectangular shapes. Switch to the Bevel Tool (Ctrl F3). Apply an Inner Bevel by dragging any of the red arrow control handles a short distance towards the center.
Increase the Contrast slider setting to 80%.
From the Slider Type drop down list, select Size. Change the Size to 1pix and press Enter.
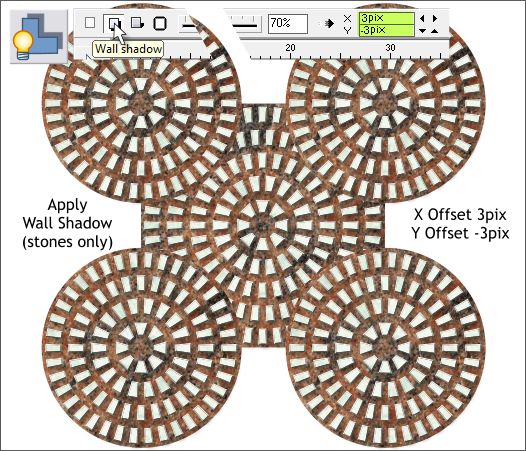
With all the beveled shapes still selected, select the Shadow Tool (Ctrl F2). Apply a Wall Shadow. Change the X and Y Offset Distance to 3 and -3pix.
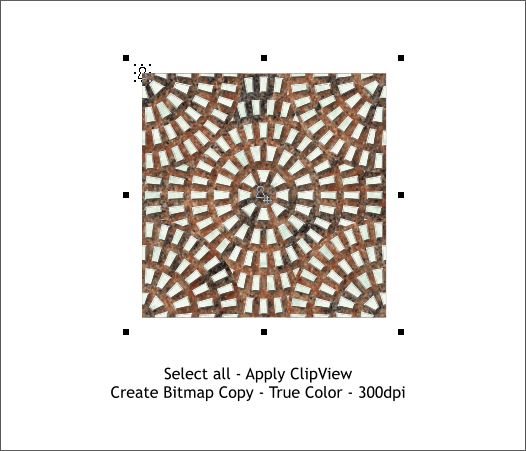
Select every thing and Arrange > Apply ClipView. This is our tile.
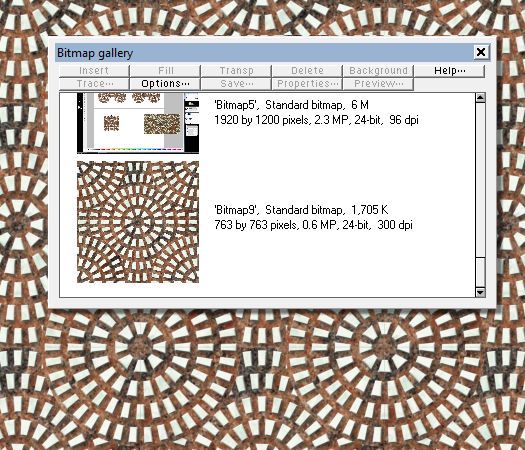
Select a shape to which you want to apply the tiled fill. Open the Bitmap Gallery (F11). Select the tile, then press Fill.
Ack! There is only one square. Hardly a tiled fill is it?
With the shape selected, switch to the Fill Tool (F5). From the Fill Tiling drop down list on the Infobar, select Repeating (not Repeat Inverted). Now your fill should look like mine above.
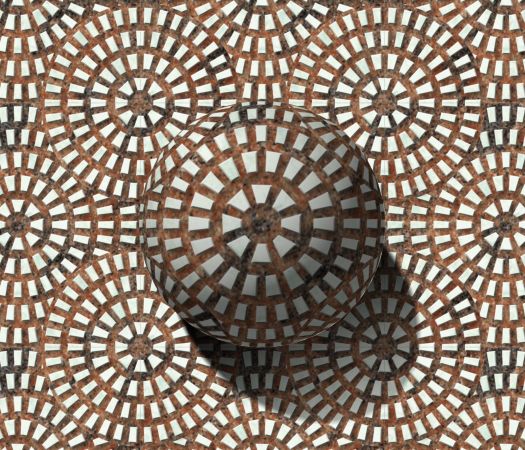
Easy, if you do it in Xtreme.
|
|
