|
|
|
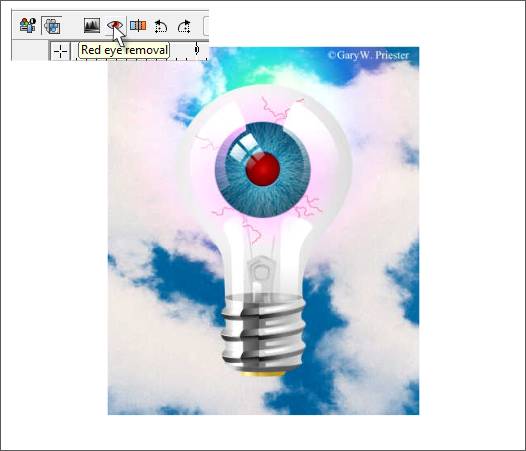
Camera's with a flash attachment can often create what is known as red eye. This happens when the flash illuminates the red retina at the back of the eye and is very ghoulish. Xtreme 4.0 can, as the Visine advertisements used to say, "Get the Red Out."
The image above, one of my early Xara illustrations, is afflicted with the red eye problem. Of course since an eye bulb does not have a retina, I had to induce this condition artificially. But no matter.
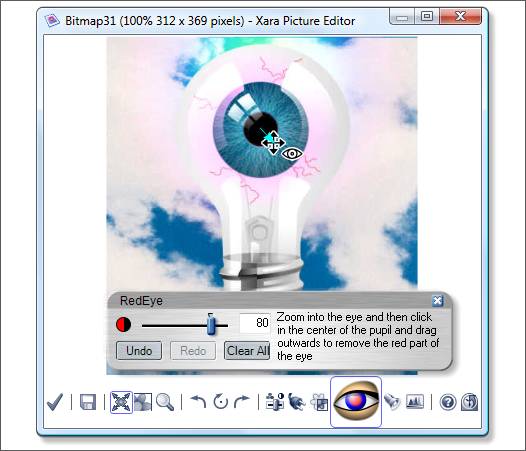
Click the Red Eye Removal icon and, whoa! Isn't that the Xara Picture Editor? And you thought it had gone the way of the Dodo bird! Well not quite. It's alive! It's alive! Excuse me I got a bit carried away by this discovery. As the dialog instructs, zoom in on the red pupil. click the Red Eye Removal cursor in the center of the pupil, and drag outward until the pupil is covered. Xara darkens the pupil getting the red out. How hard is that?
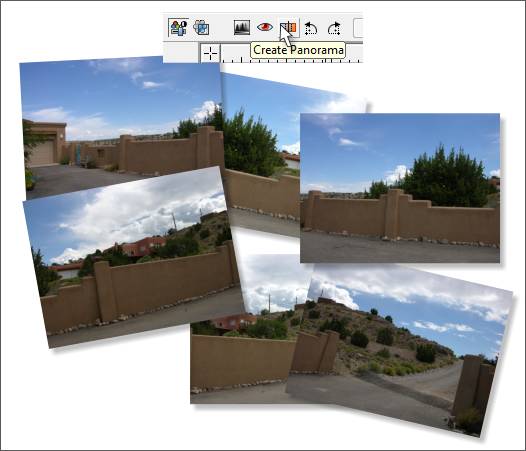
A new feature introduced in Xtreme 4.0 and Xtreme Pro 4.0 is the Create Panorama Tool. and Panorama Studio (Xtreme Pro only). This is a straightforward and quick process. Let me qualify that. If you are working with several large high resolution photos the process is not that quick and depending upon the amount of RAM and speed of your computer, maybe not so quick But easy, yes. Above are a series of photos I took of the wall that runs along my driveway. I used a tripod and let the area enclosed in each photo overlap some. That is to say that each photo contains a bit of the previous photo.
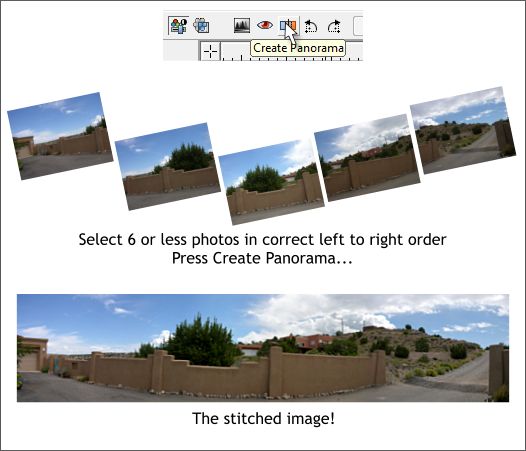
Select between two to six photos, that are arranged in the correct order, and press Create Panorama. The Create Panorama Tool does a bit of figuring, and then stitches the images together into one continuous and seamless image. This example is very small and uses small low resolution images. So the process was almost instantaneous. For larger high resolution images you might consider getting a bite to eat or taking a long eye break. Panorama Studio can handle a larger number of images and has more options including a 360 degree image and animation. Finally, let's look at those two arrows to the right of the Panorama Tool. They rotate a selected image 90 degrees anti-clockwise or 90 degrees clockwise. 90 degree per click. And that wraps up the Photo Tool edition of the Workbook. Comments, questions, suggestions, gossip, gripes, etc. are graciously accepted. Gary W. Priester
|
||||||
|
|


