|
|
|
The Brightness Levels Tool is a very powerful tool for correcting photographic images. It can open up a dark image and darken (to a degree) an over exposed photo. Paul Söderholm's excellent Guest Tutorial 68 and Guest Tutorial 69 go into the workings of the Levels Tool in much greater detail. I'll just cover the basics here.
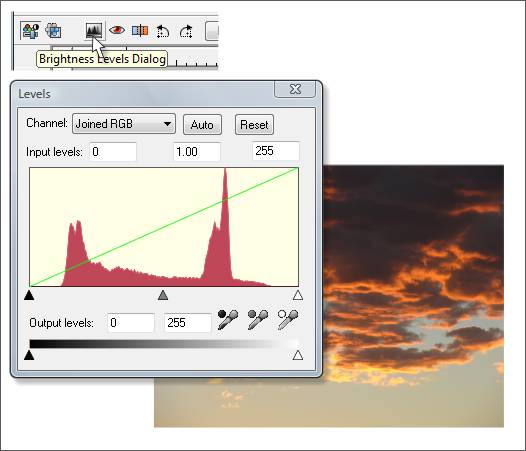
When you click the Brightness Levels Dialog icon, a histogram appears that represents the distribution of light and dark and mid-range values. A photo that is well balanced will have an even distribution from dark to light. As you can see with my sunset photo above the values are bunched up in the middle. The problem with digital cameras (unless you really know about exposure and aperture openings and can over rule the default settings), is it's easy to just let the camera make these decisions for us. We paid a lot of money for that professional photographer on a microchip who lives in our digital camera, so why not let the little dude earn his keep? Unfortunately what happens is the camera assumes that we want everything to be properly exposed. In the case of my sunset, my Nikon has made the light areas lighter and the dark areas lighter as well. The color is not as deep and saturated as the actual sunset I saw in the viewfinder. It's dull and washed out. The camera does not have a built-in sense of aesthetics.
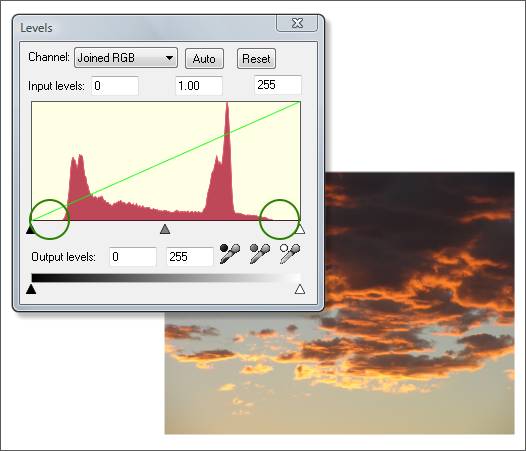
Part of the problem is shown above with the open space at each end of the distribution display. This indicates a lack of deep tones and a lack of light tones leaving a kind of muddy mess in the middle. The three triangles under the histogram can be used to correct the deficiencies in the image. And we'll look at these in a moment. But first let's press the Auto button and see how well Xtreme does at guessing how my photograph really wants to appear.
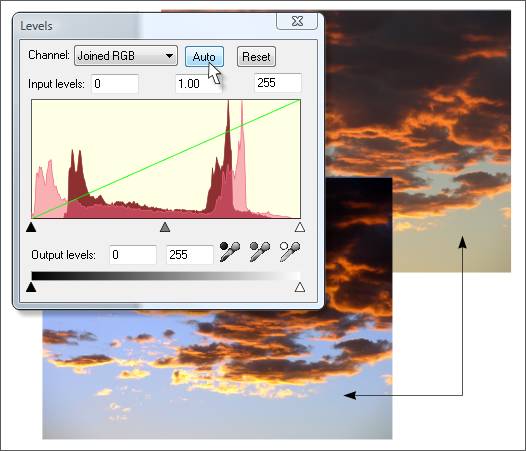
If you remember I was less than enthusiastic about the Enhance button on the Photo Tool Infobar. The results to my sunset photo were not all that breathtaking. Well look at the results of the Auto (automatic) operation shown above in the bottom image! The brilliant blue of the sky is back. The dark areas of the clouds are restored and that fabulous intense pink orange color is back in the clouds. All with the press of one button. The pale pink area of the histogram shows that the distribution of darks has been extended in both directions.
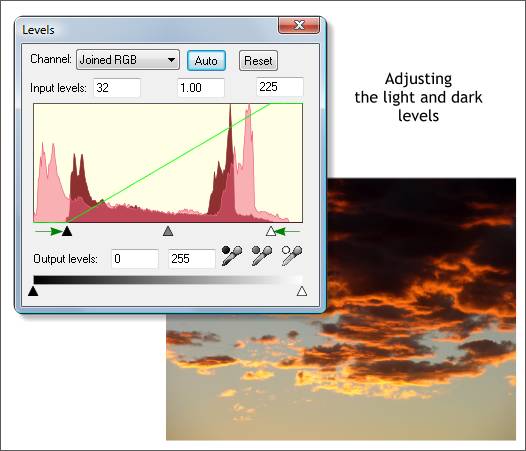
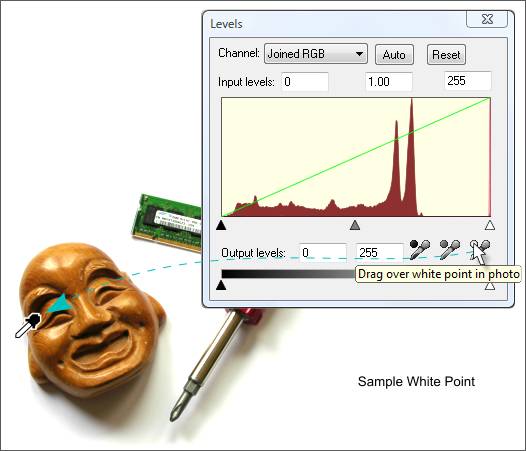
The three triangular handles under the histogram let us manually edit the distribution of values. The black triangle controls the darker tones, the white triangle controls the lighter tones and the gray triangle controls the mid-range tones. NOTE: In most Levels tools the center triangle makes the middle tones darker when you slide it to the right. For reasons unknown to your editor, Xtreme works the opposite. I suspect it is because you are moving the center slider to the right towards the lighter values and to the left towards the darker values. By moving the dark and light triangles toward the center, some of the intensity is restored to my sunset. But not near as much as when I let Xtreme do this automatically. So my advice is always try the Auto button first. If you don't like the results, press Reset and you are back where you started. Paul Söderholm covers the color balance in his Guest Tutorials for those who want to get deeper into this process. He also addresses the Input level settings as well as how to improve the overall color by editing the Red, Green and Blue values separately. You'll notice three eyedropper tools below the histogram. These let you designate the white, black and neutral gray areas of your image. We'll look at these next.
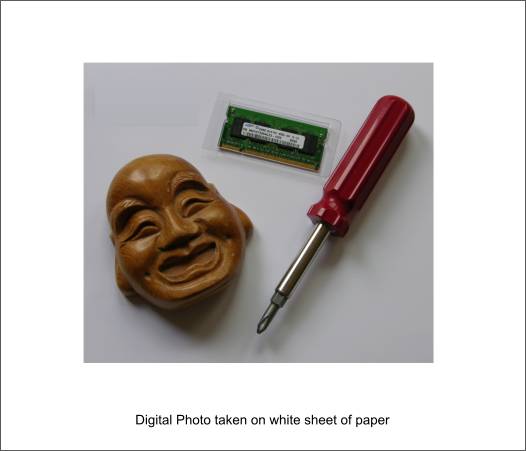
Above is a digital photo taken on a sheet of bright white printing paper. Only it does not appear very bright or white, overall the image is very dark. The white point eyedropper tool can correct this.
The wide space on the right of the histogram (the light values) indicates a lack of lighter values. We can slide the white triangle to the edge of the first spike of color and this may help. Or we can drag the Set White Point eyedropper over the white areas of the page until the image is brighter and the white areas are white. As you drag the eyedropper over the white areas, the image changes in real time. As it turns out, the white area to the left of the wooden mask produces the best overall white. It's a matter of trial and error. Xtreme looks at this eyedropper selection and says' hmm? OK if this is white, then let's adjust the other values in proportion. The result is a better balanced image.
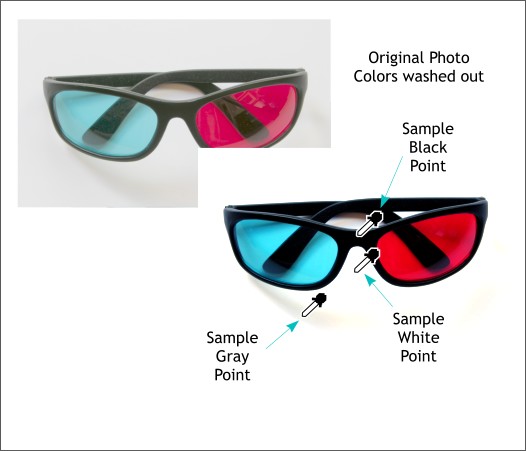
In the photo shown above left (my red and cyan anaglyph glasses), everything is washed out. The white of the paper is gray and the black of the frames is gray. Not a pretty picture. I used the Set White Point eyedropper to sample the white area between the lenses to make the white areas brighter. I used the Set Black Point eyedropper to make the blacks darker. And after dragging the Set Gray Point eyedropper around the shadows, found a good spot to make the shadow more neutral. There is a lot to master in the Brightness Levels Tool and I strongly recommend looking at Paul's two guest tutorials.
|
||||||
|
|
