|
|
|
The Enhance operations include, Brightness, Contrast, Saturation, Sharpness and Enhance (the Enhance button). These are the same tools that were found in Xara Picture Editor. But in some cases the operations and settings have been improved.
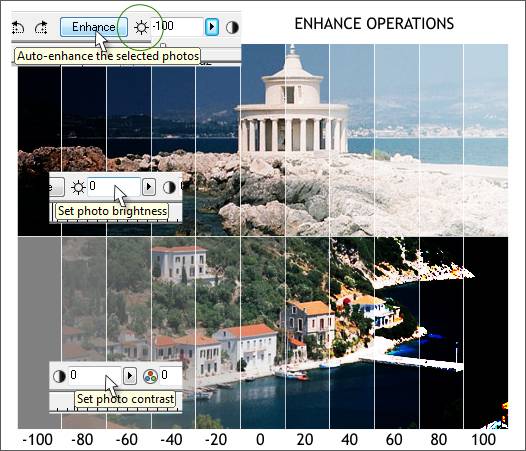
The illustration above shows a range of settings from -100 to 100% for the Brightness and Contrast controls. With both sliders, less is usually more. Brightness makes the selected photo lighter or darker. Positive numbers make the image lighter while negative numbers (values preceded by a minus sign), make the image darker. No real surprises here. Contrast increases or decreases the difference between areas of color. A small amount of Contrast can increase color intensity, but often at the expense of detail. A good example of this is adding a bit of Contrast to a cloud filled sky image. The lightness and darkness of the clouds is enhanced and the blue of the sky is intensified. But a lot of the subtle detail within the clouds is lost. Decreasing the Contrast to -100 results in a neutral gray. Increasing the setting to 100 produces an almost black, posterized image.
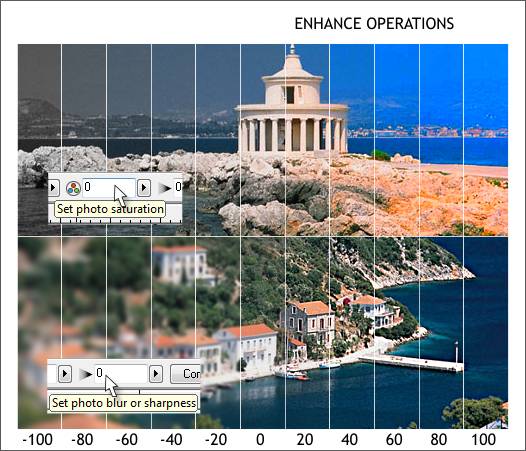
Saturation increases or decreases the amount of color in an image. Again, less is usually preferable. -100% Saturation results in a grayscale image with no color. In most cases, a small amount of Saturation , 3-6% adds a spot of life to an otherwise dull photo. In the past, you had to enter -100 in the text entry box to achieve a grayscale image. This has been changed in 4.0 with the maximum slider setting increased from 50 to 100%. Blur / Sharpen as you may have guessed, blurs or sharpens an image. Blur can be used to create an out of focus image. If you blur a duplicate image and apply a Circular, Mix transparency, you can create a range from sharp to blurry. TIP: If you have a scroll mouse, click inside the text entry box and roll the scroll wheel to increase and decrease the settings.
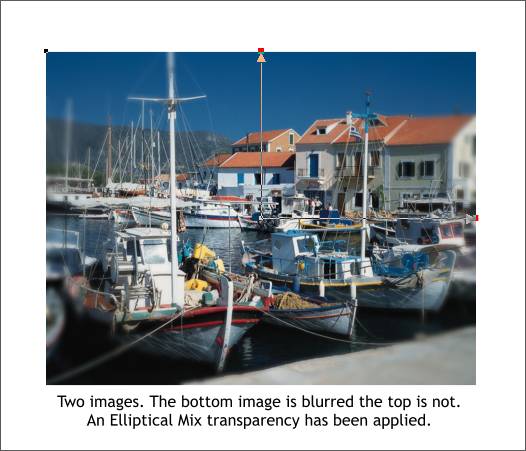
The image above is actually two images, the original and a clone. The original image on the bottom is blurred. An Elliptical transparency applied to the top, non-blurred image accentuates the center of the photo.
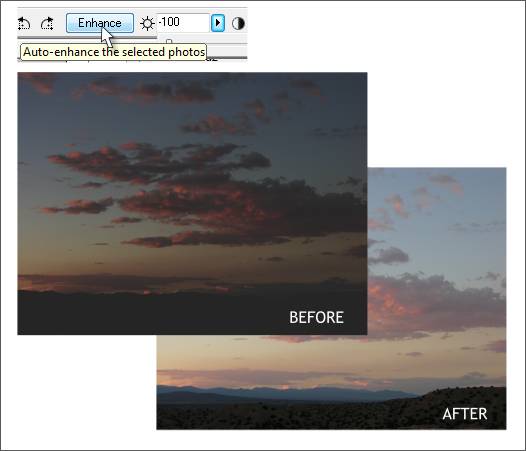
The Enhance button is supposed to automatically improve an image. I purposely made a dark bitmap copy of my cloud photograph shown above left. When I pressed the Enhance button, the dark photo was more or less restored to the original shown bottom right. Not too bad. But not earth shattering either. For your editor's money, this button would not be missed were it to drop off the Infobar. There is a more effective automatic enhancement feature in the Brightness Levels dialog, which we'll look at on the next page.
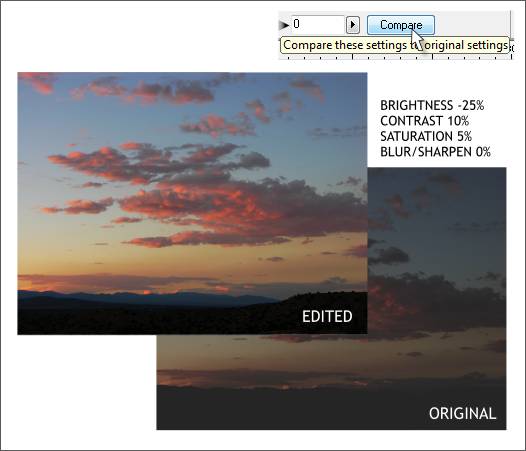
Using the slider settings shown above, I was able to improve my sunset photo more to my liking. The Compare button on the right end of the Photo Tool Infobar lets you toggle back and forth to compare the edited with the original image. TIP: Press Compare to return the image to its original state and remove all edits. This is useful when you have totally bollixed an image and want to start over again.
|
||||||
|
|


