|
|
|
In addition to the Live Effects Tool filters included in the original version, the Xtreme 4.0 and Xtreme Pro 4 versions contain a host of new filters including Art filters, Color filters, Deformation filters, Distortion filters, Sharpen and Soften filters and Stylization filters. There is another category Video filter which not being a video person, I will assume that Deinterlace removes the interlaced scan lines from a video frame capture, but that is only a guess. To be honest, the normally helpful Help file is not much help for the newest members of the Live Effects Tool family. I pretty much had to audition each filter to try to figure out what each one does. This is the first appearance for most of these filters and the UI (user interface) for the filters is pretty basic. I expect the UI will improve in the next version. We'll start with the Art filters.
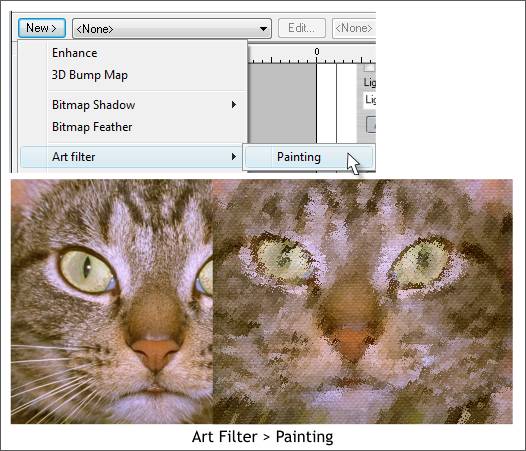
The Art filters are a series of Brushes and Preset brush effects that can be applied to bitmaps and vector objects. When applied to vector objects and text, unless you Lock the effect, the vector shapes and text can be edited and the changes will reapply. The example shown above right, shows the effect of a brush on a bitmap image. Because these are "Live Effects" the original photo remains unchanged and you can edit or remove an effect at any time. As the name of the group of filters suggests, these filters create a painted quality to the selected image.
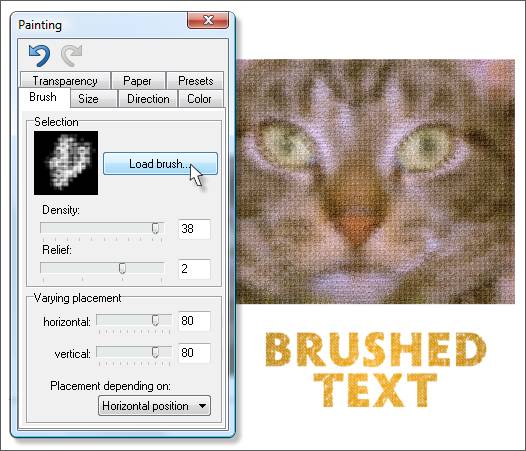
Press Load Brush and a drop down list of brush shapes appears. It is hard to guess the effect each brush will have on any bitmap or vector object. The best way to find out it to apply the different shapes to find the ones you like. And as we will see in a moment, the dpi resolution affects the brush as well. Basically, the lower the resolution, for example 96 dpi, the more pronounced the effect. The higher the resolution the more subtle the effect. The ear shaped object to the left of the Load Brush button shows the brush applied to the bitmap photo and the text. You can edit the settings for each brush and Name and Save the modified brush.
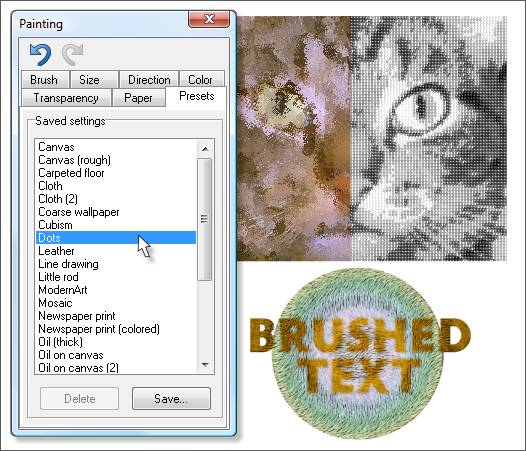
There is a drop down list of Presets shown here. Again, the best way to see the effect of each preset is to try them out. The titles for the presets are more impressionistic. Dots shown above right, is one of the exceptions to this. Even though I have applied a preset brush to the text, it remains fully editable and the size, style, font, etc. can be edited and the applied effect will like magic be reapplied.
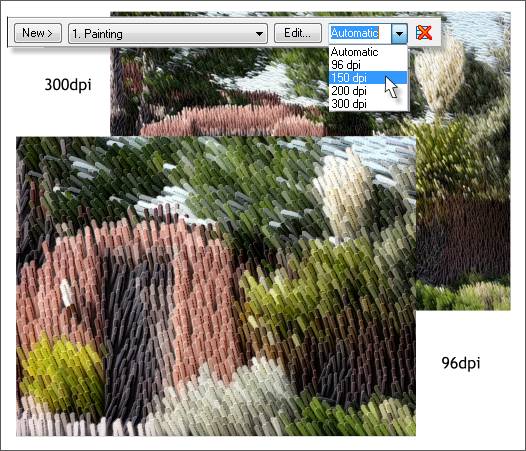
Increasing the Resolution of Effect setting, alters the appearance of the effect as shown above. The same photo is used for both examples. But at 300 dpi the effect is finer. The example shown above is a Preset called Little Rod. I would have called it Shag Carpet. If you are creating an image for commercial printing, use an image that is at least 300 dpi to begin with. But then you can edit the Resolution of Effect setting to create more or less subtle effect. You can also key in an amount and press Enter to apply the custom resolution.
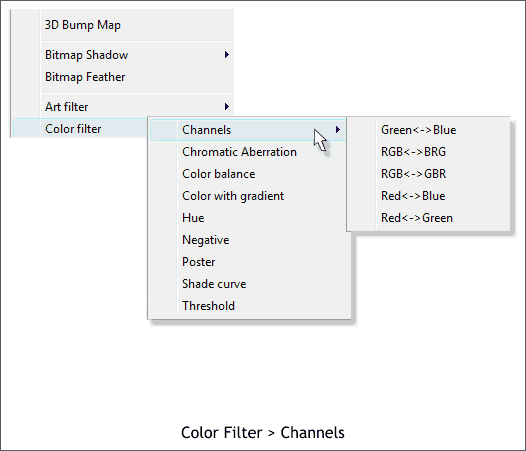
The next series of Filters are the Color Filters. And the first of these is Channels as you can see in the fly out menu.
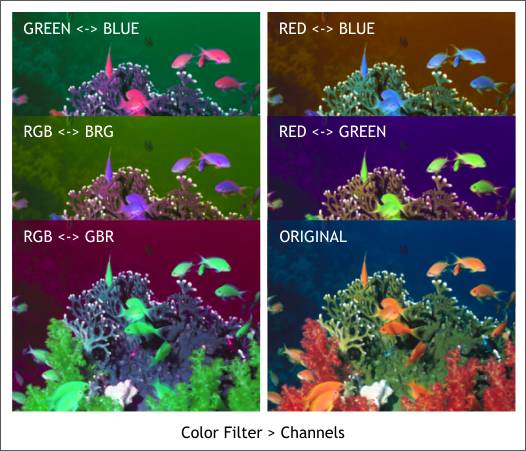
As near as I can tell, these settings remap the colors in an image. The orignal image in the example above is shown on the lower right and the five examples show the results of each filter. The Channels filters give an image a kind of surreal otherworldly appearance. The next filter in the list is Chromatic Aberration. For the life of me I cannot figure out what this filter does or why it is even in this list. The only thing I could observe is it adds the most subtle outline color around the outside of a selection.
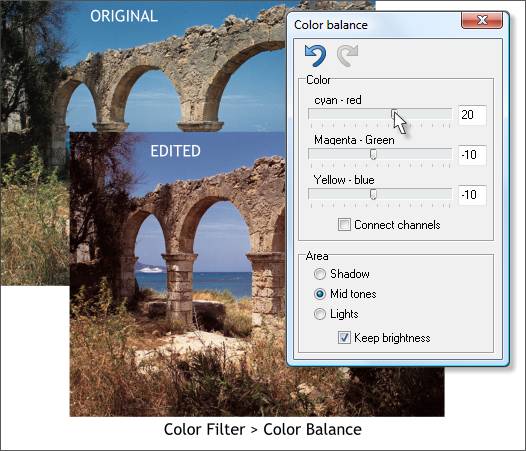
Color Balance lets you make subtle or not so subtle color shifts to an image. You can adjust separately the color balance for for Shadows, Midtones and Highlights. Usually adjusting just the Midtones will do the trick. In the example shown above, your editor (that's me) warmed up the color of the stone and made the sky more sky blue.
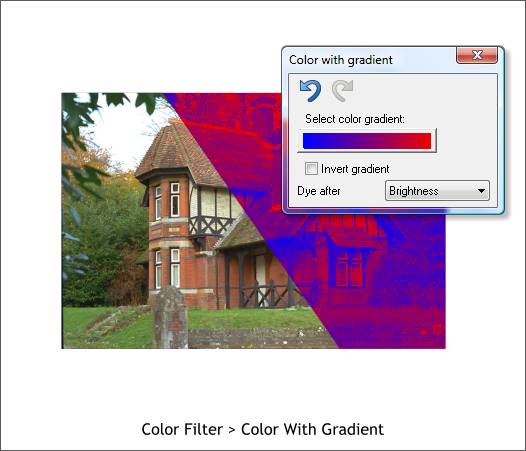
Color With Gradient also creates a kind of decorative, other worldly effect. There are dozens of Gradients to choose from and you can apply the gradient based on a series of parameters found in the Dye After drop down list.
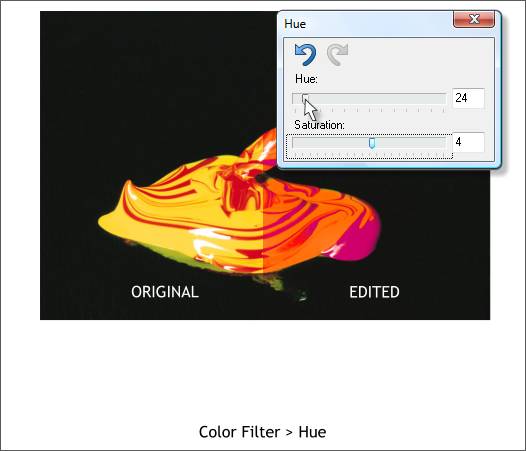
The Hue color filter shifts all the colors in an image at the same time. The example above shows a subtle shift in color from yellow to orange. The Hue slider represents the 360 degrees of the color wheel. You can also adjust the Saturation, the amount of or lack of color in the image. 0% Saturation represents a grayscale image.
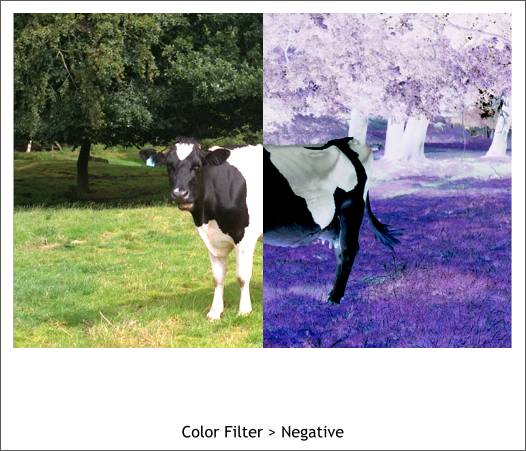
The Negative Color Filter inverts the color of an image in the same way as a color photographic negative. Each color in the Negative version is the exact opposite on the color wheel. The grass for example is yellow green and in the negative version it is red purple. If you have a scanned film negative, this filter will invert the color and give you a normal image.
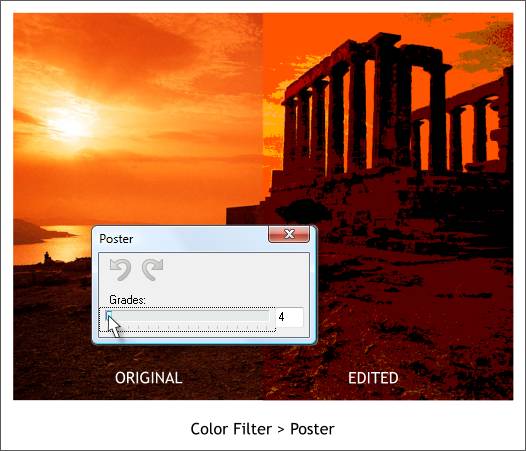
The Poster Filter works best with a small number of colors and produces a posterized effect. 8 or fewer colors produces the best results. This filter in effect reduces a 24-bit image to 8-bits (256 colors or less).
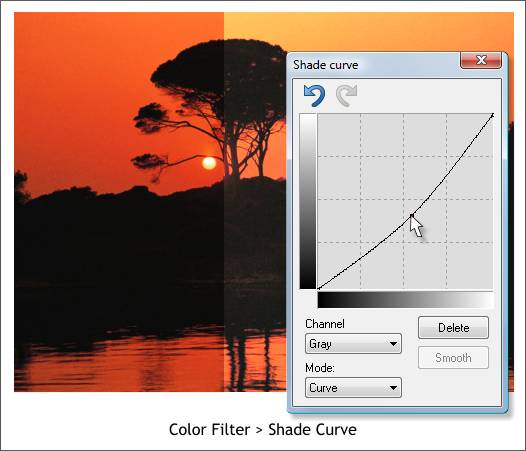
The Shade Curve filter is an interactive way to adjust the tonal curve for an image. Drag the curved line upward and the colors in the image get lighter. Drag the curve downward and the colors get deeper as show top left. You can adjust the colors by their Red, Green and Blue Channel. The curved line can be dragged left and right as well as up and down.
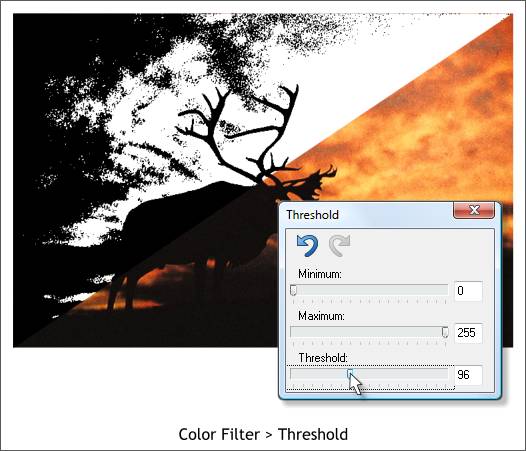
The last Color filter is Threshold. This filter creates a 2-bit image (black or white). The Threshold slider sets the middle point at which a value in the image goes from white to black. Each image works differently so it's best to move the slider back and forth to see which setting captures the most detail. Normally 128 is right in the middle (one half of 256). But because the image of the moose at sunset was very dark, a lower Threshold setting worked better. Images with strong contrast will work best with this filter. Any questions?
|
||||||
|
|
