|
|
|
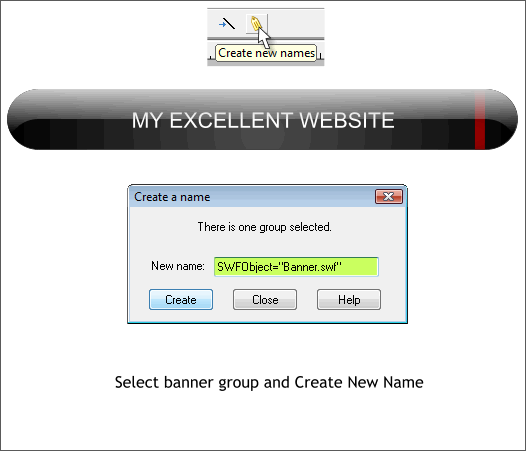
One of the Xara development team responsible for much of the HTML export capabilities, John aka covoxer has made it almost a no-brainer. Select the banner group. Press the Create New Names yellow tag icon. Key in the text shown above exactly as shown. The file name is in quotes. You can name the file anything you wish but be sure it is exactly the same as the file name you use when you export your Flash animation. The new file you just added to the Filters folder will automatically replace the banner (place holder image) with the proper Flash script. Also your placeholder and your Flash animation need to be the same size. If they are not the Flash movie may be distorted. Export your website. This is important so do it now. Your editor (moi) will wait for you.
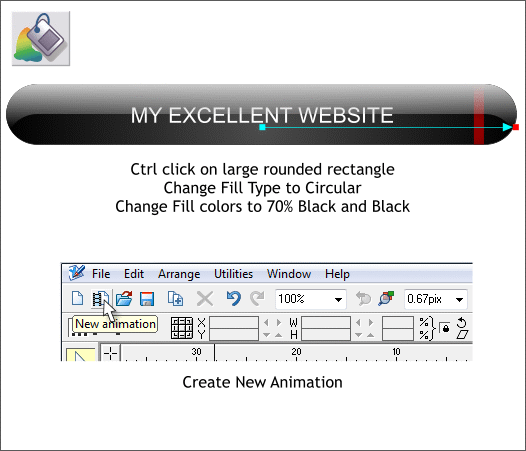
We will now create a subtle glowing animation for just the banner on the home page. Select the banner and make sure there are no outlines. Right click on the cross hatched box to the left of the screen palette. Second, Flash only supports Linear and Circular fills so we need to change the elliptical fill to Circular. Ctrl click on the large capsule shape then switch to the Fill Tool (F5). Select Circular from the drop down list of Fill Types on the Infobar. Change the center fill color to 70% Black. Copy the banner group to the clipboard (Ctrl c). Click the Create New Animation icon on the Infobar to open a new animation page.
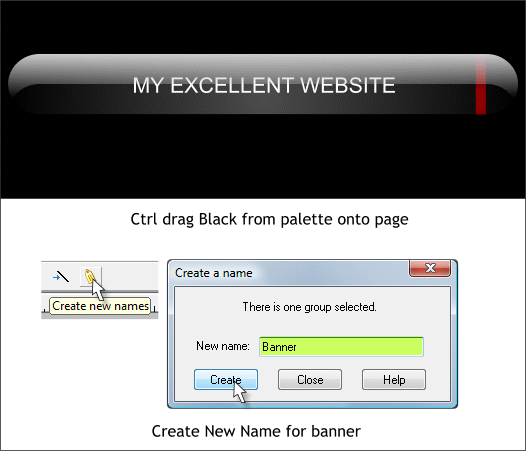
Paste the banner into the Animation page. If the page is too small, change the size in Page Options > Page. Just make the page a bit larger than the banner. The exact size does not really matter. IMPORTANT Open the Name Gallery (Ctrl Shift F9). Locate the SWFObject="Banner" name. Select it and press Delete. This will remove the Name from the banner and avoid confusion later on. Hold down the Ctrl key and drag the color Black from the screen palette and drop it onto the page. With the banner group selected, click the yellow Create New Names icon on the Infobar. Name the banner Banner. Press Create. The name has to be the same name as the name you used when you created the placeholder image. (This is an anchor by the way that goes back to the image with the placeholder copy). New Users: Xara can create tween frames, or in between frames for a smooth transition, but only if the object has been named. That's why we are naming it.
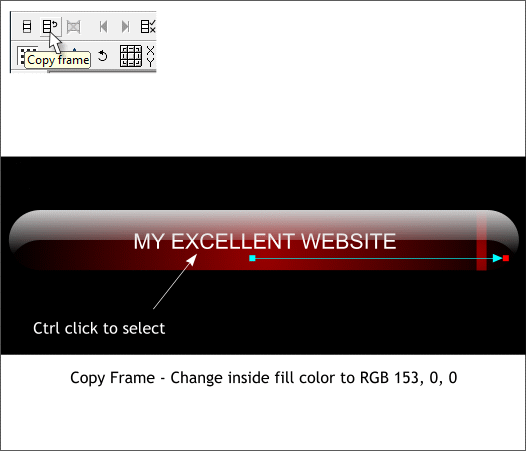
Press the Copy Frame icon to create a new frame with the same objects. Ctrl click on the large capsule shape then switch to the Fill Tool. Change the center color to a deep red.
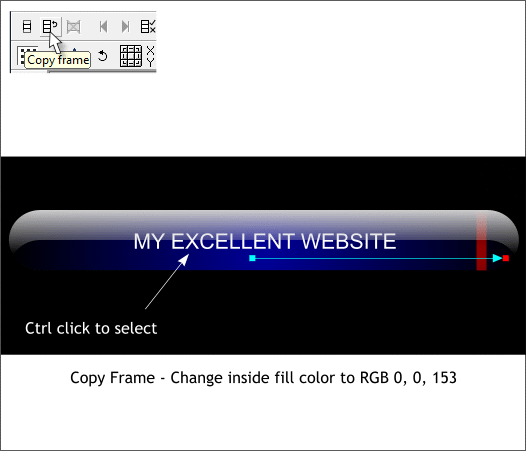
Press Copy Frame. Change the center fill color to deep blue.
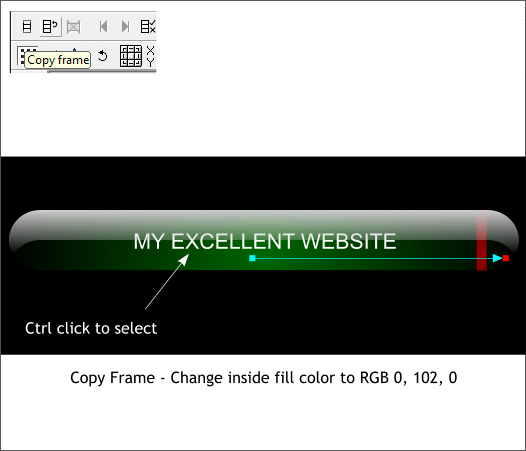
Press Copy Frame. Change the color to deep green.
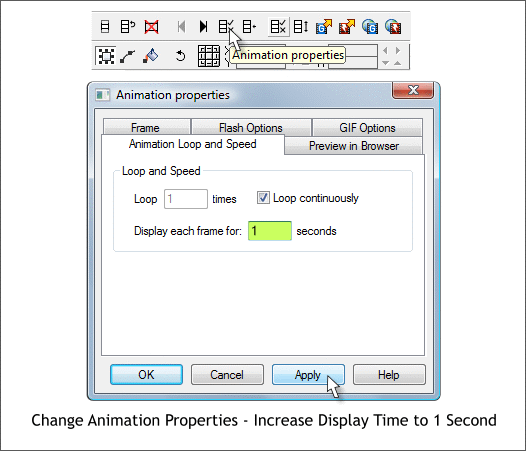
Click the Animation Properties icon. Change the Display time to 1 and press Apply, then OK to close the dialog.
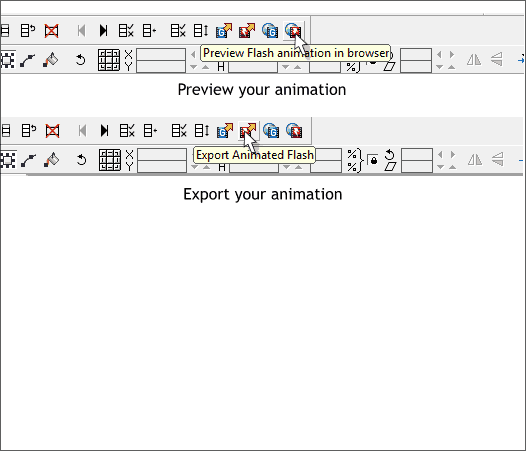
Press Preview Flash Animation in Browser icon and preview your animation. If there are no errors, press Export Animated Flash.
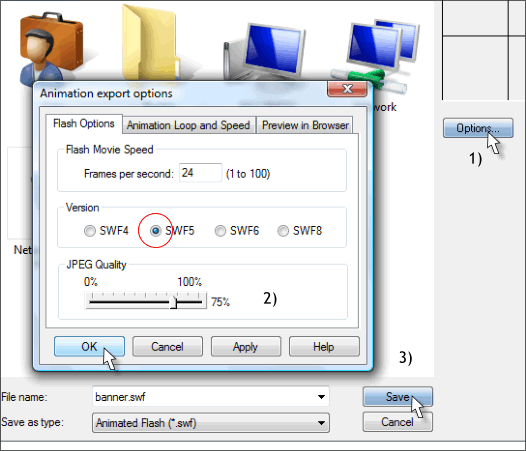
In the Export dialog, press the Options... button and select SWF5. This will assure backward compatibility with older versions of the Flash player. Press OK.
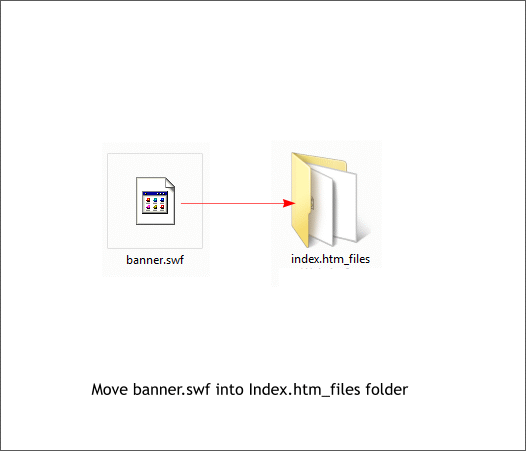
Save your Flash animation into the folder with your website files. Now when you preview your site, Xara substitutes the Flash animation for your place holder file. How does it do that? It's magic! Click here to see my example. I mentioned this before but it bears repeating. Group text and objects such as the banner and buttons. If you have an illustration such as the chart, group the whole thing. It will cut down on the number of objects and make the page load faster. Finally if this is all way over your head, there are several predesigned website templates in the Clipart Gallery > Example Templates. You can download these templates and see if one is right for you. In the Clipart Gallery (Shift F10) press Get Clipart. Make sure you are connected to the Internet. Xara will download thumbnails of all the available clipart to your computer. If you select one of the templates and press Open , Xara will fetch it for you and open it on your page. It's magic. I know I said that before. But it really is. And if even modifying the template strains your modest abilities and makes you want to cry, consider a website such as zynet.net/ where you can build your website on-line with a minimum of fuss or hair pulling. Sanity is important to keep. zynet offers the whole enchilada under one roof and you can still throw out phrases like e-Commerce and JavaScript at your next cocktail party and bore everybody to tears. There was a lot to cover here and I hope I did not leave anything out. Questions, comments, suggestions are always welcome. You can e-mail me from the link below. Have fun. Gary W. Priester |
|
|
|
|


