|
|
|
Getting back to the whole idea of the Workbook, which is a series of short tutorials, this month, you and I will create a folk art kind of rooster.
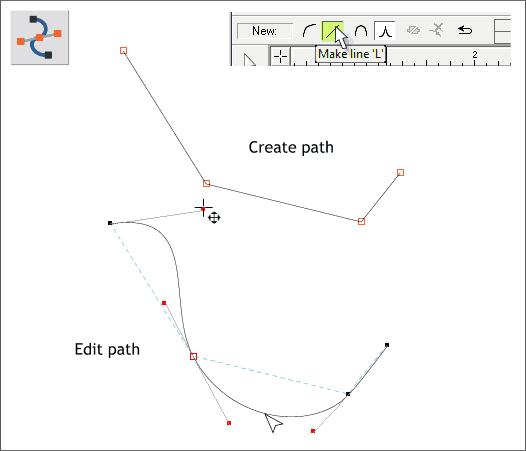
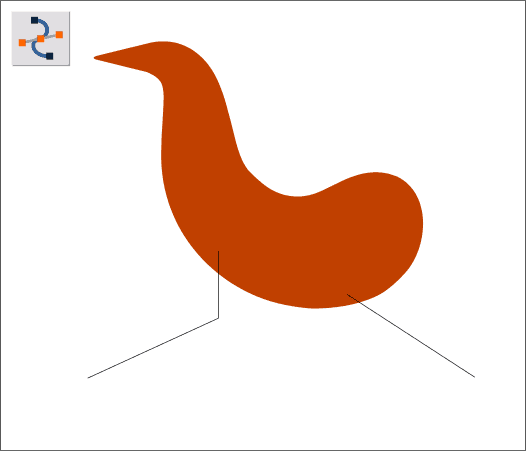
Select the Shape Editor Tool (F4). Select the Make Line option on the Infobar. Click four points onto the page to create a shape shown above top. Drag the sections with the Shape Editor Tool into curves as shown on the bottom example. You can also click on any of the control points with the Shape Editor Tool and drag the tiny red boxes on the ends of the gray lines (called Bezier control handles) to edit the curves.
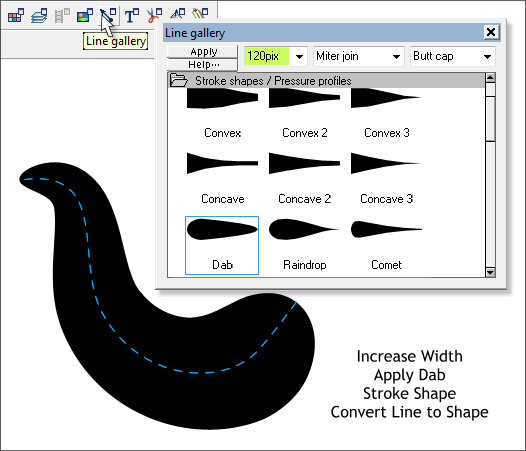
Select the edited line then open the Line Gallery (F12). In the Stroke Shape folder, change the Width to 120pix. This will produce a heavy graceless line. Select the Dab stroke shape and press Apply. Better.
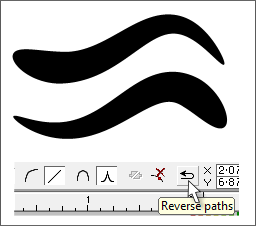
NOTE: If your shape is thick on the wrong end, switch to the Shape Editor Tool, then press the Reverse Paths icon on the Infobar. From the Arrange menu, select Convert Line to Shape. The line is now no longer a line but a shape with an outline and separate fill.
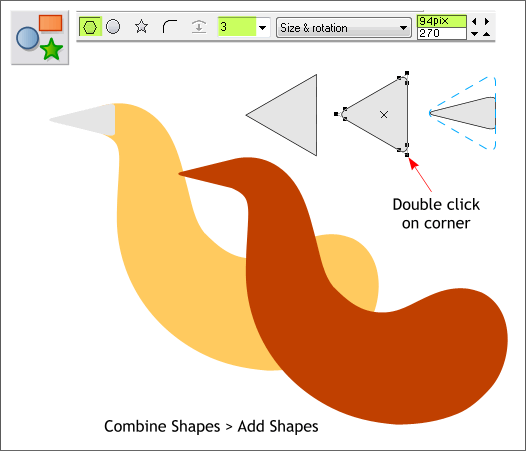
Select the QuickShape Tool (Shift F2). Select 3 sides from the Number of Sides drop down list and select the Polygon option. Draw a triangle and rotate the triangle as you draw do the point faces left. Double click on any of the end points to round the corners. Scale the triangle so it is more of a beak shape. Move the triangle over the tapered end of the shape. Adjust it so it is tangent to the end of the tapered body shape as shown above in yellow. Select both shapes and Arrange > Combine Shapes > Add Shapes or use the keyboard shortcut, Ctrl 1. This is the rooster's body.
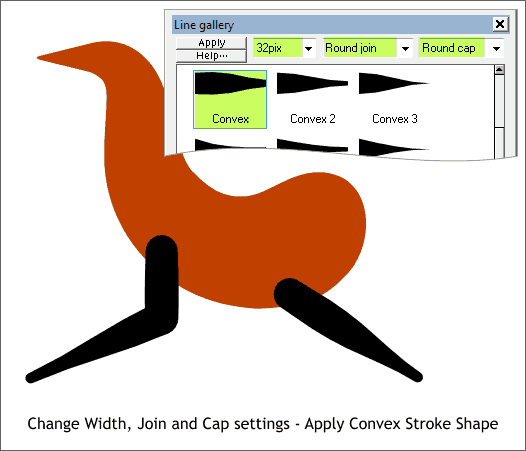
Add two legs as shown using the Shape Editor Tool. Press the Esc key before starting a new line segment.
In the Line Gallery, Stroke Shape folder, change the Width to 32pix and select the Convex shape. From the drop down lists, select Round Join and Round Cap. Press Apply. Select both legs and from the Arrange menu, select Convert Line to Shape.
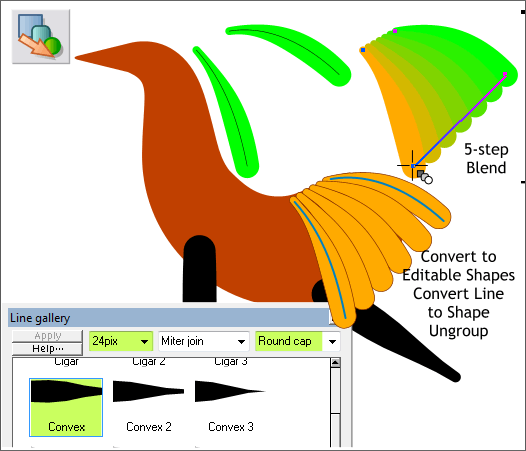
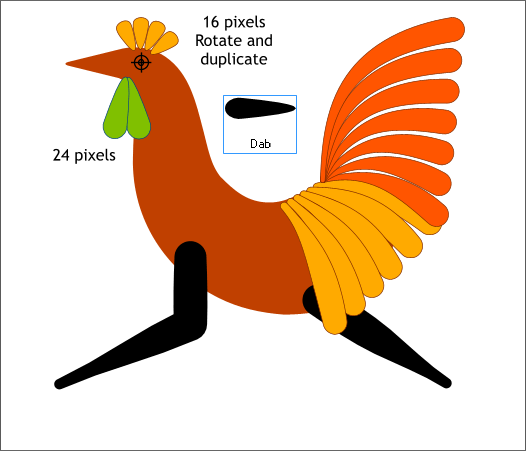
Create two more lines (shown in blue inside the yellow saddle feather shapes). Apply a Convex stroke to each, set the outline Width to 24pix, select Round Cap, and press Apply. Select the Blend Tool (F7). Drag from the right to the left line to create a 5-step blend. With the blend selected, Arrange > Convert to Editable Shapes, then Arrange > Convert Line to Shape and finally, Arrange > Ungroup.
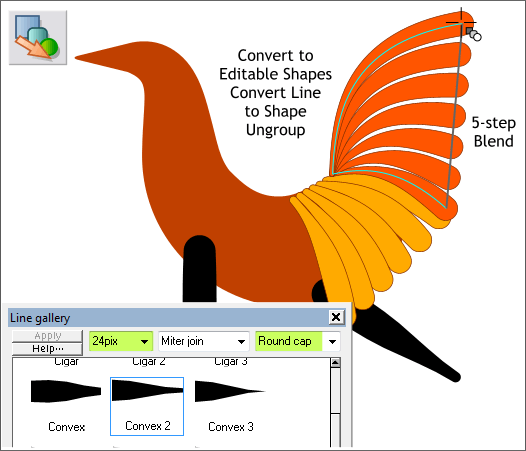
Repeat the last step to create a tail using the settings shown above. Create and curve the two lines, apply the Width and Stroke Shape, change the End Cap and press Apply. Create the Blend. Etc.
Add 6 more lines to create the comb and wattles. Apply a Dab stroke shape. For the comb, add one line directly above the round part of the head. Click twice to enable rotate skew mode. Drag the Center of Rotation bulls eye down to where the rooster's eye would be. Press Ctrl k to clone duplicate the line then drag one of the corner rotation arrows to rotate it to one side or the other. Repeat cloning and rotating to create the 4 lines.
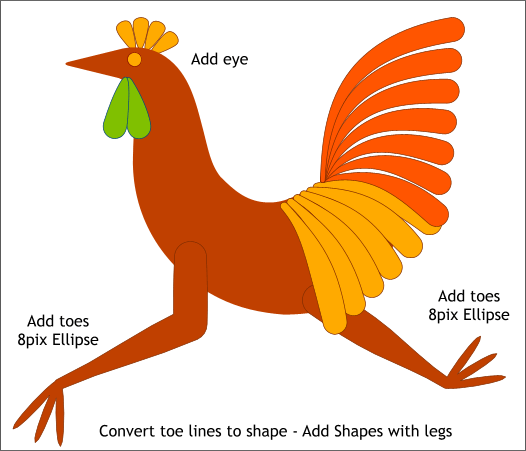
Add a circle for an eye. And add some toes and apply an Ellipse stroke shape. Convert the toe Lines to Shape, Select a leg and toes and Combine Shapes > Add Shapes (Ctrl 1). Repeat for the other leg and toes.
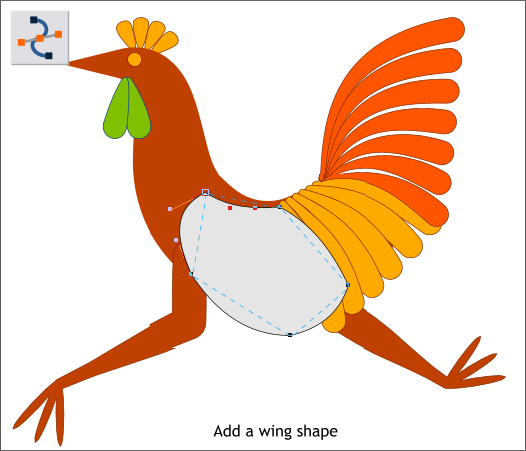
Add a wing shape.
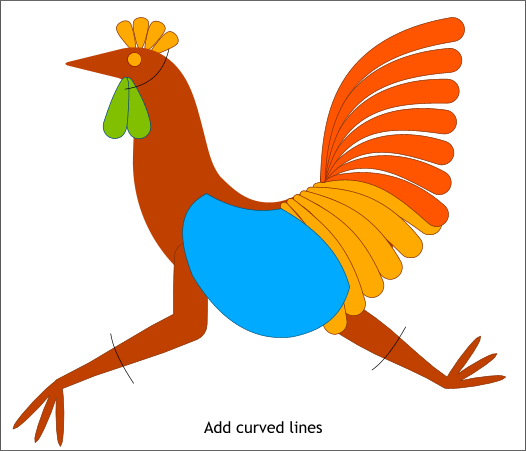
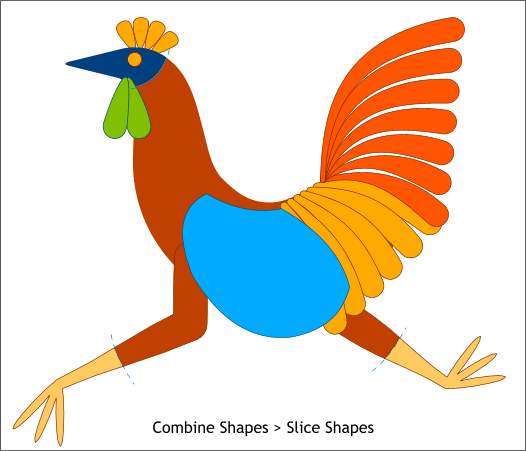
Add three curved lines as shown that pass through the neck, and the legs.
Select one of the lines and the body shape and Arrange > Combine Shapes > Slice Shapes or press Ctrl 4. Repeat two more times. The lines will disappear after the Slice Shapes operation as indicated by the blue dashed lines.
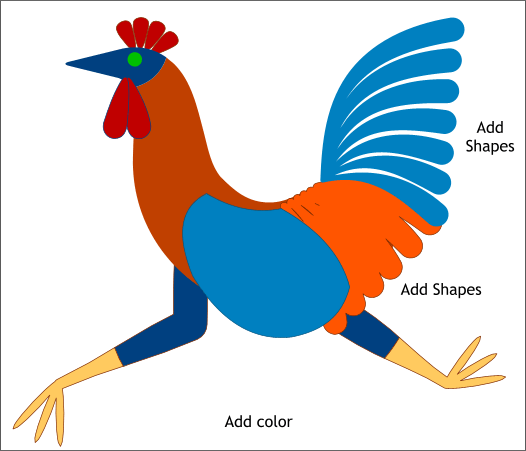
Select the set of tail feathers and Arrange > Combine Shapes > Add Shapes. Repeat with the set of saddle feathers. Apply colors. You can use my color scheme or devise one of your own.
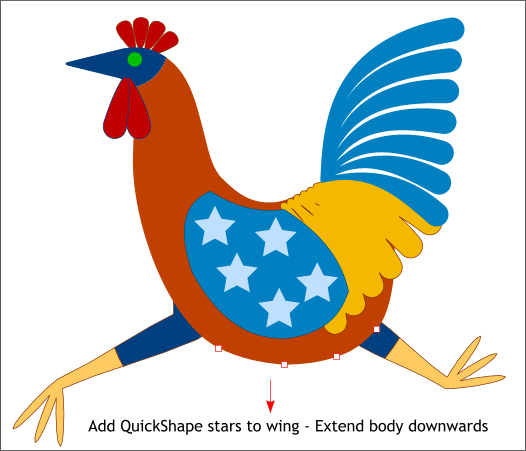
The rooster is too slim! Select the body then switch to the Shape Editor Tool (F4). Select the bottom control points shown above in red outline and press the down arrow key on your keyboard to bring the bottom down as shown. Create a star with the QuickShape Tool, make some duplicates and place them on the wing.
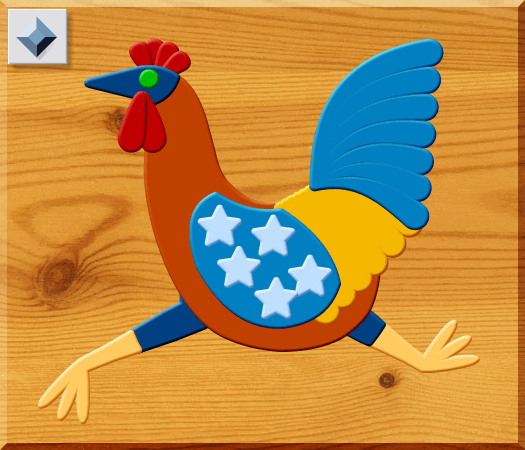
Select all the shapes then switch to the Bevel Tool (Ctrl F3). Drag any of the red arrow control handles towards the center just a small amount. From the drop down list of Bevel Types on the Infobar, select Rounded. Add a wood grain background (Fill Gallery > Wooden Fills folder) and you're done! And we're done as well. Comments, questions, and suggestions are always greatly appreciated. Please use the Send e-mail link below to send me your feedback. Gary W. Priester |
|||||||
|
|||||||
|
|
|||||||


