|
|
|
This was more of a challenge than a necessity. In the past, using objects with transparency in EPS or PDF files created problems. One of the problems is objects with transparency were converted to RGB bitmaps and if you were creating a CMYK document, these RGB bitmaps created a bit of a problem (to say the least). The answer was often to replicate the transparency by matching the effect with a gradient fill. This is no longer a problem because Xtreme Pro can produce a PDF file that supports transparency even with CMYK intent. But it was a fun exercise for me and I hope you find it a challenge as well.
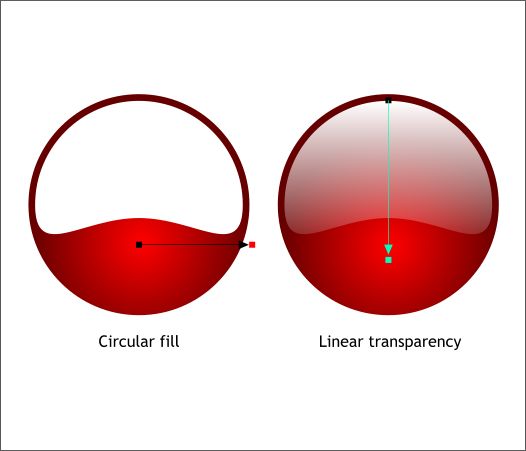
Create a circle and using the Fill Tool (F5) apply a Circular fill. I have used red and a deeper red. Create a slightly smaller circle. Convert it to editable shapes (Arrange menu) and then drag the bottom control point towards the center with the Shape Editor Tool. Apply a Flat, White fill. Switch to the Transparency Tool (F6). Click on the top of the white shape, hold down the Ctrl key, and drag straight down past the end of shape as shown above to create an interactive Linear transparency. This is the transparency effect we will attempt to duplicate.
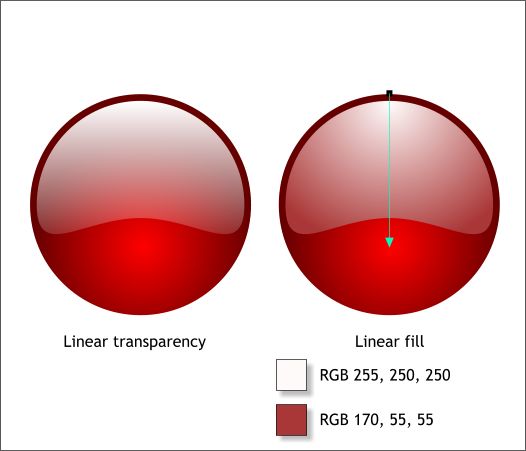
On the left is the shape with transparency. On the right is my solution; a Linear fill using white and deep red. What's missing is a bit of the red glow but otherwise it looks more or less the same.
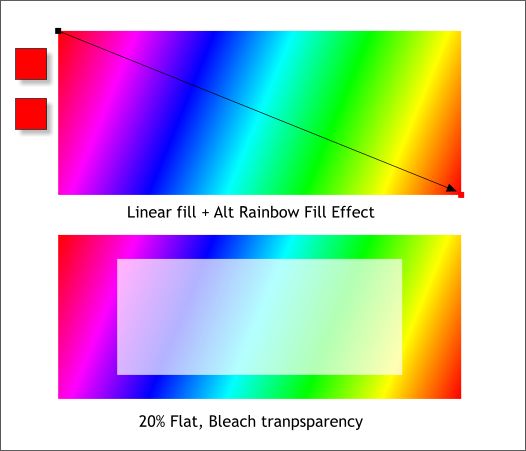
Here's another challenge. Apply a diagonal red to red Linear fill with an Alt Rainbow Fill Effect (select Alt Rainbow from the Fill Effect drop down list on the Infobar). Place a smaller white rectangle on top and apply a Flat, 20%, Bleach transparency.
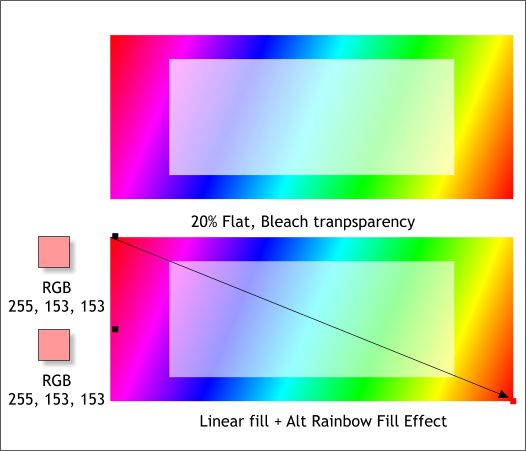
For this solution I applied the same fill using the same start and end points but changed the start and end color to a pale red. Isn't this fun?
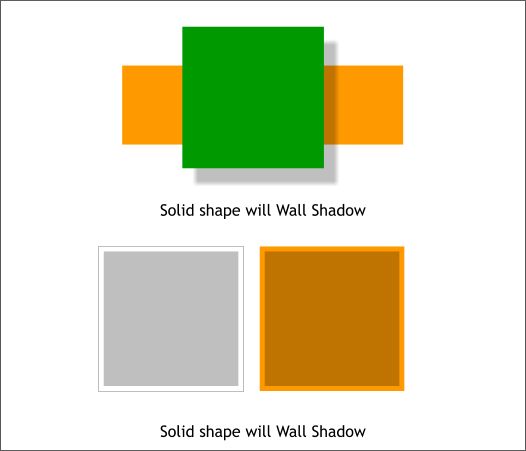
The example on top uses a Wall Shadow. The shadow in reality is a transparent black bitmap with feathered edges. Feathering uses transparency too so that is out. Users who have worked with Xara for many years will remember the old days before we had the Shadow Tool and had to create soft shadows manually. Create two duplicate squares and then create a smaller square in the center or each. Fill the first square White (no outlines) and the inside square 10% Black. Fill the second larger square orange. Select the smaller square. Drag the eyedropper tool from the Color Editor (Ctrl e ) over the orange shadow color from the example with the Wall Shadow to copy this color.
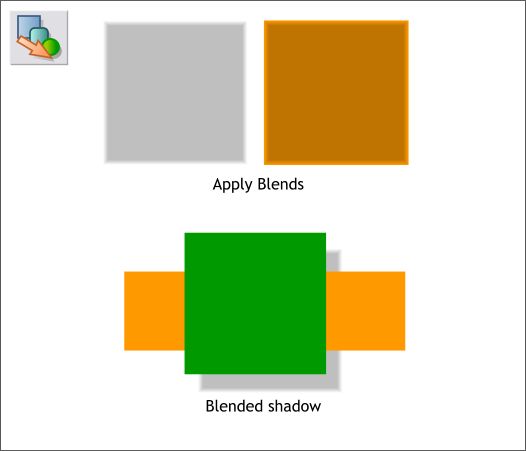
Select the Blend Tool (F7). Drag from the white square to the gray square to apply a blend. Change the number of Blend Steps on the Infobar to 10 and press Enter to apply the change. Repeat this step for the two orange squares. Place the gray blend behind the green square and down and right as shown above.
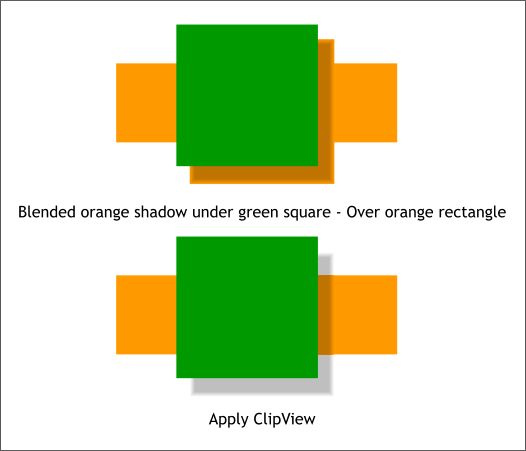
Place the orange blended squares over the gray blend and between the orange rectangle and the green square. Select the orange blend and the orange rectangle (remember the orange blend has to be on top of the orange rectangle). Shift click on the orange blend and the orange rectangle to select both. From the Arrange menu, select Apply ClipView. That's how we did soft shadows in the olden days.
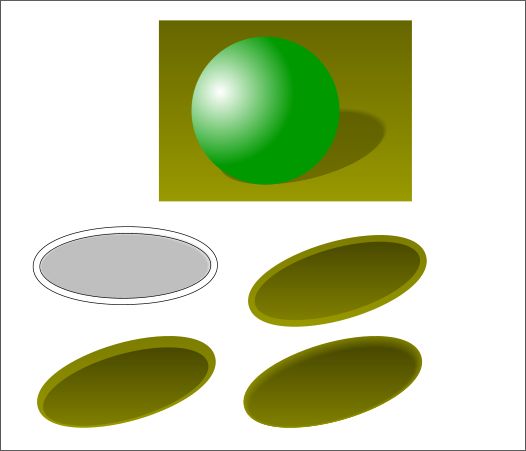
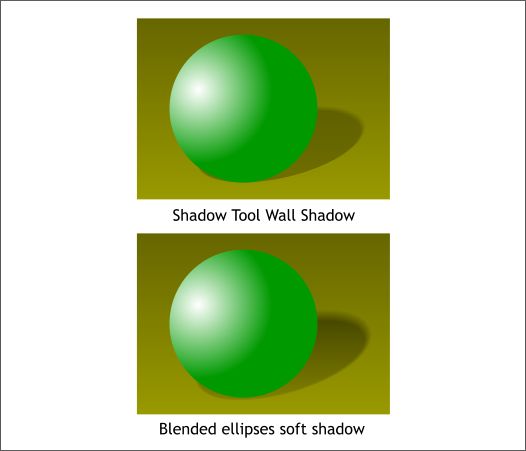
The top example shows a green circle with a Circular fill against a gradient filled background and a Floor Shadow created with the Shadow Tool. More challenging but not impossible. Duplicate the circle and floor shadow. Convert to Editable Shapes, Ungroup (Arrange menu), and delete the duplicate circle. Rotate the shadow shape until it is horizontal. Use this shape as a guide and create a same sized ellipse. Using the Contour Tool (Ctrl F7), drag outward a short distance. Change the number of Contour Steps on the Infobar to 1 and press Enter. Arrange > Convert to Editable Shapes, then Ungroup. Rotate the two ellipses back to the original angle of the shadow. Apply a vertical Linear fill to each. Use the Color Editor's eyedropper tool to copy the start and end colors for each fill. Move the darker and smaller ellipse to the left and bottom of the larger ellipse. Create a blend of the two ellipses.
Here's my effort along with the Shadow Tool effect. Mine is a little softer but it still works pretty well I think.
|
||||||
|
|


