|
|
|
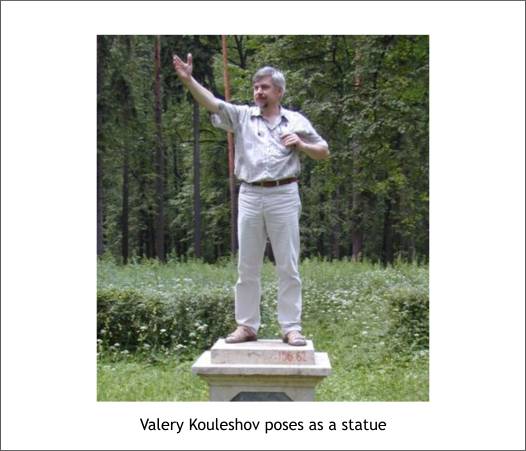
Valery Kouleshov (Cool Show in the Xara Conferences), the remarkable January Featured Artist, sent me a humorous photo of himself standing on a plinth pretending to be an old Russian statue. I thought, hmm?, I wonder how I could make Valery himself look more statue like (or is it statuesque?) And this is what I came up with.
Click here to download this photo to use with this tutorial.
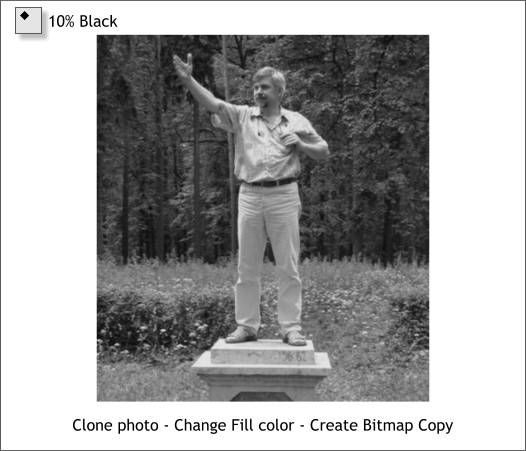
Clone the photo (Ctrl k). With the photo selected, left click on the 10% Black swatch on the color palette. This converts the color photo clone to a continuous tone, grayscale photo. Clicking the 10% Black color instead of white reduces the amount of light and dark a small amount.
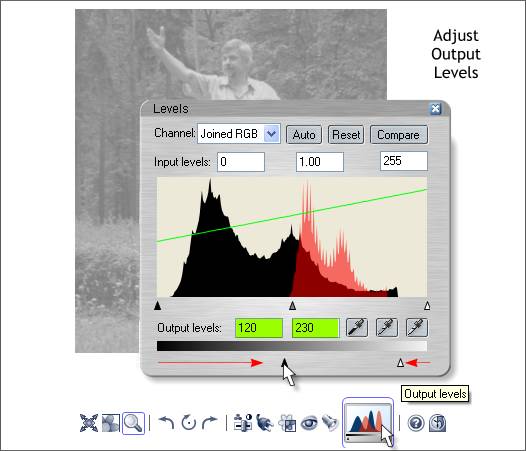
Double click on the photo (or right click and select Xara Picture Editor) to open the Xara Picture Editor. Xtreme Pro has added a new Levels control, which we can use to further reduce the contrast. This is necessary because Valery's photo in grayscale shows the dark of his belt and hair. A statue in which everything is the same color, only darker or lighter depending on the highlights and shadows, would not show a dark belt. We cannot eliminate this altogether but we can minimize the difference. Move the bottom left Output Levels slider to about the middle of the preview and more the right Output Levels slider to the left a small amount as shown above. This reduces the amount of light and dark in the photo.
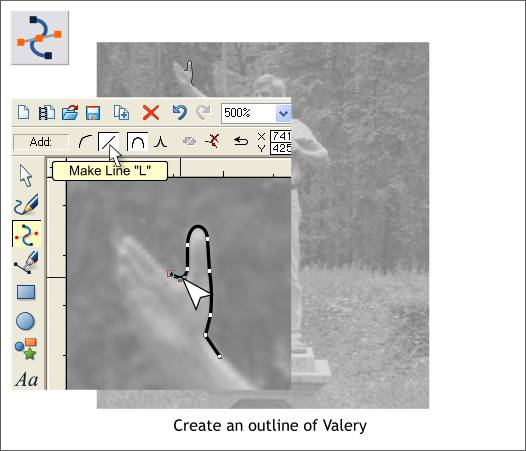
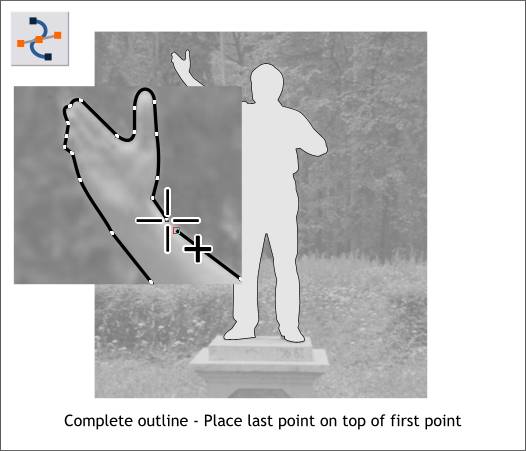
Zoom in close and using the Shape Editor Tool (F4), begin to create an outline of just Valery. I like to work with the Make Line (/) option which creates a series of connected straight line segments. As you draw, you can drag on the line segments to convert them to graceful curves (as shown in the above example) without having to switch to another editing tool. In other words, you are drawing and editing the lines in one step.
Continue the outline until you have reached the starting point. Click the last control point directly on top of the starting control point (the cursor changes to display a + indicating the shape is about to become "closed". You will know the shape is closed when it becomes a solid filled shape as shown above. I have changed the default fill color black to light gray to better show the shape.
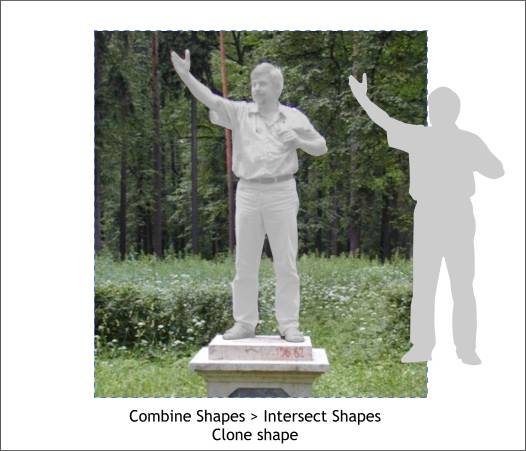
Select the filled shape and the continuous tone photo (the edited grayscale photo), and Arrange > Combine Shapes > Intersect Shapes, or press Ctrl 3. All of the gray photo disappears except the portion that was under the shape. Clone the shape (Ctrl k).
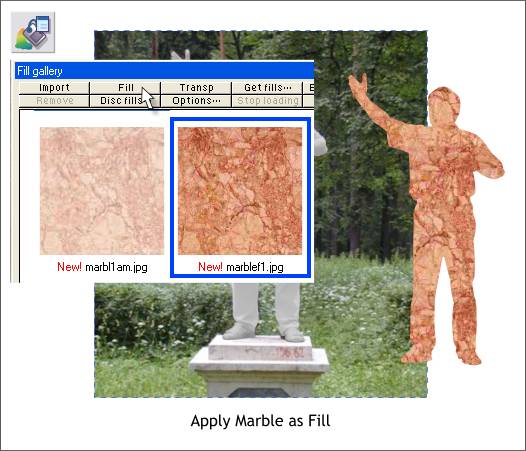
Select the cloned shape (I have moved the shape to the right so you can see the dialog and the shape at the same time. Open the Fill Gallery (Shift F11) and from the Marble fills section, select a very grainy marble texture and press Fill or drag and drop the fill onto the shape.
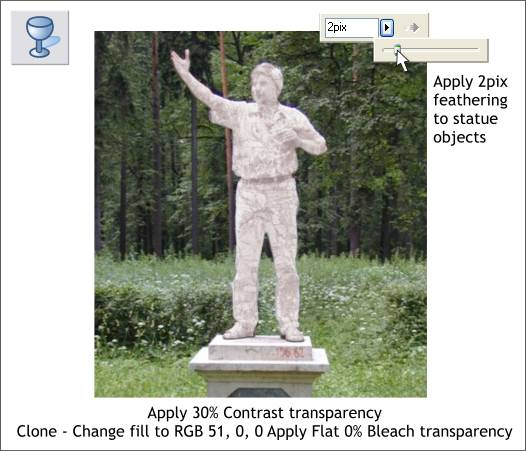
Select the Transparency Tool (F6), and with the marble filled shape selected, select Contrast from the Transparency Type drop down list on the Infobar. Set the Transparency slider to 30%. Clone this shape (Ctrl k). Change the fill to a dark red, RGB 51, 0, 0. Change the Transparency Type to Bleach and the slider setting to 0%. This adds a slight pinkish tint to match the plinth. Finally, using the Selector Tool (the arrow pointer F2), drag a selection rectangle around all of the statue shapes to select all the shapes. Apply a small amount of feathering using the Adjust Size of Feather Region slider in the top right area of the Infobar to soften the edges. And there you have it. Now Valery looks more like he has been carved in stone. Your feedback is always helpful and helps to maintain my delicate metal balance. Please use the form on the next page to forward your questions, comments and suggestions. I really do appreciate hearing from you and try to respond to each and every comment. Gary W. Priester
|
||
|
|


