|
|
|
In this month's Guest Tutorial, Sally Bode shares her excellent technique for correcting bad perspective in a photo. Sally's tutorial covers several different aspects of photo ehnancement and correction and very effectively uses a series of Clip View objects to straighten out the perspective. Sally's photo is not unlike many badly distorted photos I receive from my real estate clients that they wish to add to their Websites. I have my own technique for correcting the embarrassment of bad perspective which I will cover here. Click here to download the photo so you can practice the steps shown in this tutorial.
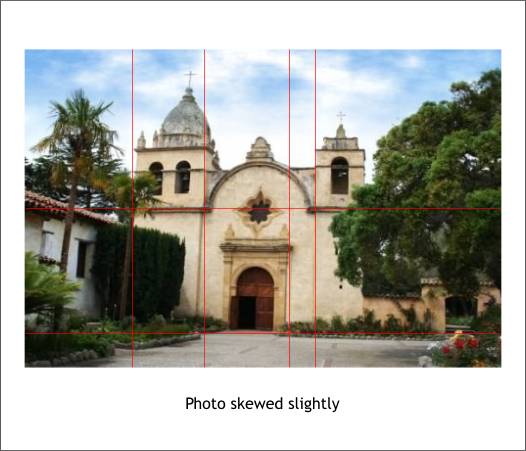
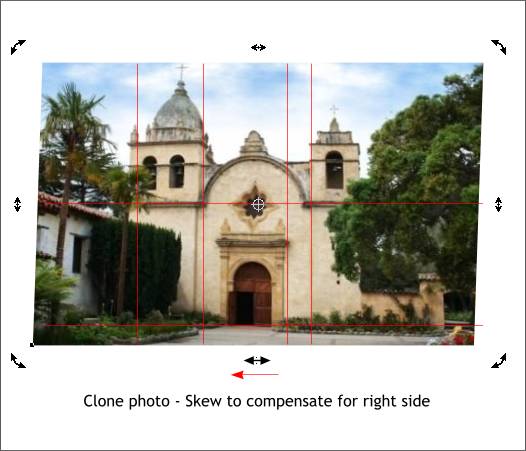
The photo above is Sally's taken on a recent vacation trip. I have added red lines to show the problem areas. The church appears to be leaning towards the right.
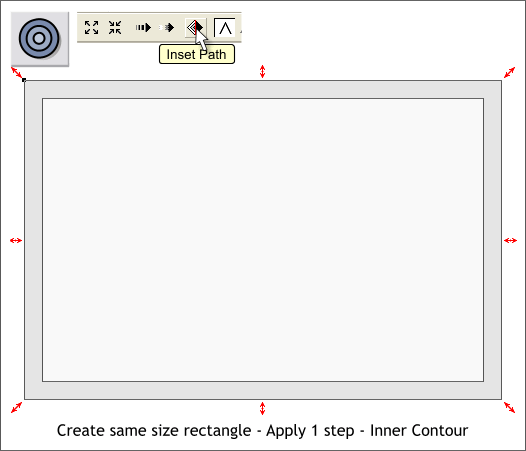
I start by creating a rectangle the same size as the photo image then applying a 1-step, Inner Contour of about 10-20 pixels. Pressing the Inset Path icon (shown above) saves just the smaller inner rectangle.
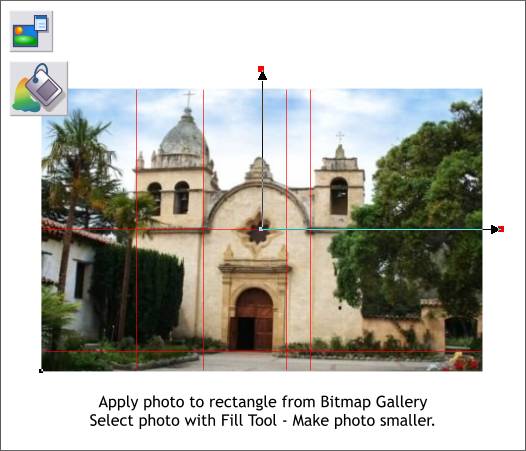
Next the photo is imported into Xara (if it is not there already). Select the rectangle, open the Bitmap Gallery (F11), select the photo image in the Bitmap Gallery, and press Fill. Switch to the Fill Tool (F5) and an L-shaped set of two arrows (the fill path) appear. Click the control handle (the tiny square) on either outside arrow and press the arrow keys on your keyboard repeatedly to reduce the size of the image. Leave some room all around however.
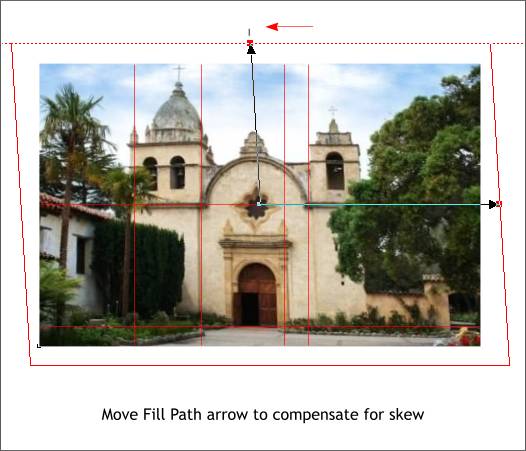
Select the top control point and drag a guideline from the top screen ruler through the point. Drag the control handle to the left until the left side of the photo is parallel to the red lines. Keep the height of the arrow snapped to the horizontal guideline you added above the photo.
Clone the photo (Ctrl k). This makes a duplicate in the same position as the original photo. Click twice on the clone with the Selector Tool (F2) to enable rotate/skew mode. Drag the bottom center skew handle to the left until the right side is parallel to the red lines.
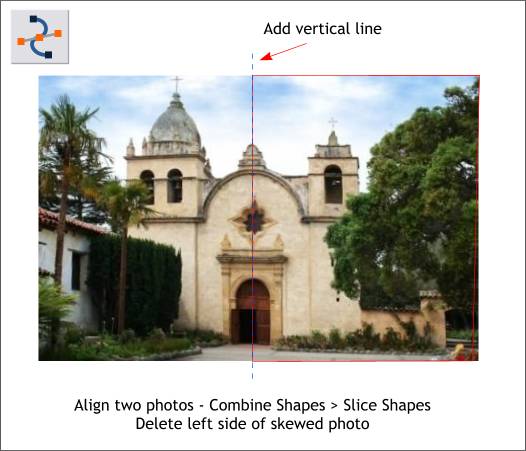
Using the Shape Editor Tool (F4), click once just above the photo, hold down the Ctrl key, and click and drag downward in a vertical direction to add a vertical line through the center of the church. Extend the line above and below the photo. You may need to nudge the line to the left or right to center it on the church. Select the line and the photo (hold down the Shift key to select multiple objects) and from the Arrange menu, select Combine Shapes > Slice Shapes or keyboard shortcut Ctrl 4. Select the left side of the photo and delete it.
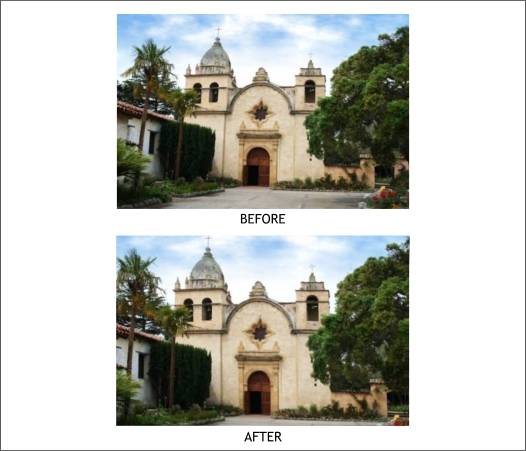
Here is a before and after photo to show the effect of the photo skewing.
|
||
|
|


