|
|
|
A frequent question is can I (meaning you) create a table in Xara Xtreme Pro? And the answer is yes I (meaning you) can. Thanks to the new text editing functions, including tabs, you and I can easily create a table. Here's how.
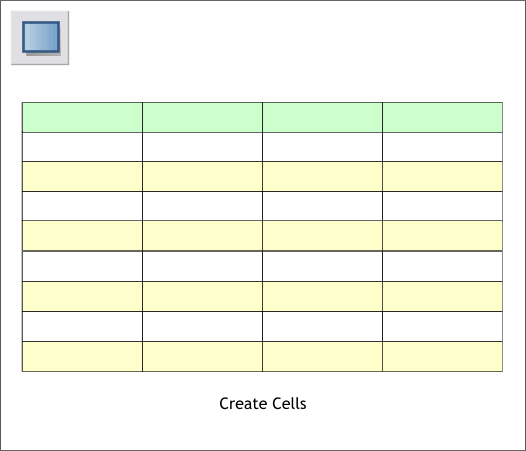
First using the Rectangle Tool (keyboard shortcut Shift F3) construct your cells. TIP: Enabling Snap To Grid (Window > Snap to Grid), makes creating and aligning the cell rectangles easier.
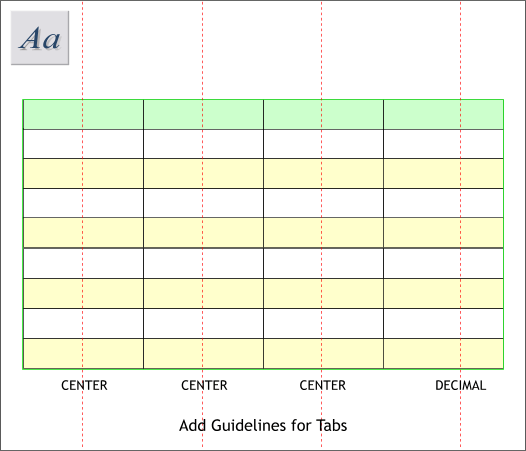
Determine the text alignment for each cell and drag guidelines from the left screen ruler (Ctrl L to display rulers) to the appropriate areas as shown above. The guidelines will help to place the tab stops.
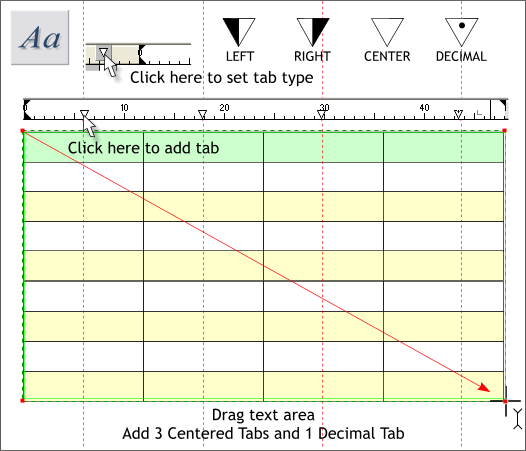
Select the Text Tool (F8). Click in the upper left hand corner of the table and drag a "text area" ending at the lower right hand corner. Text areas are new (see Workbook 53 for an overview of Text Areas) and provide an efficient way to format paragraph text. To add a tab stop, you must first select the appropriate kind of tab. Click the small inverted triangle icon just to the left of the text and tab area on the screen ruler to select from the four kinds of tabs. Each click changes the icon display and tab selection. The four tab options are shown above top and are enlarged versions of the tab icon options. First chose what kind of tab stop you wish to add, by clicking the Tab inverted triangle icon, then click on the screen ruler as shown above to add the tab stop. The first three cells will be center aligned tabs so click the Tab icon until it displays an empty triangle (Center Tab) then add these 3 tabs. Click the Tab icon once again to select the Decimal tab and then click on the guideline in the last cell to add a decimal tab. Figures with decimal points, align to the decimal point.
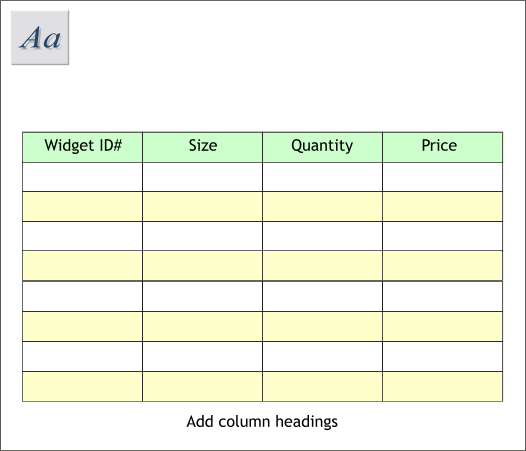
With the text area and the Text Tool selected, press the Tab key on your keyboard to advance to the first centered tab and enter the heading for the first column. Press the Tab key to advance to the second column. Repeat this step and add the headings for the next cells. Because there was no decimal in the decimal tab column, Xara centers the text.
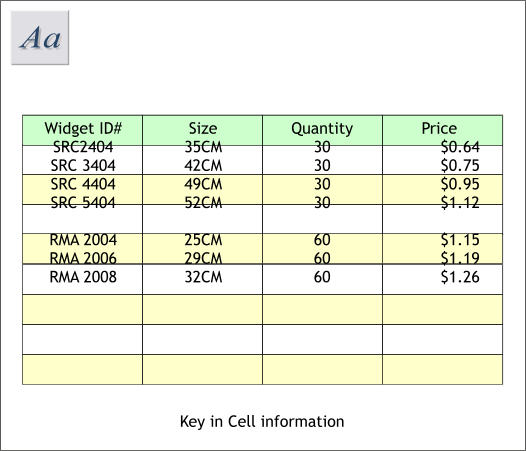
Using the Tab key on your keyboard to advance from one cell to the next, key in your information as shown above. Do not add extra space between the cells except to add a blank line. We'll adjust this spacing next.
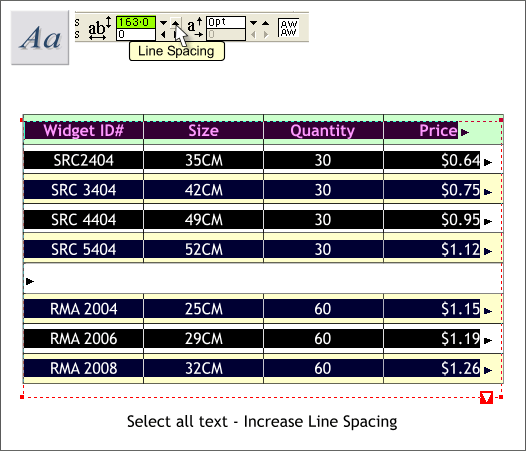
With the Text Tool cursor inserted in the text, press Ctrl a (Select All) to select all of the text. Move the text area down until the top line of text (the headers) is centered in the first cell. Adjust the spacing of the text in the Line Spacing text entry box on the Infobar by clicking the increase arrow button until the lines are vertically centered to the height of the cells. If need be, you can manually change the spacing percent by keying in a new number and pressing Enter to increase or decrease the percent by smaller amounts. You can modify this as needed. You can also change the tab types and spacing for individual rows or several rows by highlighting just these rows with the Text Tool cursor, then changing the tab settings.
|
||
|
|


