|
|
|
Xtreme Pro has enhanced the power of its PDF capabilities in a big way. Among the many improvements is support for a variety of Adobe Acrobat reader versions and support for PDF/X which has become the industry standard for handing off files to a service bureau of a commercial printing company. PDF/X creates a file where all objects are in the same color space, CMYK, where fonts are embedded, transparency is flattened, and many other problems that have plagued designers over the years overcome. In this tutorial, we'll create a simple US sized business card, and then create a PDF/X3 file that will be printer ready. The card size is arbitrary and feel free to make your card any size you want.
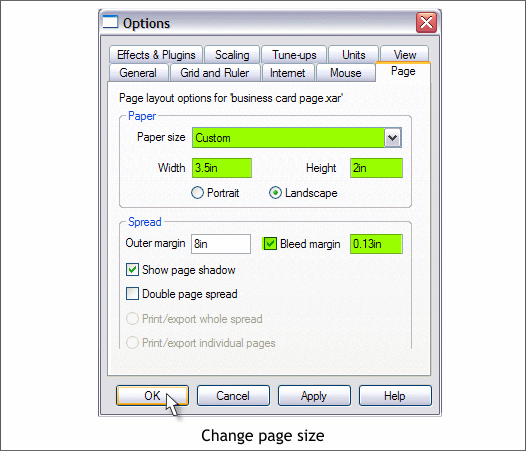
The first step is to change the page size to the actual size of the business card, 3.5 inches wide by 2 inches tall. Right click on the page and select Page Options... from the pop up menu. In the Page tabbed section, select Custom from the Paper Size: drop down list and change the size to your card size as shown. Press OK to close the dialog. Check Bleed Margin and make the amount 0.13in. The card we are creating will have a photo that bleeds off all 4 sides and printing companies require the image to be about 1/8" larger all around so when they trim the card there will be no white areas on the edges. NOTE: I'm working in Inches so I only have to enter the numeric value. If you have your rulers set to another unit of measurement, add the inches tag the numbers, for example 3.5in and 2in. Part I - Creating the Business Card
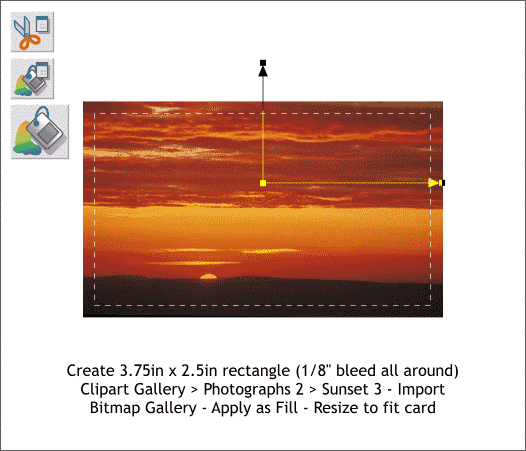
Create a rectangle 1/8 inch larger (for the bleed) than the page size (3.75 inches by 2.25 inches). Open the Clipart Gallery (Shift F10). Open the Photographs 2 folder and select Sunset 3. Press Import. You can delete the image as soon as you import it. A copy is automatically placed in the Bitmap Gallery. NOTE: If you are a new user and do not have the clip art files yet, click here to download the sunset image cropped to the actual size. If you use this image you can skip to the next section. Select the rectangle then open the Bitmap Gallery (F11). Select the sunset photo and press Fill to apply the photo as a fill to the rectangle. Switch to the Fill Tool (F5). An L-shape with 2 fill path arrows will appear. Click on the outside box of either of the 2 arrows (they both work the same way) to select the fill path arrows. Press the left arrow key on your keyboard to reduce the size of the image. Click on the area where the 2 arrows come together and press the up arrow key to move the sun up in the picture. This is how you resize a bitmap fill and move a bitmap fill around in Xara.
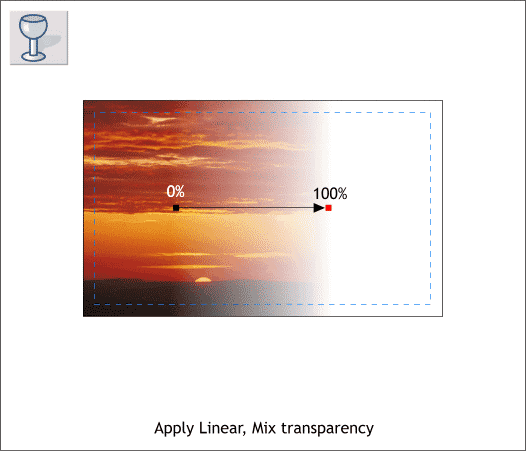
Select the photo with the Transparency Tool (F6). Click to the left of the sun, hold down the Ctrl key, and drag the fill path arrow to the right to about 2/3 of the card as shown. This is the intuitive way to create a Linear transparency. The Ctrl key constrains the direction of the transparency to horizontal.
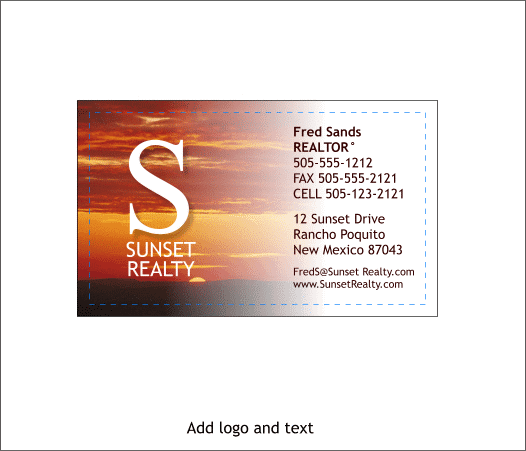
Add text and a logo. My logo is a white filled 100pt Times Roman S with a Wall Shadow applied with the Shadow Tool (Ctrl F2). The other text is 10pt Trebuchet. You can use any font you like. This completes the card. If your rectangle still has an outline, set the outline to none by selecting None from the Width drop down list on the Infobar.
Preparing the Card for PDF/X Export
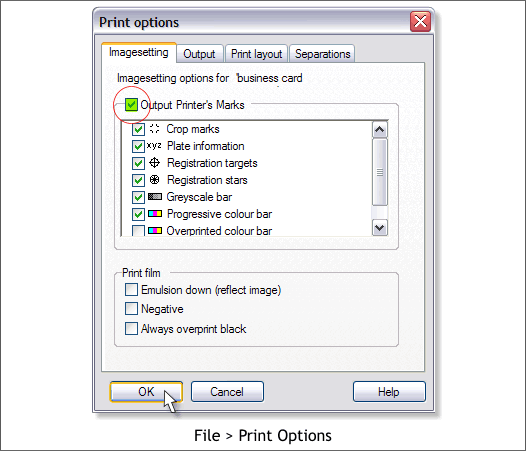
We can add a variety of printer's marks to the PDF file. This is done in the Print Options dialog. File > Print Options... Select the Imagesetting tabbed section, check Output Printer's Marks check box and select those marks that you want to include from the list. NOTE: Several times in this tutorial I will advise you to check with your printing company representative to determine what settings and options they require. As you are providing the printing company with a PDF file, they may be more comfortable making the changes at their end. If you are including a bitmap image, as we are with this card, ask what resolution they need the image. 300dpi is about the minimum for good printing and up to 600dpi is better. But do ask first.
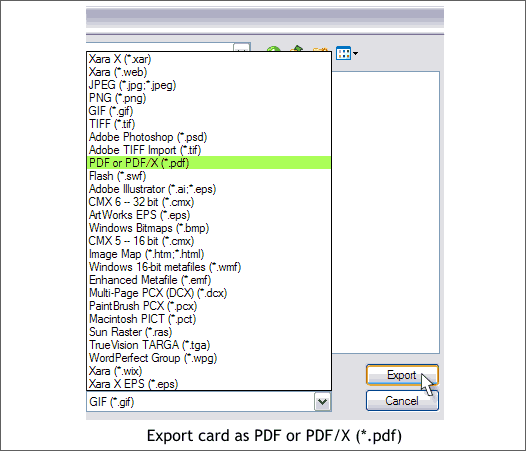
Export your file as a PDF/X file. File > Export > PDF or PDF/X (*.pdf). Press Export.
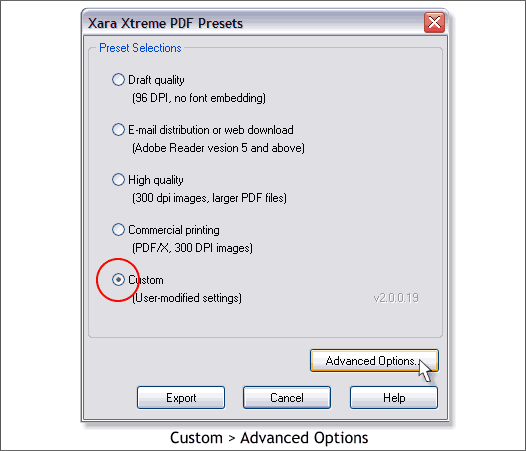
Xtreme Pro offers a series of PDF Presets. You can check Commercial Printing and press Export and you will probably be OK. Or you can opt for more options. We'll work through the options. Click Advanced Options...
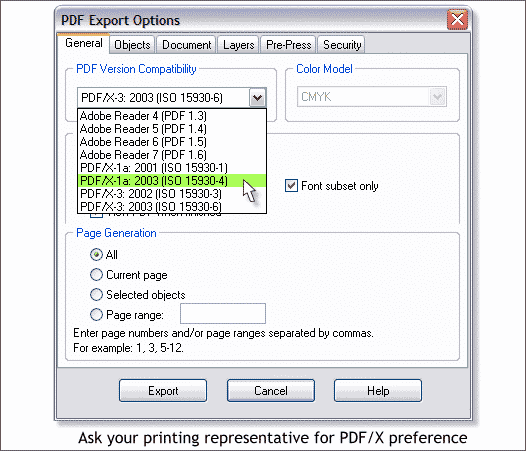
Select an option from the PDF Version drop down list. For this tutorial, select PDF/X3 2003. This is the latest export filter and has the most up to date settings. But in the real world, ask your printing company representative for her or his preference. Not all printing companies can accept a PDF/X3 file. Check Font Subset Only. This embeds only the characters you are using in your document, not the entire character set. NOTE: Certain fonts cannot be embedded. Xara can synthesize some fonts but other fonts may trigger in an error message (when you create the PDF file) that the specified fonts cannot be embedded. In this case, Convert this text using these fonts to Editable Shapes (Arrange menu) and export the file again. If the fonts do not embed, the file will not pass the PDF/X validation test.
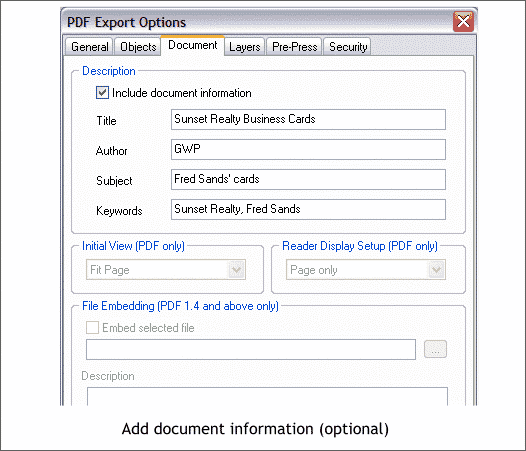
Do not make any changes in the Objects tabbed section unless you are having a problem with fonts not embedding. In this case check Convert Text Into Shapes in the Objects tabbed section. But this will convert all the fonts in your document to shapes that cannot be edited later in the PDF document. You can add information about the document in the Document tabbed section. This may or not be useful to your printing company. Adobe Acrobat 7 and 8 can search for keywords, author, and other information.
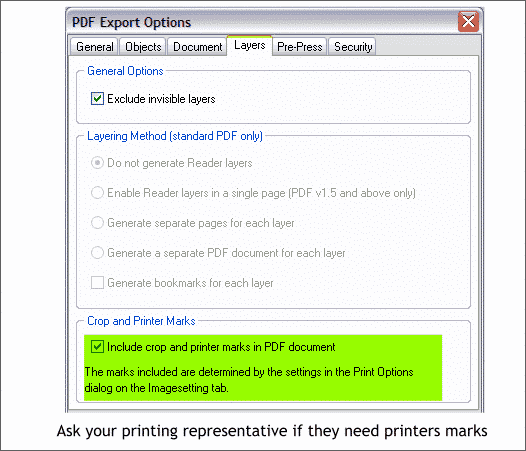
In the Layers tabbed section, check the box highlighted above if you want to include printers marks. Again, your printing company may have their own preferences and may want to add these options themselves. Most printing companies can open and edit your document in Adobe Acrobat or more recent versions of Adobe Illustrator. So when in doubt, it might be best to let the printing company do what they get paid to do.
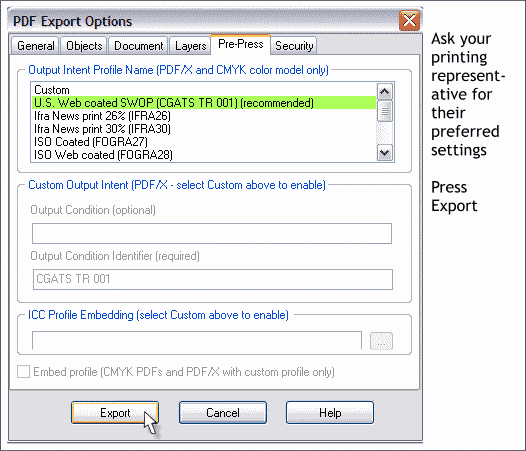
The Pre-Press tabbed section contains a series of Output Intent Profiles. These settings make subtle changes to your file depending upon the kind of printing press and the paper stock. For example a sheet-fed press vs. a high speed web press. Ask your printing representative what settings you should use. Or to be on the safe side, use the default setting and let the printing company make the change at his or her end. Many of the better printing companies have compiled their own output intent profiles and they can apply these custom profiles to your job. If they can't, then either chose the closest profile or ask them to walk you through the process of creating your own custom profile. We are done, so press Export. If there are any problems, Xtreme Pro will flag these during the document creation stage. If not, the file will open in Adobe Acrobat Reader.
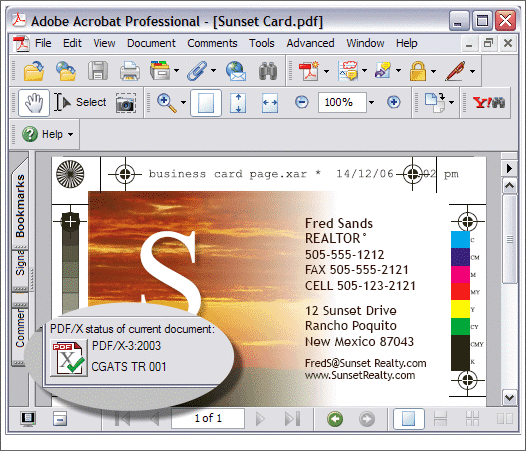
If there are no problems, your document will be saved and if you have a copy of Adobe Acrobat Reader (it's free, click here to download the latest Acrobat 8 reader), or in Adobe Acrobat if you own a copy. If you own Acrobat 7 or 8 (just released) you can run a prepress check to make sure your file is PDF/X3 compliant as I have done here. In Acrobat 7 or 8, go to Tools > Print Production > Preflight. Press the Options... button and from the drop down list in the Preflight dialog, select Verify Whether Current PDF is PDF/X Compliant . If everything is OK you will get the green check mark shown in the inset above. You can also see the various Printer's Marks we specified have been added. And that's it. This is the last Workbook for 2006. The time has gone by so fast and much has changed in the world and in our own special Xara world. I wish everybody A Very Special Happy Holidays and a Healthy, Happy, and Prosperous New Year! And as we like to say in New Mexico, Mozeltov! Your questions and comments are always welcome. Please use the feedback form on the next page to forward your thoughts to me. See you next year. Gary W. Priester
|
||
|
|


