|
|
|
Xtreme Pro has added the ability to create Flash movies in the same way as GIF animations are created. The big difference is Flash movies, if created with vector objects, create a very modest file size. The December 2006 tutorial shows you how to create a complex Flash movie. In this Workbook, I'll just cover the basics. GIF animations are made with GIF bitmap images. As bitmaps, even the smallest GIF images can be several K in file size. If the physical size of the GIF animation is fairly large, say the size of my illustrations for these tutorials, then the file size can be such that only a few frames can be used before the file size becomes very large. This is because for a GIF image, every pixel in the bitmap has to be described in terms of its color and position relative to all the other pixels. Flash movies, like vector objects, describe the objects in terms of their outlines. A circle, for example, can be defined as 2 arc shapes that extend a certain distance and contain a certain outline and fill. A bitmap circle is defined by each pixel. Even if every pixel is the same color. And this is why bitmaps are much larger in terms of file size than vector objects.
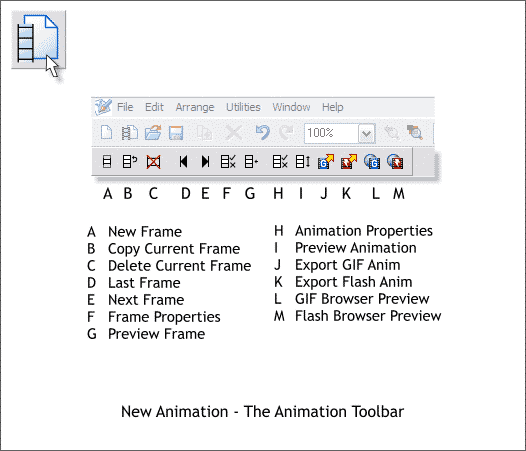
Click the New Animation button on the top of the screen or select File > New... Animation to open an animation window. The new window looks just like the drawing window except a set of animation related icons appear on the Infobar, the Animation Toolbar. Most of these icons are grayed out at first, but as you add new frames to your animation, the icons become enabled. Rather than explain each of the icons, (the Help menu does this very well), we'll just create a simple animation and see first hand how many of the icons work.
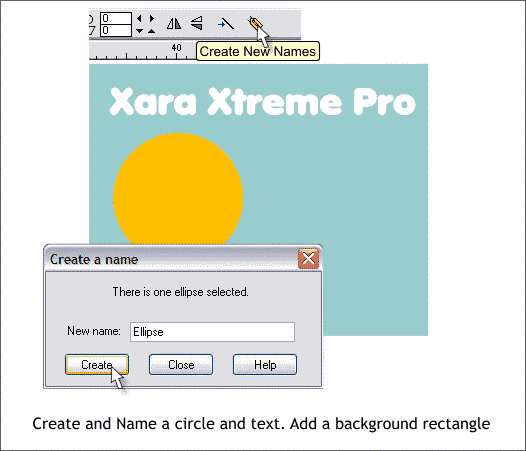
Xtreme Pro creates animation between objects by "tweening", a process that uses a start and end object and then creates the steps in-between. Xtreme Pro can only tween objects that are named and objects that have the same basic shape and fill type. A named object can only be tweened with the same named object. You cannot tween two circles, for example, if one is named Circle 1 and the other is named Circle 2. A circle can be tweened with a circle resized into an ellipse since both are ellipses. But a circle cannot be tweened with a star or a square. For this tutorial we'll use a rectangle, a circle, and some text as shown above. The size is not important. If you have not already opened a New Animation window, do so now. Create the three objects shown above and name each object. Here's how. Select the circle the press the Create New Name icon (the yellow tag). You can either create a name or just accept Xtreme Pro's name, in the example above, Ellipse. Create names for the background rectangle and the text.
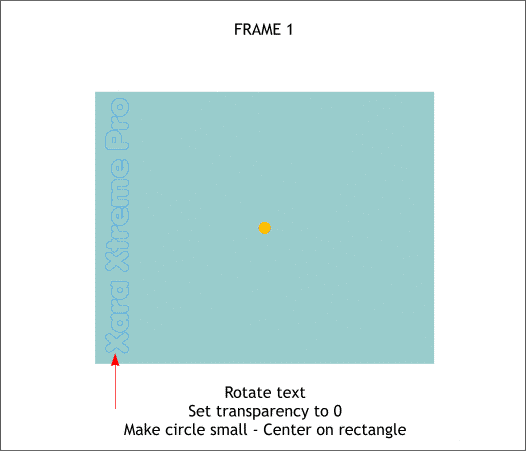
Rotate the text 90 degrees counterclockwise, reduce the height to fit within the rectangle. Select the text with the Transparency Tool (F6) and move the Transparency Slider all the way to the right (100%). Reduce the size of the circle and center it on the page. (Arrange > Alignment to open the Alignment menu). TIP: New users who are not familiar with a certain tool or menu can select Help for a context sensitive help menu or press F1 to see what a certain tool does and/or how it works.
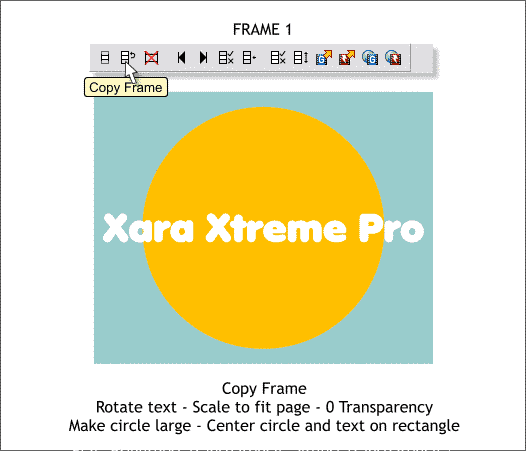
Press the Copy Frame icon. This creates a new frame that is exactly like the last frame. Rotate the text 90 degrees and resize it to fit the rectangle as shown above. How can you select the text if it is invisible? Switch to Outline View (Window > Quality > Outline). When the text is rotated select the Transparency Tool and set the transparency to None by moving the slider all the way to the left (0%). Select the circle, hold down the Shift key and drag any of the corner bounding box handles (the small black squares) to resize the circle from the center). Go back to Window > Quality and select Anti-aliased.
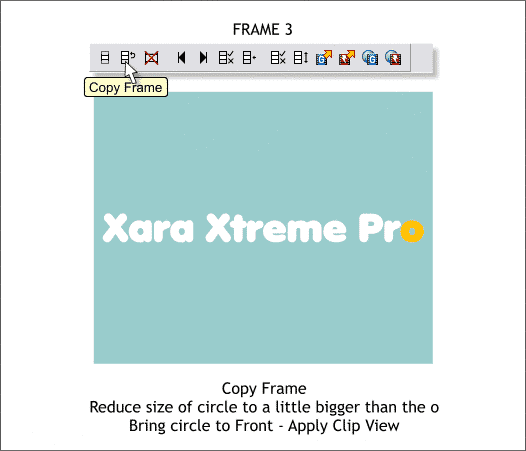
Press Copy Frame. Reduce the size of the circle to slightly larger than the o in Pro. Center the circle over the o. Select the circle and the text (hold down the Shift key and click on each object to multiple select). From the Arrange menu, select Apply Clip View. The orange circle is now masked inside of the o.
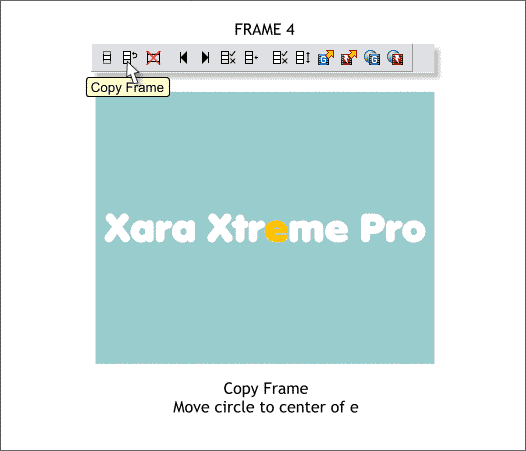
Copy the frame. Hold down the Ctrl key and click the orange part of the o to select it. Using the left arrow key on your keyboard, click several times to move the orange circle to the left until it is inside the e.
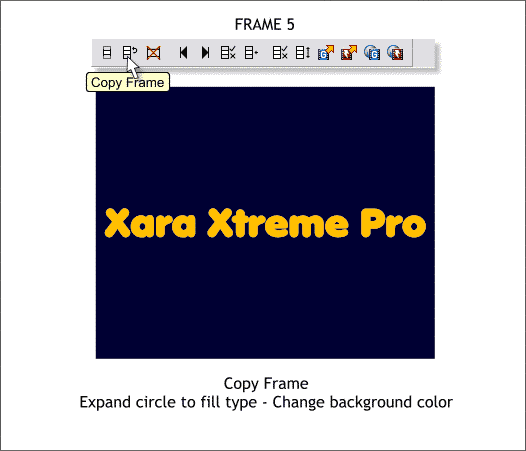
Copy the frame. Ctrl click on the orange part of the e to select just the orange circle. Hold down the Shift key, drag any of the corner bounding box handles and resize the orange circle until it fills the entire line of text. Change the color of the background rectangle to deep blue.
TIP: You can also select the orange circle by clicking the text then clicking the keyhole icon in the center. ClipView uses the metaphor of a container, the masking object, and the contents, the object or group of objects that are masked within the container. If there is just a single object in the container, then Ctrl clicking is often the fastest way to select the contents.
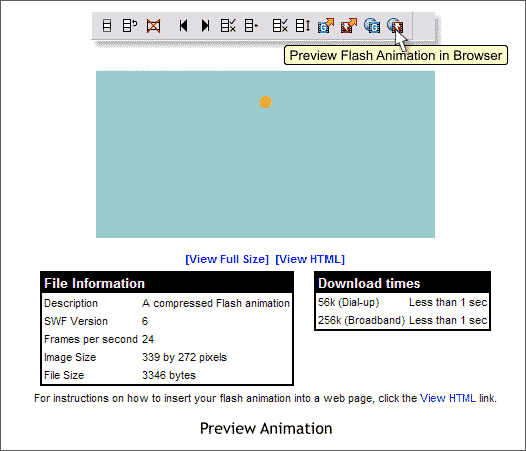
To preview your animation, press the Preview Flash Animation in Browser icon. Xara will open your default browser and play the animation. In addition Xara displays the file information including the image size, the version of Flash you exported to, and the file size which is this case is about 1/3 K. I'm pretty sure there is a line of code that instructs your browser to download the Flash player if it is not installed on your computer. But if not then go here to download the latest player.
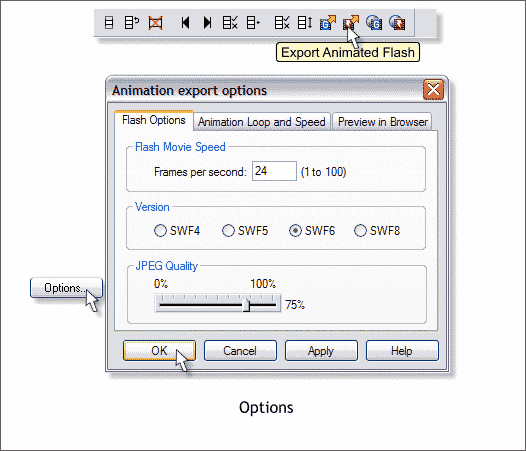
To save your animation press Export Animated Flash. You can press OK or press Options... to change the number of Frames Per Second and Flash version. |
|||||
|
Here's the finished animation. Its not Cecil B. DeMille, but hey, it's a start. For a more detailed Flash animation tutorial, see the Creating a Holiday Flash Animation December 2006 tutorial.
|
|||||
|
|
|||||


