|
|
|
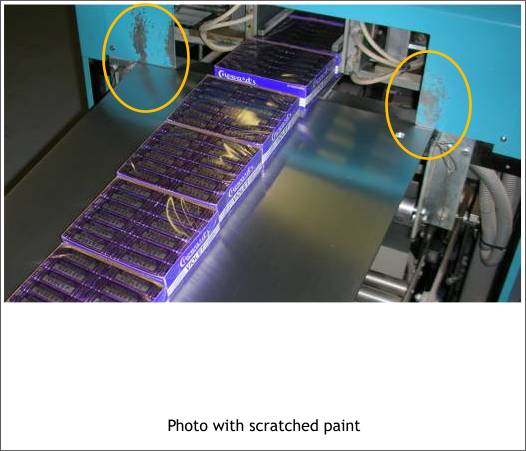
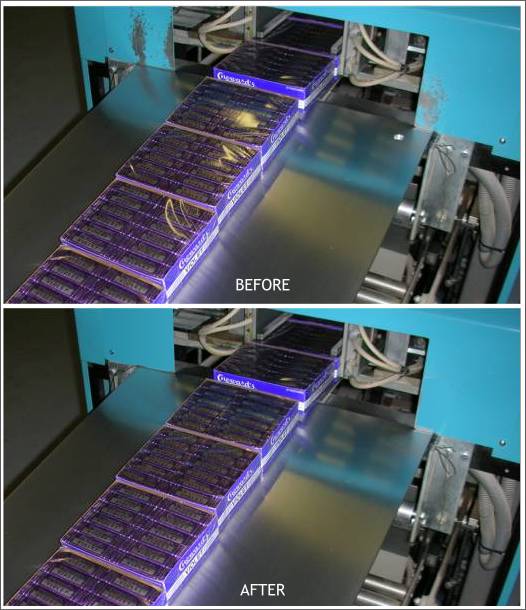
Mike (aka privatepratz) posted an image in the Xtreme Conference and asked for help restoring the scratched surfaces on the machine in the photo. You can see the actual thread here. This was a perfect project for Xara. I'll show how your editor would have retouched the photo if anybody had asked him to do it.
In the photo shown above there are several scratches in the paint that you can see inside of the yellow ellipses. The yellow reflections on the cellophane wrapping that covers the packages is distracting as well. In addition the scratches are reflected on the metal surface, pointed out to your editor by Big Frank, on the left and there is an odd white circle reflecting on the metal surface on the right. In my former life as an advertising art director, we would send a photo like this one to a photo retoucher who would use a toolbox of dyes, paints, bleaches, and an airbrush to get rid of these bothersome things. Thanks to Xara and Photoshop, most of these very skilled retouchers are now either retired or have adapted to the digital method of retouching.
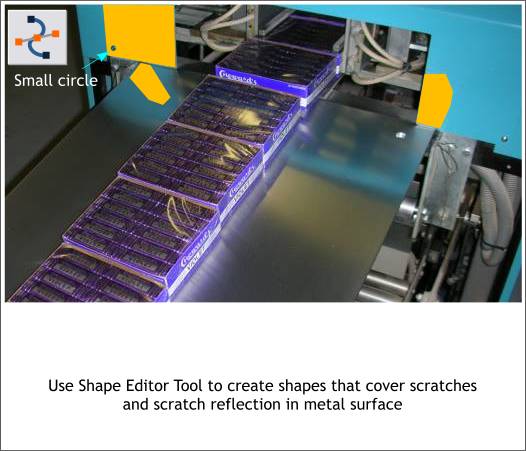
Using the Shape Editor Tool, create shapes to cover the scratched areas. They are shown above in dark yellow. With the exception of the large rectangular shape in the upper left area, the other shapes should be small and cover just the scratched areas. There is a small circular shape to the bottom left of the large rectangle. Create a small elliptical shape and remove it to let the shape show through. Select the small ellipse and the shape and Arrange > Join Shapes .
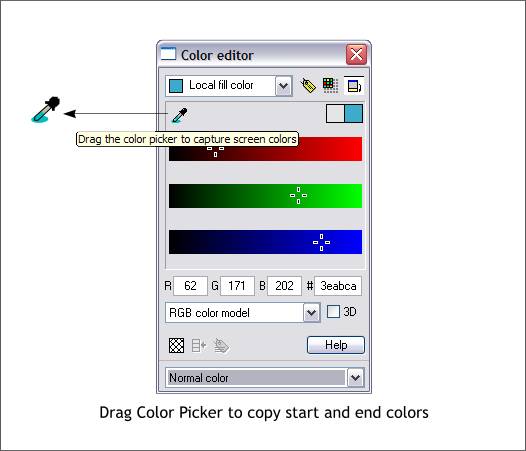
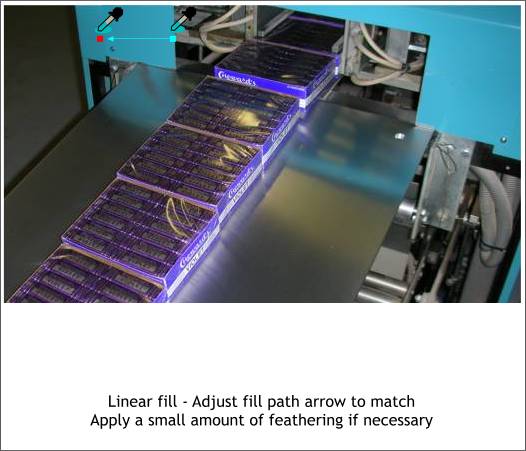
If your memory is longer than your editor's, you remember from the first page how you can use the Color Picker to copy or sample colors. Open the Color Editor (Ctrl e) and use the Color Picker to copy the start and end colors of gradient fills we are about to create.
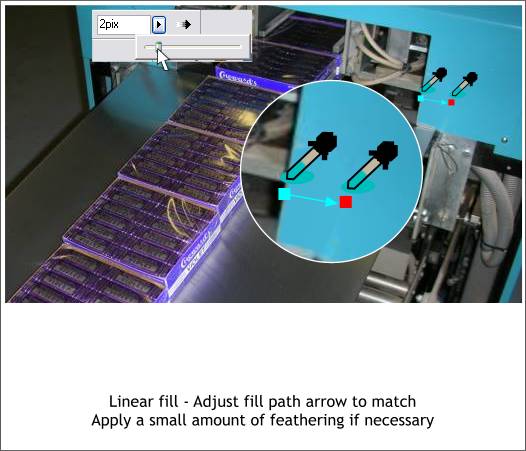
Because the colored areas of the scratched surfaces are uneven, a flat color will not work. So create a Linear fill for the small area top right and copy the start and end colors from the actual surface. Add 2 pixels of feathering (to soften the edges only) using the Adjust Size of Feather Region slider, which is located in the upper right hand area of the Infobar. TIP: To create a Linear fill, you can select Linear from the Type of Fill drop down list. But an easier way is to click the Fill Tool on the object to select it, then drag in the direction in which you want the fill to go.
Create a Linear fill for the left area copying the start and end colors as shown.
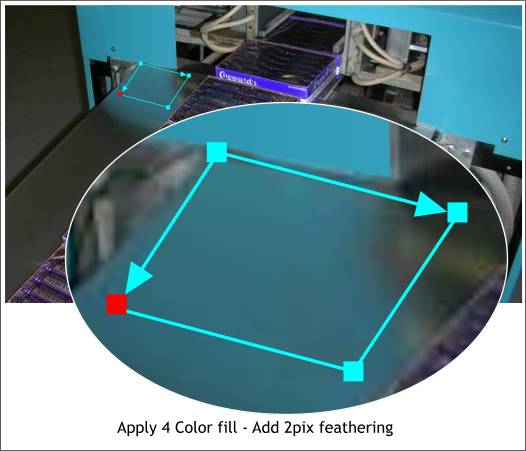
The reflection on the metal surface is too complex for a Linear fill and so create a 4-color fill and adjust the corners as shown above. Experiment editing the copied colors to get the fill just right. Add a small amount of feathering to soften the edges and help the shape blend with the photo.
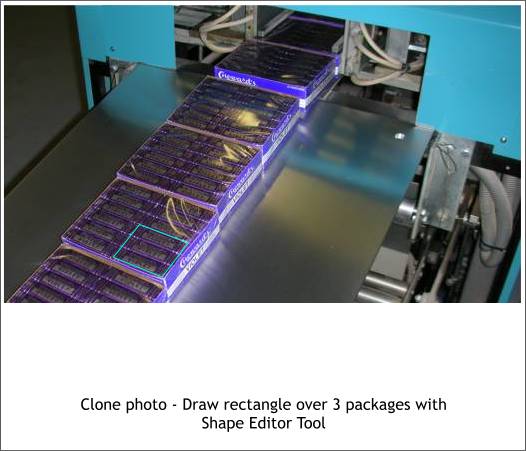
The technique for removing the reflections was suggested by Norman (parahandy). Norman's method is to duplicate the photo and remove a small area of the wrapped mints that has no reflection but is close to the part that does have a reflection. The area shown inside the aqua colored outline was cut out by selecting the rectangular outline and the duplicate photo, and Arrange > Combine Shapes > Intersect Shapes (or press Ctrl 3).
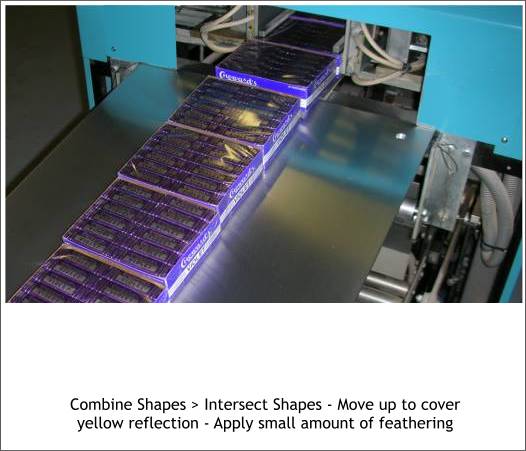
The section has been moved up to cover the reflection.
Some additional retouching was done. Looking at the Before and After images can you tell what was done?
|
||
|
|


