|
|
|
This tutorial is for all of you new users who are just getting to know Xara. I'll show you 2 ways to create a 3D star, and both are easy.
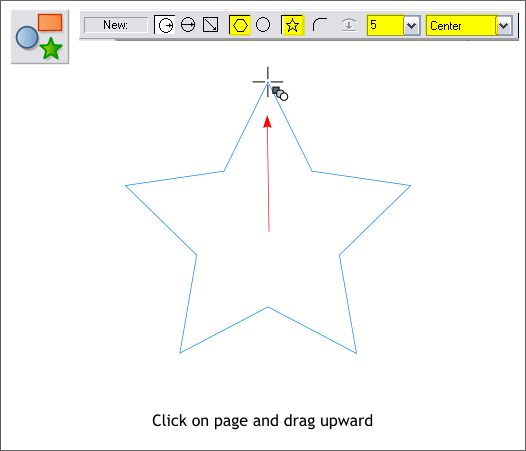
Select Xara's QuickShape Tool (keyboard shortcut Shift F2). On the Infobar at the top of the screen (the Infobar, by the way, is context sensitive and changes to offer options specific to each selected tool and which eliminates a lot of the screen clutter created by other programs). click the Create Polygons icon (the hexagon), and the Starred Shapes icon (the star). From the Number of Sides drop down list, select 5, and from the Editable Items drop down list, select Center. (It may already be selected). Click the QuickShape Tool on the page. Hold down the Ctrl key (to constrain the direction) then drag upward to create a star with the top point pointing up.
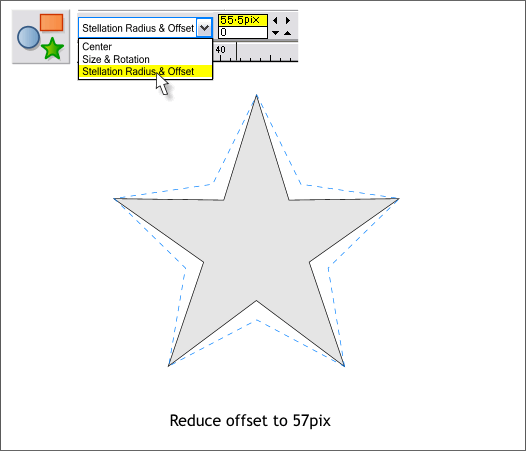
From the drop down list, select Stellation Radius and Offset. In the Stellation Radius text entry box, highlight the current number by dragging the cursor over the number, and change it to 55.5pix. Press Enter to apply the change.
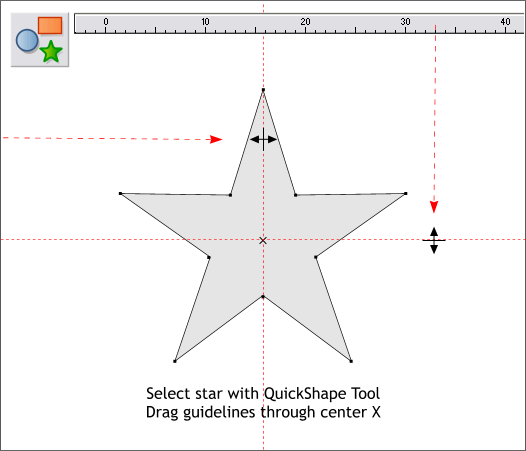
Select the star with the QuickShape Tool. Notice an X appears in the very center of the shape. With the orange magnet icon (Snap to Objects) enabled (in the down position), and the screen rulers displayed (Ctrl L to display rulers or Window > Bars > Rulers ), from the top screen ruler, drag down and snap a horizontal guideline to the center of the X. From the left screen ruler, drag and snap a vertical guideline to the center. TIP: For greater accuracy, use the Zoom Tool (the magnifying glass button on the main tool bar) to draw a zoom selection around the star. This will help to get the guidelines in the exact center of the star.
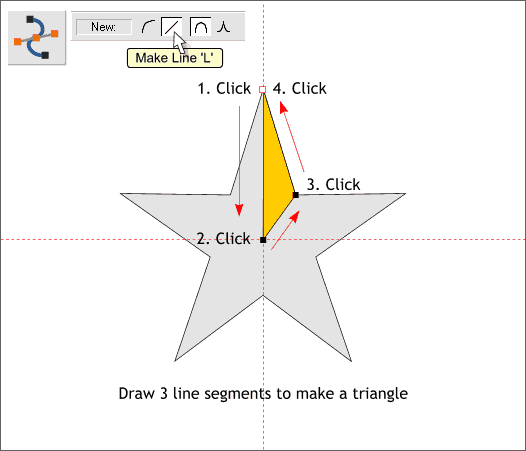
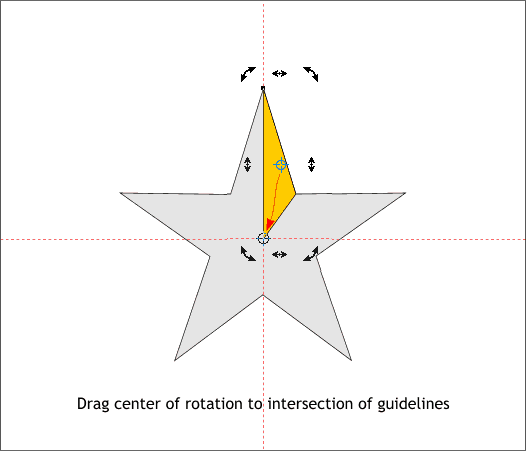
Switch to the Shape Editor Tool (F4). If the diagonal line icon (Make Line) on the Infobar is not in the down position (see above), click it or just press L. Click a series of control points to create a triangle shown above in dark yellow. Click the last control point on top of the first control point to create a "closed shape". You will know the shape is closed if a black fill is applied to the new shape. NOTE: For clarity, I fill all my new shapes in gray with black outlines. By default, Xtreme fills all new shapes black with a black outline.
Click twice on the new triangle shape to enable rotate/skew mode. The small black bounding box squares will change to arrows as shown above. Drag the Center of Rotation bulls eye down to the intersection of the 2 guidelines. The Center of Rotation can be dragged anywhere on the page and it's position determines the point around which the selected object will rotate.
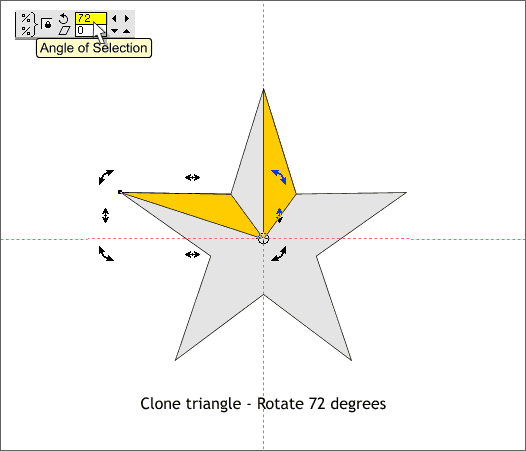
Clone the triangle (Ctrl k). In the Angle of Selection text entry box on the Infobar (shown above), key in 72 (1/5 of 360 degrees) and press Enter to rotate the selection. NOTE: You can manually rotate a selection by dragging any of the corner curved rotation handles. But in this case, using the Infobar to rotate a precise amount is more accurate.
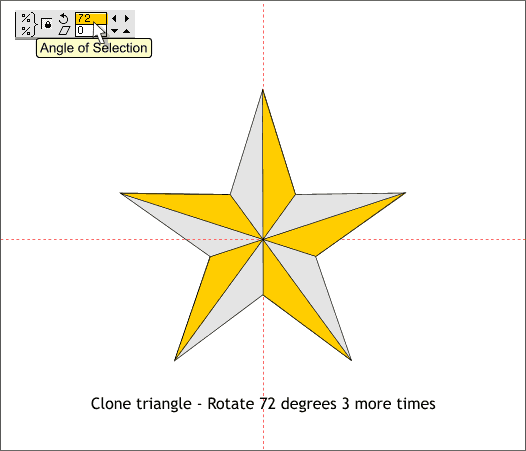
Clone and rotate again and repeat this step until you have 5 triangles.
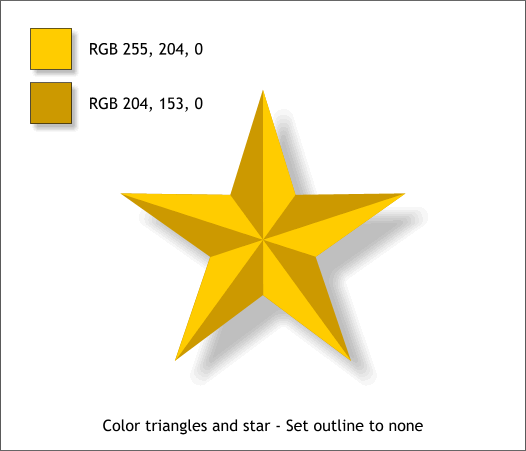
Color the original star shape and the triangle sides with the colors shown above or colors of your choice. In the example above, I selected and grouped all the star objects and added a soft Wall shadow with the Shadow Tool (Ctrl F2). That was the easy way. Next I'll show you the very, very easy way.
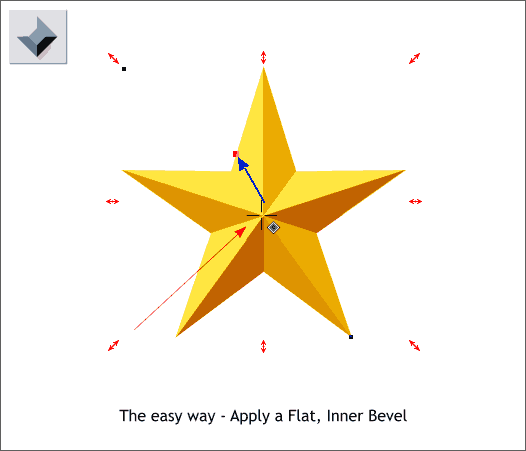
Create a star with the QuickShape Tool (your choice of sides). Apply a golden yellow fill (or any color you prefer). Select the star with the Bevel Tool (Ctrl F3). Drag any of the red arrow handles to the center of the star. Easy?
|
||
|
|
||


