|
|
|
Thanks to Egg Bramhill, my fellow Xara Conference Moderator, for creating a rope brush and an embossed seal effect that inspired this tutorial.
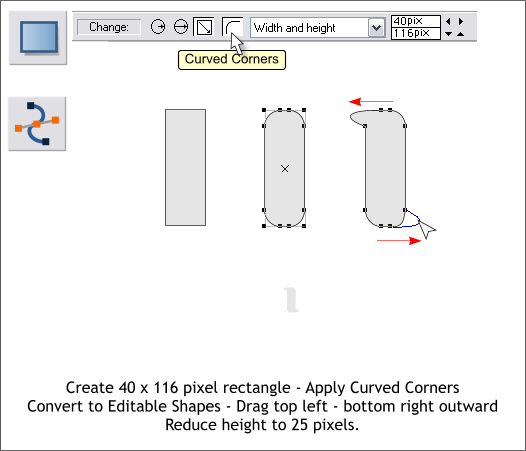
Using the Rectangle Tool (Shift F3) create a rectangle approximately 40 pixels wide by 116 pixels deep. Try to draw the rectangle as close to the actual size a as possible. Press the Curved Corners icon (shown above) on the Infobar. From the Arrange menu, select Convert to Editable Shapes. With the rectangle selected, switch to the Shape Editor Tool (F4). Drag the top left corner and bottom right corners outward as shown above. Reduce the Height of the shape to 25 pixels. With the black padlock icon on the Infobar (Lock Aspect Ratio) in the down position (enabled), enter 25pix in the Width text entry box and press Enter to apply the change.
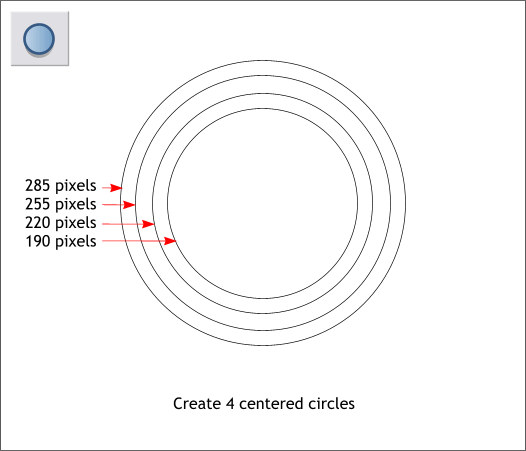
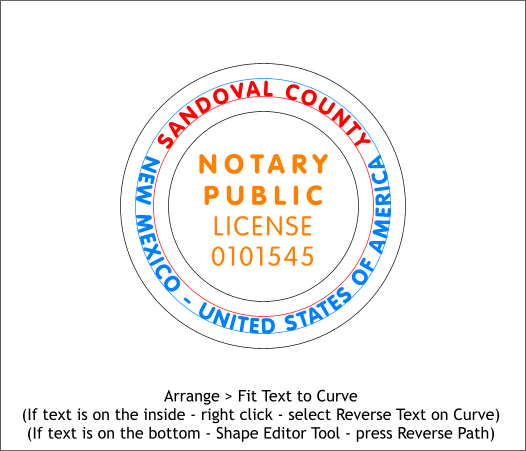
Using the Ellipse Tool (Shift F4) create 4 circles to the sizes shown above. Hold down the Ctrl key to constrain the ellipse to a circle. TIP: Create the largest circle. Clone the circle (Ctrl k). and change the Width on the Infobar and press Enter to apply the change. Repeat to create the other 2 circles. Set the fill to none by selecting None from the Width drop down list on the Infobar or by left clicking the small cross hatched box to the left of the screen palette. (Left click for no fill, right click for no outline).
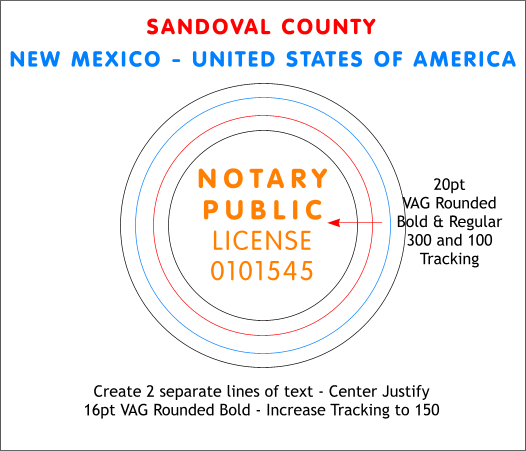
Using the Text Tool (F8), key in the text shown above, you can substitute the text for your own country and country. Increase the Size, and increase the tracking amount (the space between letters) using the Tracking text entry box on the Text Tool Infobar. I have used VAG Rounded bold and regular. If you do not have this font try to use a similar font. Adjust the size and tracking as needed. All text needs to be center justified. Highlight the text by dragging the Text Tool (F8) cursor over it, then press the Center Justify icon (the centered lines) on the Infobar. NOTE: I have colored the circles and the text that will wrap on these circles to make it easier for you to identify.
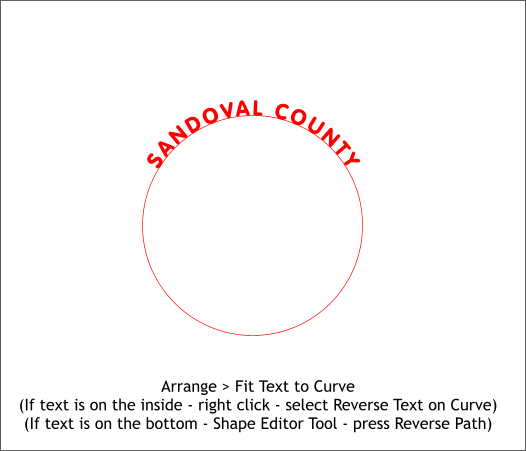
Select the red circle (the other circles are still there, I am just not showing them to make it easier for you to see what we are doing. From the very bottom of the Arrange menu, select Fit Text to Curve. If you are very lucky, the text will appear on top as shown above. If not, try the other steps shown above.
Select the blue circle and the blue text and repeat the last step. Make the adjustments shown above until your text is centered on the inside bottom of the blue circle.
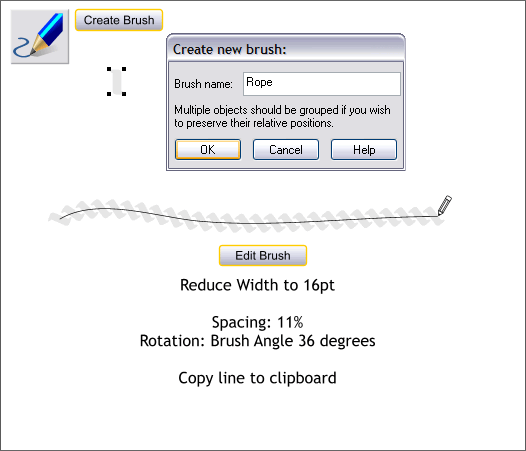
Select the small shape you created on the first step then select the Freehand and Brush Tool (F3). Click Create Brush on the Infobar. Name your brush Rope and press OK. Drag out a line with the Freehand and Brush Tool. Press Edit Brush on the Infobar. Adjust the Spacing in the Edit Brush dialog to 11% and in the Rotation tabbed section, change the angle to 36 degrees. Reduce the Width of the brush (the circle's outline actually) to 16pix on the Width text entry box on the Infobar and press Enter to apply the change. Copy or Cut (Ctrl x) the brush to the clipboard.
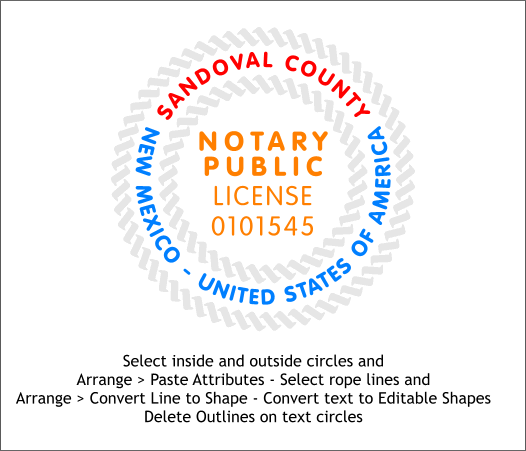
Select the inside and outside circles and Edit > Paste Attributes or press Shift Ctrl a. Marquee select all the elements by dragging a selection rectangle around the objects with the Selector Tool (F2). Arrange > Convert to Editable Shapes. Hold down the Shift key and click on the 2 rope brush circles. Arrange > Convert Line to Shape. Finally, Ctrl click on each circle on which the text has been placed, and delete the circles one at a time.
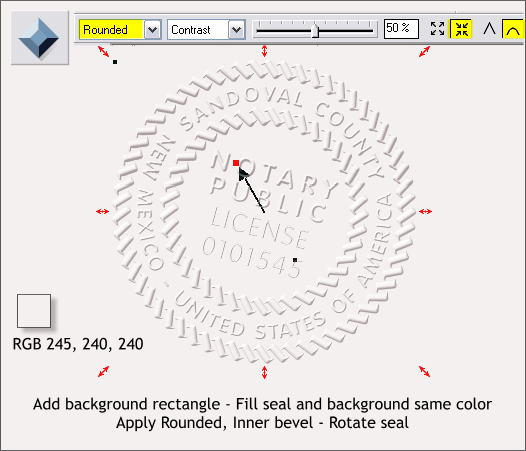
Add a background rectangle behind the objects and apply the color shown above or a similar pale paper color. Select all the seal objects and apply the same color (you can copy the color with the Color Picker in the Color Editor). With the seal objects still selected, switch to the Bevel Tool (Ctrl F3 ). From the drop down list of Bevel Types, select Rounded. Press the Inner Bevel icon (the 4 inward pointing arrows) to change the bevel from outer to inner. Click the Round Join icon.
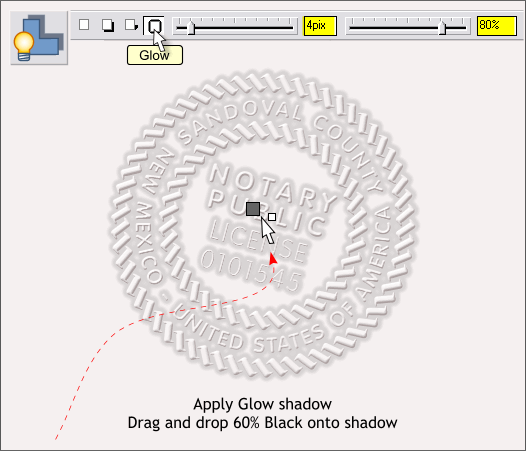
Group all the seal objects (Ctrl g or Arrange > Group). With the seal selected, switch to the Shadow Tool (Ctrl F2). Click the Glow shadow icon on the Infobar. Change the Shadow Blur and Shadow Transparency slider settings as shown above. Drag the 60% Black color from the screen palette and drop it onto the shadow area. Be careful and zoom in if you need to. Only the shadow needs to be colored.
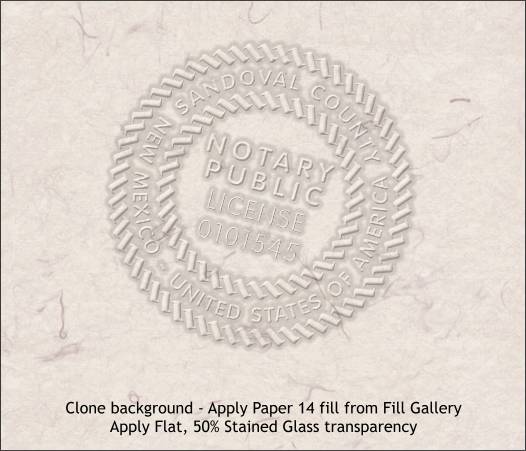
Clone the background rectangle (Ctrl k). Open the Fill Gallery (Shift F11). Open the Background Fills folder. Select Paper 14 and drag the image and drop it onto the cloned rectangle. Select the rectangle with the Transparency Tool (the wine glass icon). From the drop down list of Transparency Types on the Infobar, select Stained Glass. Move the Transparency slider setting to 50% . Did yours turn out like mine?
|
||
|
|


