|
|
|
This next effect will create an interlocking gold and chrome brush. It is a good example of a gold and chrome fill effect as well as a mini-tutorial for creating and applying a custom brush effect. But it may take a while to do.
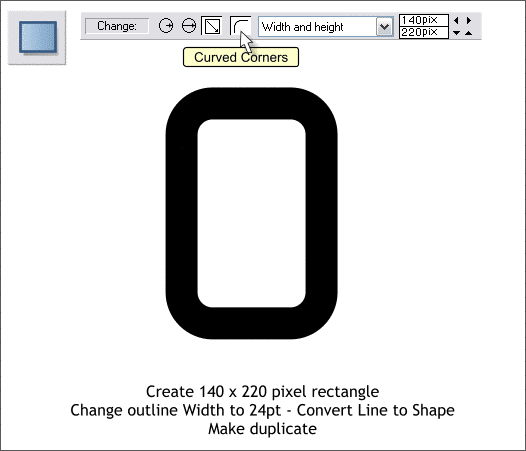
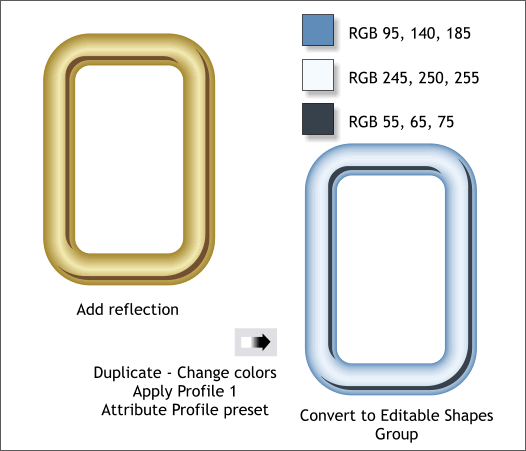
Using the Rectangle Tool (Shift F3) draw a rectangle 140 x 220 pixels. Press the Curved Corners icon on the Infobar. Change the outline Width to 24pt and then from the Arrange menu, select Convert Line to Shape. Make a duplicate of this shape and set it to the side.
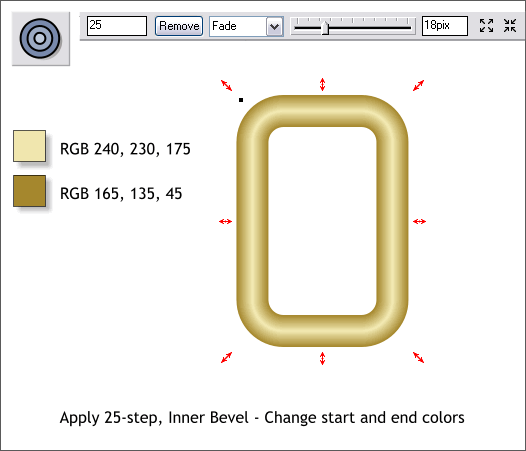
In the Color Editor (Ctrl e), change the color of the link to RGB 165, 135, 45. NOTE: If your RGB colors are shown in Percentage (%), right click on the page and select Page Options... In the Units tabbed section, change the Color Units from Percent to 0-255. Select the link with the Contour Tool (Ctrl F7). Drag inward to apply an Inner Contour. Hold down the Ctrl key and click on the very center of the contour. Change the top fill color to the pale gold shown above in the Color Editor. Change the Contour Width slider setting to 18pix. Change the number of Contour Steps to 25 and press Enter to apply the change. NOTE: If you use a slider to change a setting you do not need to press Enter. But anytime you key in a change, you need to press Enter to apply the change. And you can only apply one change at a time.
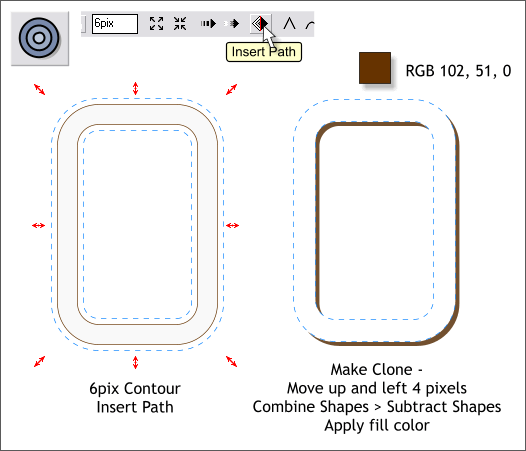
Select the duplicate link and apply a 6 pixel Inner Contour. Press the Insert Path icon. This creates one shape from the last of the contour rings. Clone the shape (Ctrl k) and move the clone 4 pixels up and to the left. TIP: If you set your Nudge Size: (Page Options > General) to 1pix then each time you press an arrow key the selection will move 1 pixel. Select both new shapes and from the Arrange menu, select Combine Shapes > Subtract Shapes (or press Ctrl 2). Apply the dark brown fill shown above to the remaining shape.
Add this shape as shown above left as a reflection. Duplicate the link and change the colors as shown on the duplicate. TIP: If you reduce the number of contour steps by increasing the Contour Width slider setting (to around 20 in this case), it will make it easier to select the start and end contour colors. After you have changed the colors then set the Width back to its original setting. When the colors are changed, select the contour with the Contour Tool and then press the Attributes Profile (the second arrow) icon. From the drop down list of preset profiles, select Profile 1 . This makes the chrome smoother and more convincing. Group the gold chain elements and then group the chrome chain elements (Ctrl g or Arrange > Group).
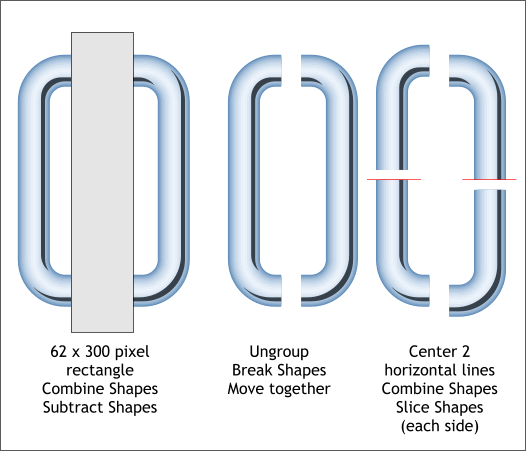
This gets a little complicated so follow closely. Create a rectangle to the size shown on the left and center it over the link. Select the rectangle and the grouped chain link and Arrange > Combine Shapes > Subtract Shapes (Ctrl 2). Click on the page to deselect the shape. Then drag a selection marquee around the entire shape with the Selector Tool (F2) to select it. (Don't ask why, it just works this way). Ungroup the selection twice (Ctrl u - Ctrl u). From the Arrange menu select Break Shapes. Marquee select all the objects of the left side of the link and group them. Then group the objects on the right side. Draw two horizontal lines (Click the Shape Editor Tool on the page. Hold down the Ctrl key, then click and drag to the left or right. This constrains the direction of the line). Center the lines in the vertical center of the links as shown above right. Select the left line and the left 1/2 link and Arrange > Combine Shapes > Slice Shapes (Ctrl 4). Repeat this for the right 1/2 link. If you have 4 separate quarters of the link, Bravo! (I told you it was complicated)
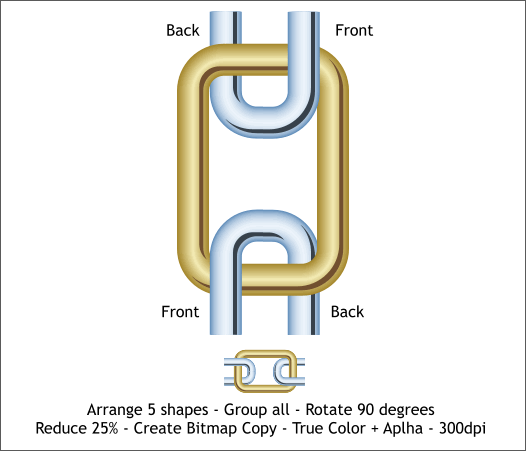
Arrange the 4 chrome link quarters as shown above. Remember Ctrl f to bring a selection to the front and Ctrl b to put it to the back. Group all the chain link objects and rotate the group 90 degrees. Reduce the size to 25% by entering 25 in the H or W % text entry box and press Enter. If your chain does not scale proportionately, press Ctrl z (or Edit > Undo), press the small black padlock icon on the Infobar (Lock Aspect Ratio) and try it again. Right click on the group and select Create Bitmap Copy... Leave the Color Depth at True Color + Alpha (transparent background). In the Bitmap Size tabbed section, select 300dpi from the drop down list.
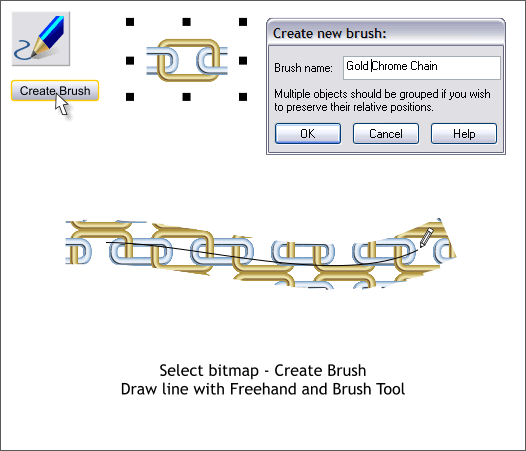
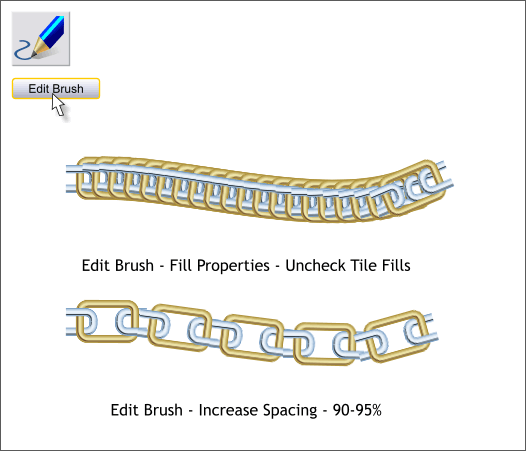
Select the bitmap with the Freehand and Brush Tool (F3). Press Create Brush. Name your brush (up to 20 characters) and press OK. Using the Freehand and Brush Tool, drag a line to the right. Interesting pattern but it does not look like individual links. We'll fix this next.
Press the Edit Brush button. In the Fill Properties tabbed section, uncheck Tile Fills. In the Spacing section, increase the slider setting until the spacing seems right (about 90-95%).
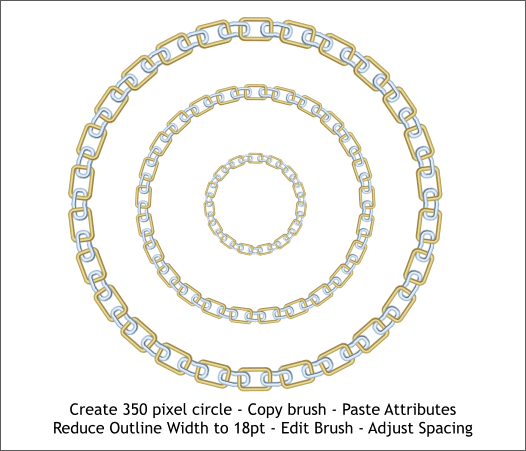
Copy the stroked line to the clipboard (Ctrl c). Using the Ellipse Tool (Shift F4), draw a circle approximately 350 pixels. From the Edit menu, select Paste Attributes or press Shift Ctrl a. Reduce the outline Width to 18pt. Select the circle with the Freehand and Brush Tool and press Edit Brush. Adjust the Spacing until the links match. In the example above I reduced the size of the circle and the outline width on the two smaller circles.
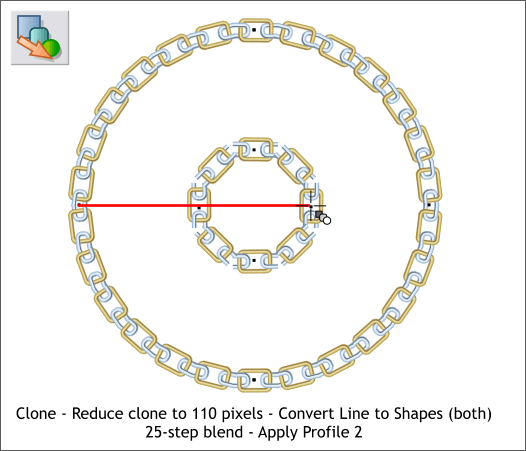
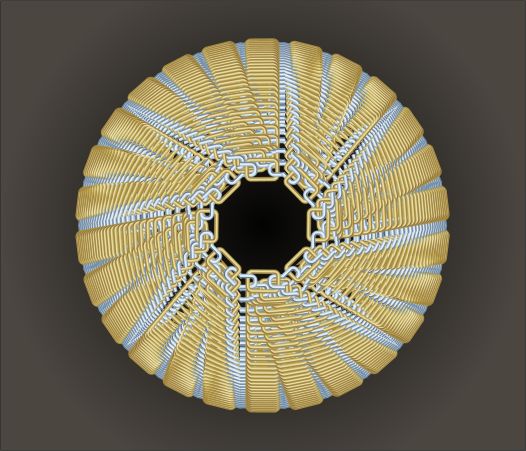
Clone the large circle and reduce the Width to 100 pixels. Select both circles and Arrange > Convert Line to Shape. Select the Blend Tool (F7). Drag from the larger circle to the smaller circle to create a blend. Change the number of Blend Steps on the Infobar to 25 and press Enter to apply the change. Press the Position Profile arrow (the first arrow icon) and apply a Profile 2 preset. The result is shown below.
Place the blend over a dark background. I call this design, Serendipity because it is not at all what I had in mind when I started out but sometimes things like this work out for the better.
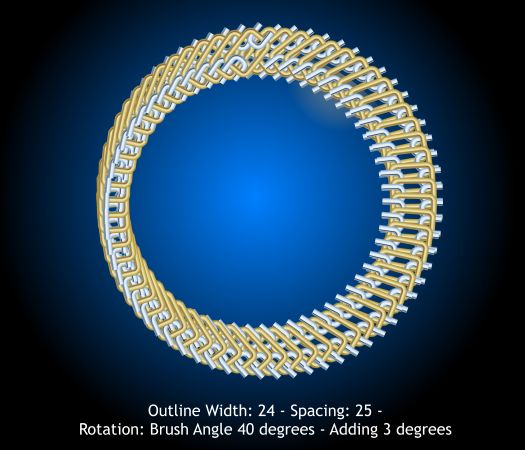
And finally, this. In this example (no longer a linked chain but interesting none the less), I increased the Width to 24pt, and edited the Spacing and Rotation settings as noted above. (You have to be open minded about these things. As a linked chain it's not that great, but as a brush...)
|
||
|
|
||
