|
|
|
I use the Shape Editor Tool for most of my drawing and editing. And often when I do a tutorial I advise readers to click a series of straight line segments to create a closed path. What I forget is if your default line join setting is Curve Join you will get a very different result from what I have shown using the Line join option. This is because the Shape Editor Tool works very differently in each mode. So when I received a frantic e-mail message from Praveen Dawar asking why his highlight result was so different from mine in this month's beer glass tutorial, I thought, aha! his Shape Editor Tool default setting is Make Curve and not Make Line. And, as I am always looking for things to explore in the Workbooks, I thought I would clear this up for once and for all.
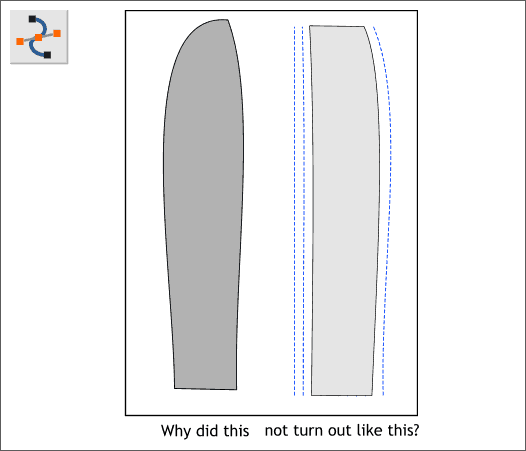
Praveen sent me the above image and asked why his result (left) did not look like mine (right). And of course as I have pointed out, the join setting is the reason why. I created my highlight using Make Line and Praveen used Make Curve. I'll show you both.
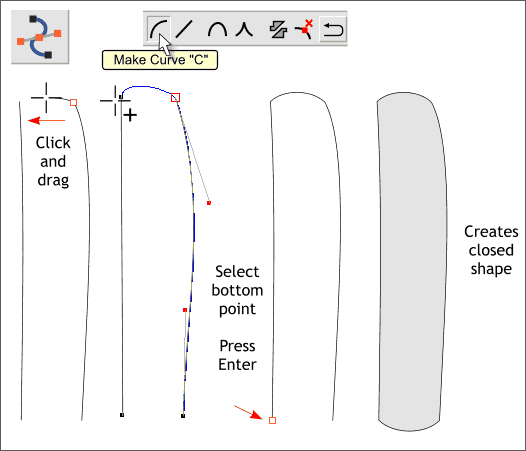
In the tutorial, 2 lines are joined to make a filled shape which is used as a highlight on the beer glass. The procedure is straightforward: Select both lines, select the Shape Editor Tool , click on the top of the right line and drag to the top of the left line. Then select either bottom control point and press Enter to create a closed shape. If when you select the Shape Editor Tool (F4) you also select Make Curve on the Infobar (or press C on your keyboard), then your result will look like the example shown above, and in most cases you will think I am not telling you the correct things to do.
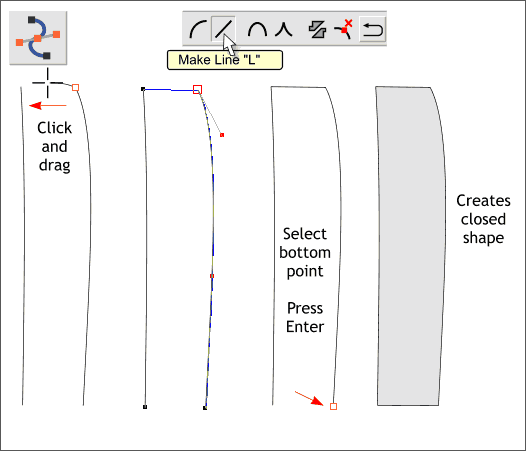
If you select Make Line (or press L) your result will look the the example shown above, which is how I had it in this month's beer glass tutorial. I just neglected to tell everyone that they needed to be drawing in the Make Line mode. Oops!
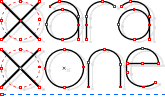
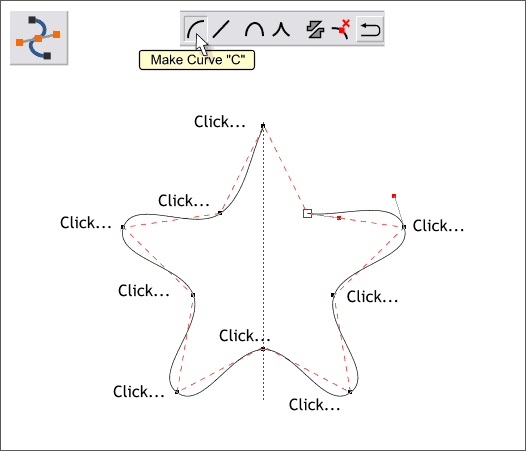
The above example in which I have used the star shape as a guide, shows what happens if you create a series of line segments using the Shape Editor Tool with the Make Curve option. Instead of Cusp Joins, you get a series of Smooth Joins, which is fine if you want rounded corners.
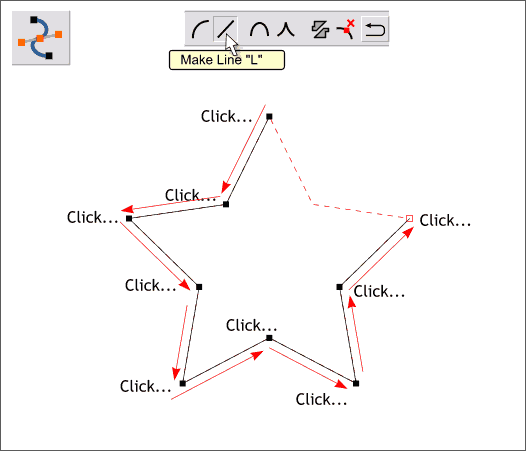
With the Make Line option selected, you get a series of straight line segments with sharp, Cusp Join corners.
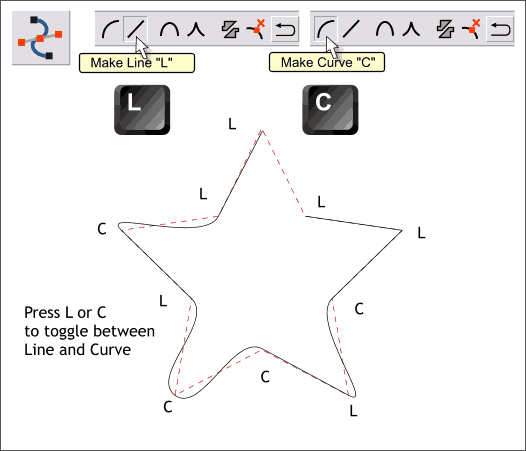
What if you don't want all your joins to be one or the other? You can use the keyboard shortcuts of C (Curve) and L (Line) to toggle back and forth. If you want to switch to one or the other, just press the appropriate key. NOTE: There are two more keyboard options you can use when drawing with the Shape Editor Tool, Cusp Join (X) and Smooth Join (S). These affect the way two line segments come together. A Cusp Join creates 2 independent Bezier control handles that you can edit separately. With a cusp join, you can create a sharp angle. A Smooth Join creates a symmetrical join that works like a see saw. If you drag one Bezier control handle down, the opposing control handle goes up. The best way to learn how these controls work is to jump right in and try them out. You can't break anything and if you are lucky, you might learn something. I hope this clears up the confusion, and I apologize for any and all who were confused by my omission.
|
||
|
|
