|
|
|
We have not worked in Xara 3D-6 for a long time and your editor (still yours truly) thought it might be a good time to revisit this fun way to create 3D objects. If you do not already own Xara 3D-6 you can go here and download a free trial copy. We will start out in Xara Xtreme, move to Xara 3D-6 and then back to Xtreme.
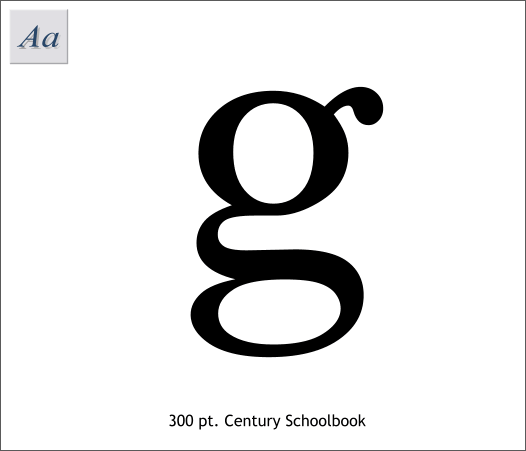
I love lowercase serif g's. They are one of the most elegant characters in the alphabet. So pick one you like and make it about the size shown above.
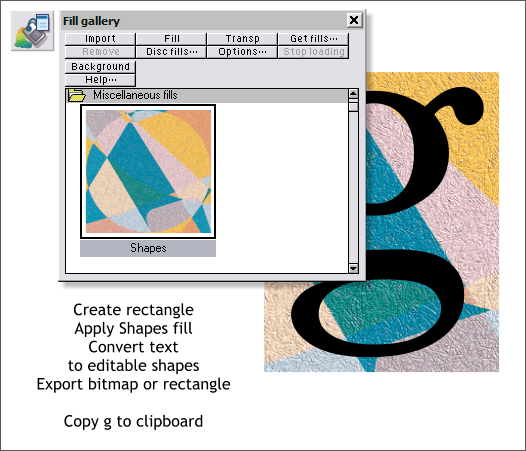
Create a rectangle behind the g that is a bit larger all around and apply the Shapes image as a Fill from the Fill Gallery (Shift F11), Miscellaneous Fills folder. Select the image with the Fill Tool (F5) and drag the fill path arrows inward to adjust the height and width of the fill. Export the rectangle as a PNG file to a place where you can easily find it (I like to use the Desktop for this purpose). Convert the g to editable shapes (Arrange > Convert to Editable Shapes) then copy it to the Clipboard (Ctrl c).
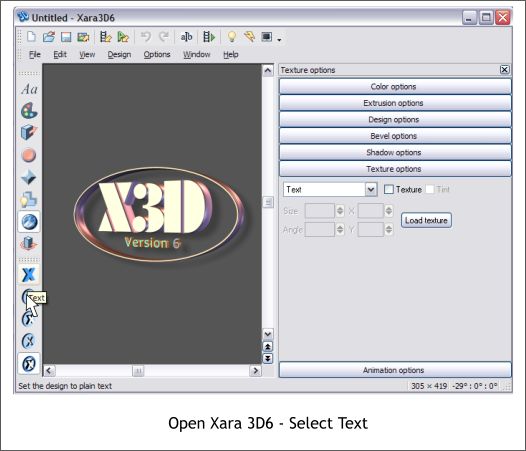
Open Xara 3D-6. On the left toolbar, click on the Text icon. What we are going to do today will only work in this mode.
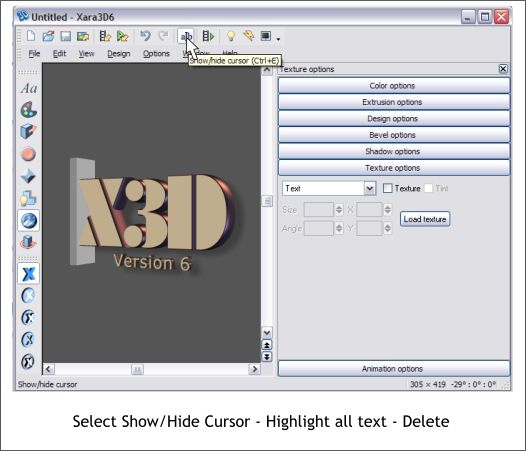
Click the Show/Hide Cursor icon on upper toolbar. Hold down the Shift and Ctrl keys and press the left arrow key on your keyboard until you highlight all the text. Delete it.
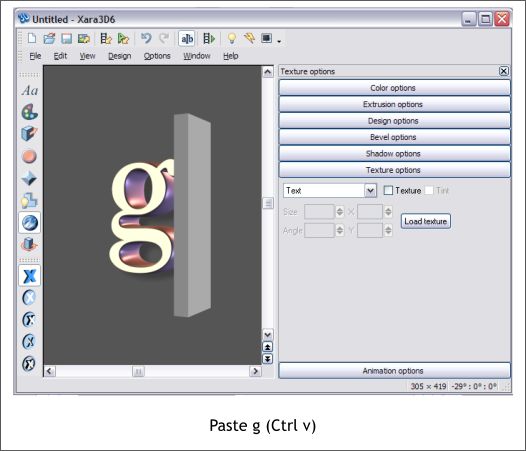
Paste the g from the Clipboard by pressing Ctrl v.
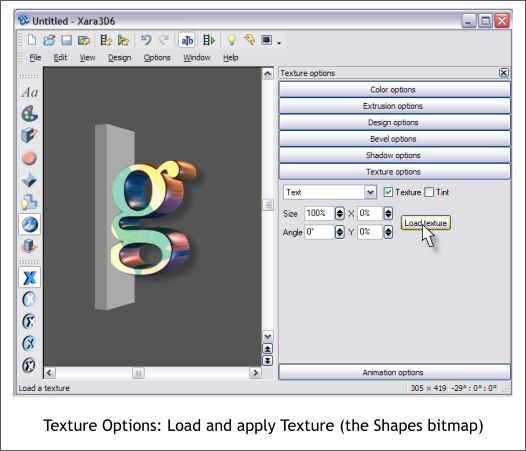
Click the Texture Options bar on the right or select Texture from the Options drop down menu if the horizontal buttons are not present. Press the Load Texture button, locate the Shapes -filed bitmap image (is it on your Desktop?) and apply it.
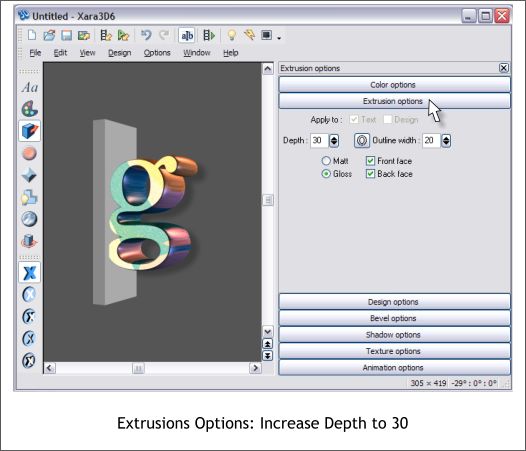
Click the Extrusion Options bar. Set the Depth: to 30.
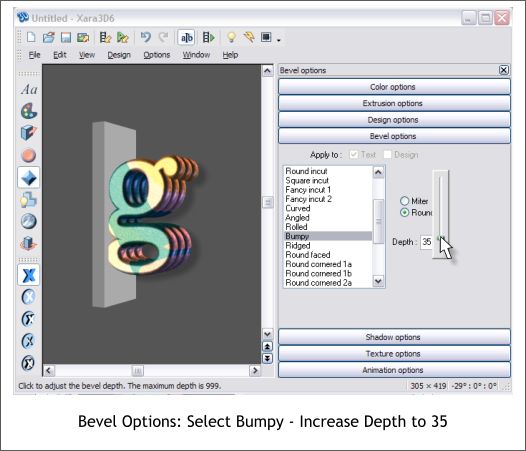
Click Bevel Options. Select Bumpy from the list of bevels, and increase the Depth: to 35. Check the radio box for Round if it is not already checked.
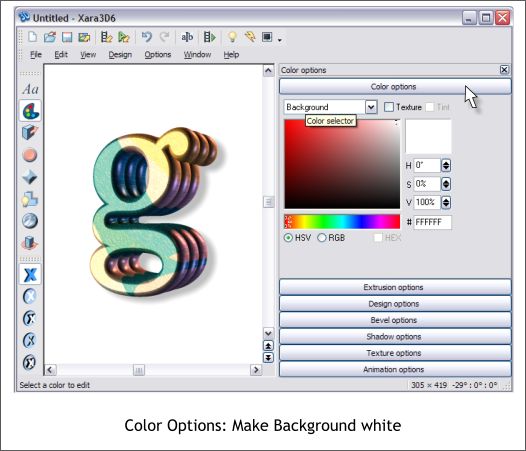
Click Show/Hide Cursor at the top of the window (a|b) to hide it. In the Color Options section, select Background from the drop down list and set the color to white. (Either use the settings shown above or for RGB, use 255, 255, 255).
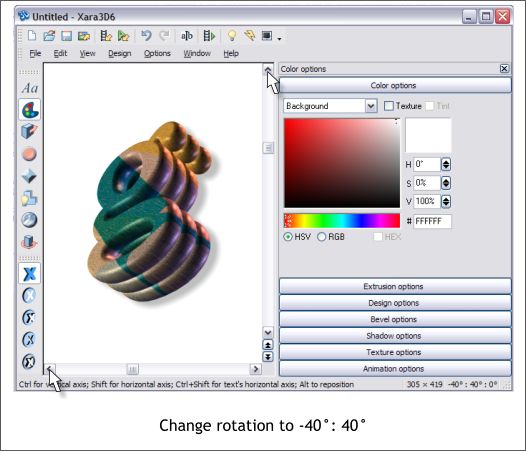
Click the top scroll bar button until the second number on the bottom right of the window reads 40°. Click the bottom left scroll bar button until the first of the 3 sets of numbers reads -40°. TIP: You can also click and drag directly on the 3D g and rotate intuitively.
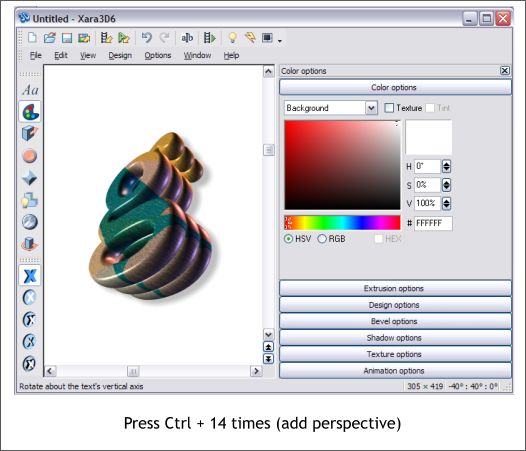
Hold down the Ctrl key and press the + key on your keyboard's numeric keypad 14 times to increase the perspective as shown above. Notice how the top of the g gets a bit smaller each time you press the + key.
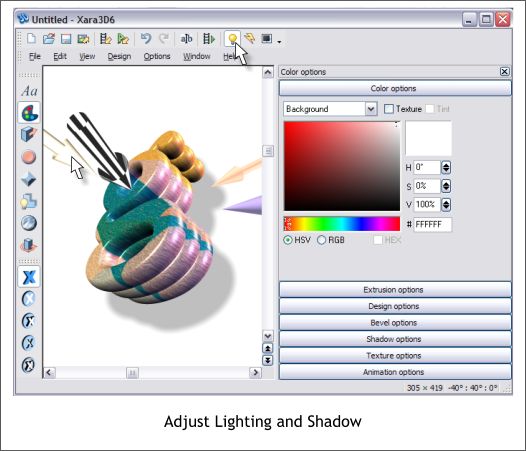
Press the Show/Hide Lighting icon (the light bulb). Drag the shadow arrow (with the black and white stripes) to increase the shadow distance. TIP: You can also drag the shadow to a new location in the window. Arrange the other lights so the g is lit more or less as shown above. When you are happy with the lighting, press the light bulb again to hide the lights.
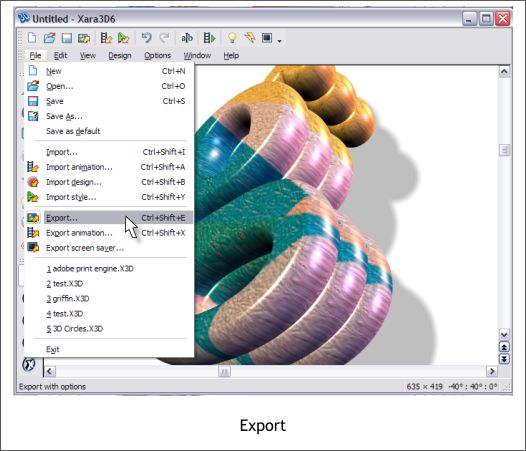
From the File menu, select Export.
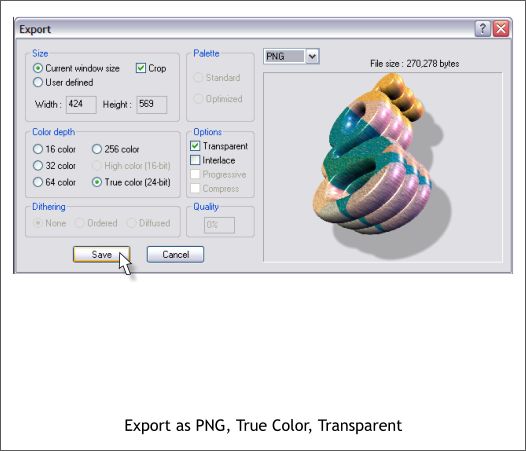
Export as a Transparent PNG file using the options shown above.
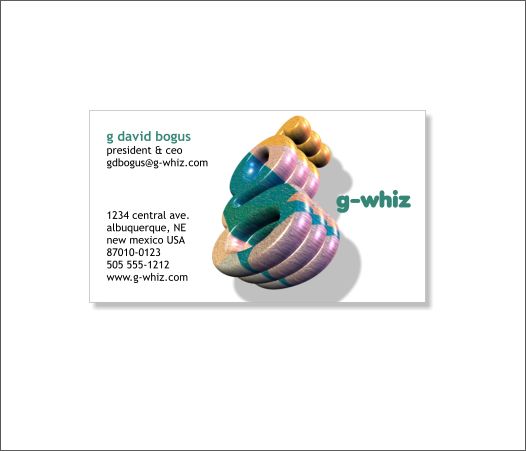
Import the logo back into Xtreme and do with it as you will. In the example shown above, the logo has been applied to a US sized business card. Long tutorial but not too hard I hope. Your comments are really helpful. They let me (and Xara who sponsors this site) know if anyone is actually reading these articles and tutorials. Please use the feedback form on the next page to send me your questions, comments, and suggestions for things you would like to see covered in future Workbooks. Gary W. Priester
|
||
|
|


