|
|
|
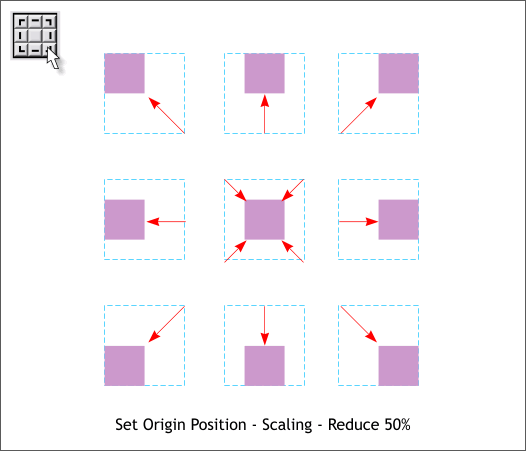
In the 9 examples shown above, each square graphically represents the scaling action that occurs when one of the 9 mini-buttons is pressed. For example, if you select the square shown bottom right, and you press the bottom right Set Origin Position button, enter 50% on the Infobar and press Enter, the original square (shown in blue dashed outline) scales by 50% to the lower right corner of the square (just like the icon represents). The other 8 illustrations relate to the other 8 buttons and show how each effects the scale.
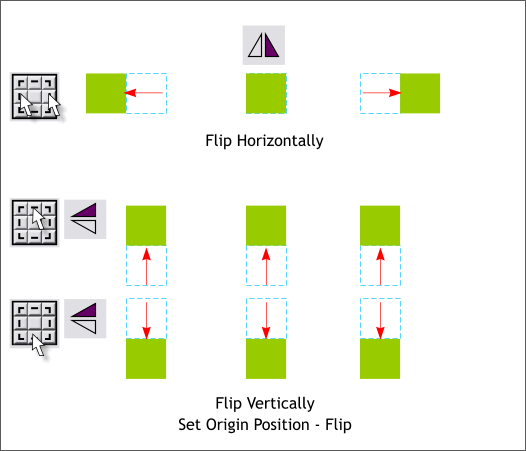
The illustration above shows the effects of setting the origin point and then pressing either of the Flip icons on the Infobar.
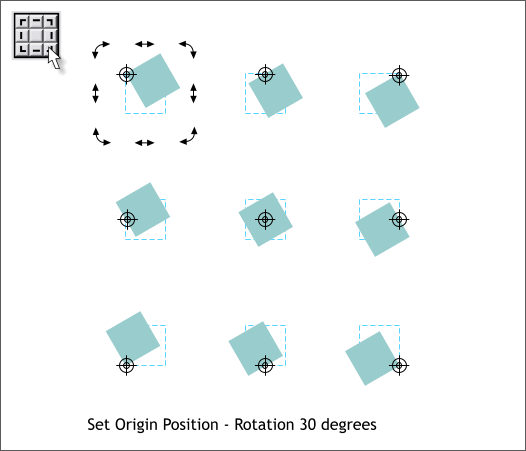
When you set the origin point and then enter a number in the Angle of Rotation text entry box on the Infobar and press Enter, the selection will rotate as shown. TIP: You can also drag the center of rotation bulls eye manually to any point on the screen and the object will rotate or skew from that point. RELATED TIP: I'm not sure if this happens all the time, but if you change the center of rotation and rotate or skew a selection, and then select another object, often the center of rotation remains where you last used it, which in some cases might be off the screen. Simply click in the center of the Set Origin Position icon and the center of rotation returns to its original position.
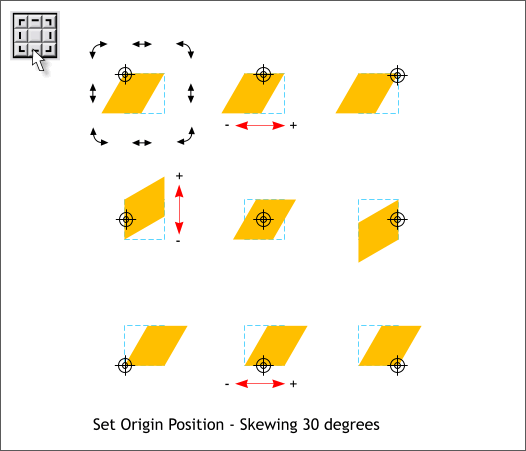
Set Origin Position can be used when skewing a selection as demonstrated above. Select the appropriate button, enter a + or - number in the Skew Angle of Selection text entry box and press Enter . The 2 outside settings in the 2nd row will cause the object to be skewed vertically when you enter a + or - number in the Skew Angle of Selection text entry box.
|
||
|
|


