|
|
|
Ron Duke (a.k.a. knightedduke), created a glass brush in the TalkGraphics Extreme Conference. Ron is the guy that does those super photorealistic car illustrations that make your editor (still me) sick with envy. But glass has always been one of your editor's greatest tricks and so your editor speaking (or writing to be more accurate) in the third person thought he would give it a go.
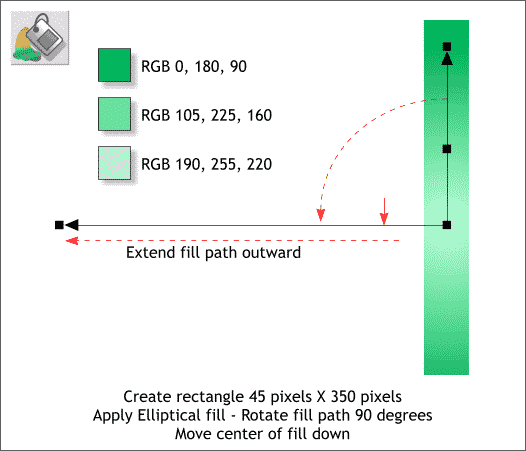
Create a rectangle to the size shown above and apply an Elliptical fill using the Fill Tool (F5) and selecting Elliptical from the drop down list of Fill Types on the Infobar at the top of the screen. Hold down the Ctrl key and drag and rotate the top control point at the end of the fill path arrow anti-clockwise until it extends horizontally. Drag it out a fair distance. Double click on the vertical fill path arrow with the Fill Tool to add a new color. Open the Color Editor (Ctrl e) and mix the RGB colors as shown. NOTE: If your colors are shown in % instead of 0-255 see Setting Up Page Units in Workbook 20. If you need help applying and editing fills, see Workbook 31. We'll wait until you come back before going any further.
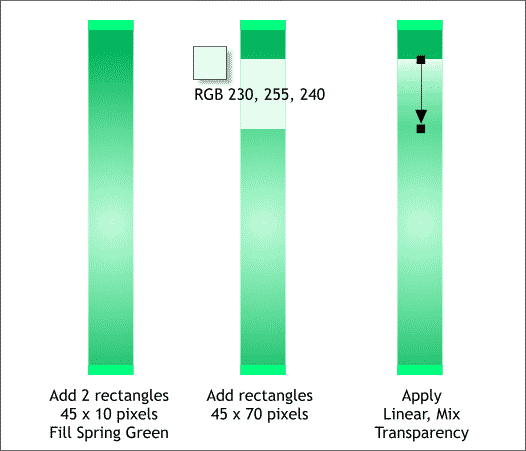
This step is shown in 3 parts. (Left) Add 2 small rectangles top and bottom and fill with Spring Green from the Named colors on the left side of the screen palette. (Center) Add a larger rectangle and apply a pale green fill. (Right) Select the pale green rectangle with the Transparency Tool (F6), hold down the Ctrl key and click and drag down to the bottom of the rectangle to apply a Linear transparency. NOTE: Spring Green is the base color for all my glass effects.
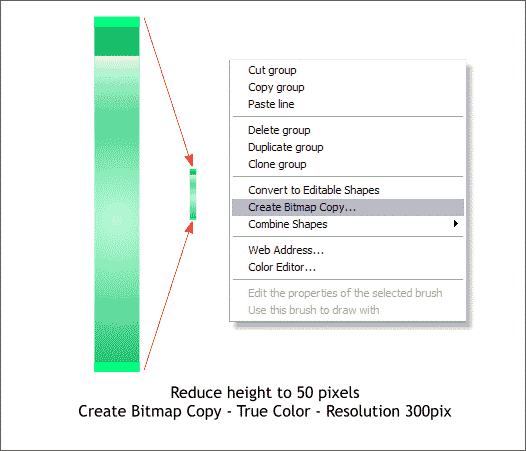
Select all the objects and reduce the height to 50 pixels. With the reduced objects selected right click and select Create Bitmap Copy... (or select this option from the Arrange menu). Use the True Color Color Depth option and set the resolution to 300dpi .
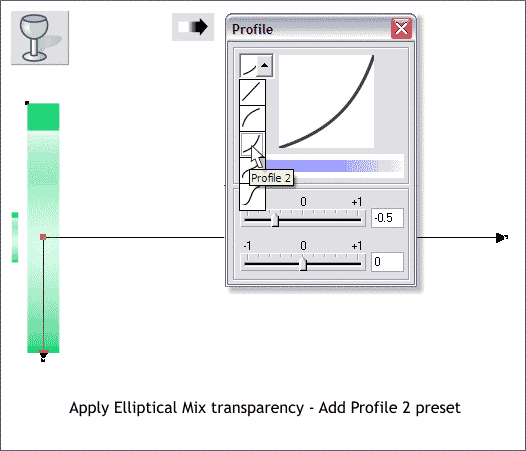
(The example above is enlarged for detail). Apply an Elliptical transparency and as you did with the fill, drag the horizontal fill path arrow way out to the left or right. This makes the transparency more linear. Click the Profile arrow icon on the Infobar and from the drop down list select Profile 2.
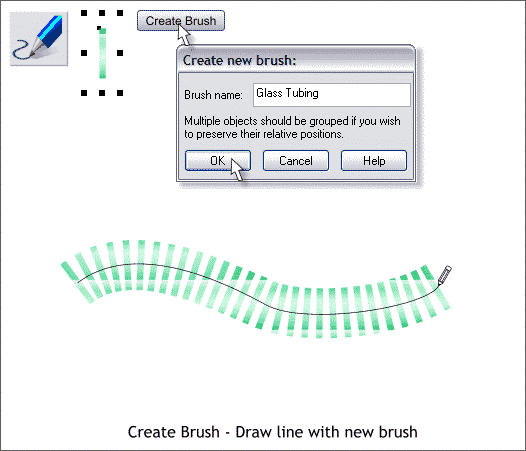
With the bitmap selected, select the Freehand and Brush Tool (F3). Click the Create Brush button on the Infobar. Name your new brush and click OK. Using the Freehand and Brush Tool, drag a wavy line with the new brush as shown above.
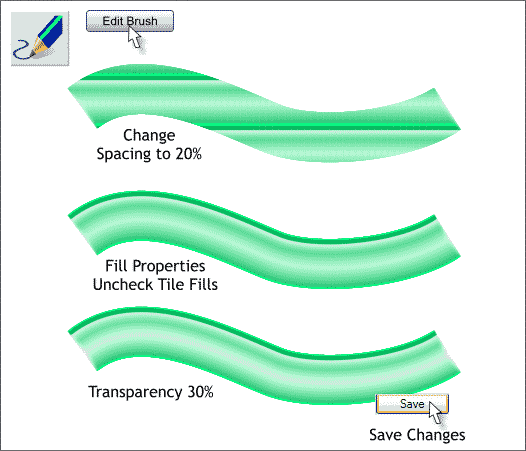
With the stroked line and the Freehand and Brush Tool selected, click the Edit Brush button to open the Edit Brush dialog. In the Spacing tabbed section, move the slider to about 20%. In the Fill Properties tabbed section, uncheck Tile Fills. And in the Transparency tabbed section, move the slider to 30%. For some reason, this works better when the bitmap used to create the brush already has transparency. When you have made all the changes, press the Save button to save your changes and to exit the dialog.
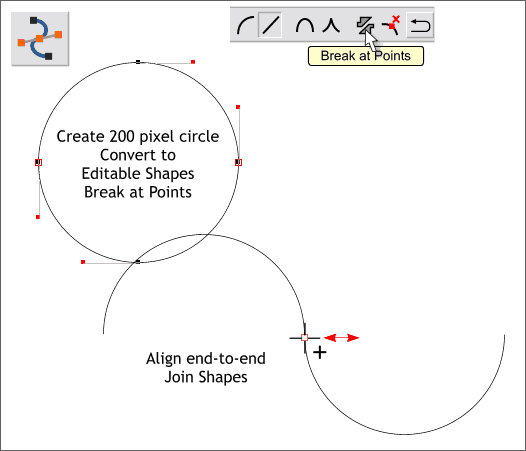
We need something to which to apply the brush. Create a 200 pixel circle. With the circle selected, Arrange > Convert to Editable Shapes. Switch to the Shape Editor Tool (F4). Highlight the middle two control points as shown above, and press the Break at Points icon on the Infobar. Drag the left edge of the lower arc over to the bottom right edge of the top arc. Zoom in if you need to because the two ends should be perfectly aligned. With both arcs selected, Arrange > Join Shapes. Switch back to the Shape Editor Tool and drag where the two ends came together. Drag the control point a short distance to the left or to the right and then back to where you started. The cursor changes to a + to indicate the two arcs are now truly one path.
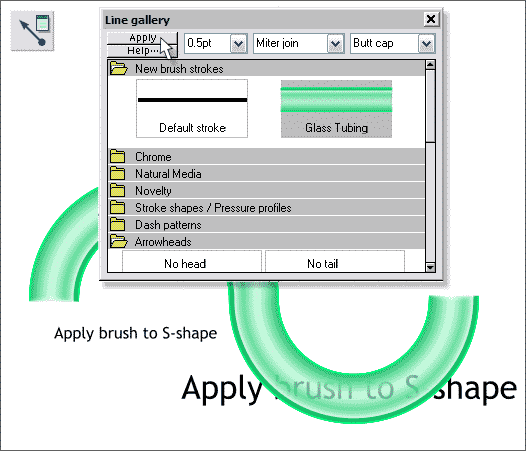
With the joined arcs selected, open the Line Gallery (F12). Open the New Brush Strokes folder, select the Glass Tubing brush and press Apply. If you remembered to Save the changes as instructed, the brush will look like the example shown above. I placed some text behind the stroked line so you can see the transparency.
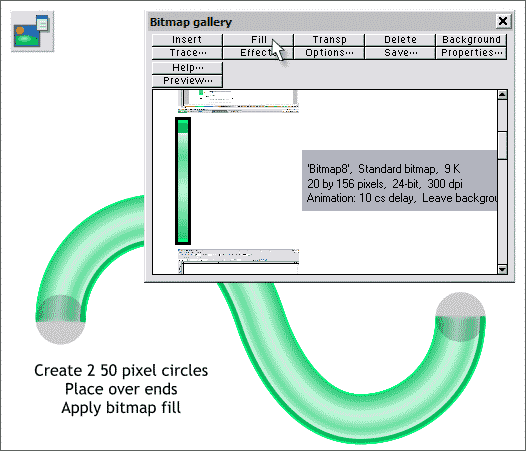
Create two 50 pixel circles and align one over each end as shown above. Select one of the circles. Open the Bitmap Gallery (F11), select the glass bitmap, and press Fill. Repeat this step for the other circle.
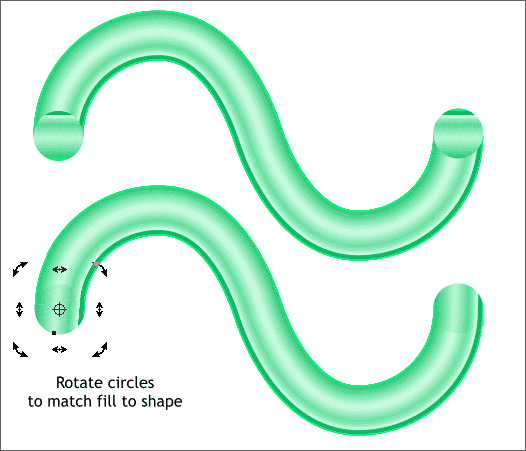
Double click on the left circle to enable rotate/skew mode. Drag any of the corner rounded arrow handles to rotate the fill until it aligns to the fill on the path. Repeat this step for the other circle (are you paying attention Ron?) Group the stroked path and the 2 circles (Ctrl g).
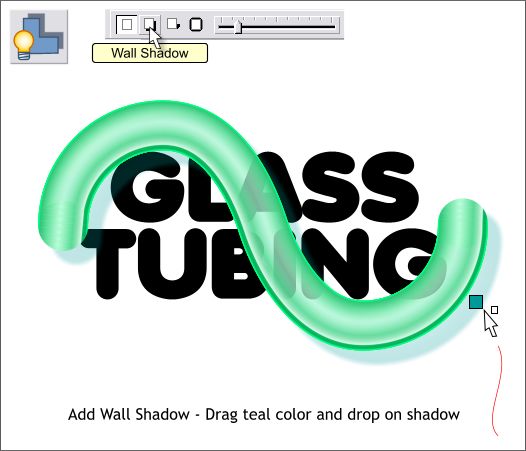
Place some text or an image behind the glass tubing. Select the glass tubing with the Shadow Tool (Ctrl F2) and drag downwards to add a Wall Shadow. A gray shadow does not visually look like glass. So find a deep teal green colored entry on the screen palette, and drag the color from the palette and drop it onto the shadow. That's better.
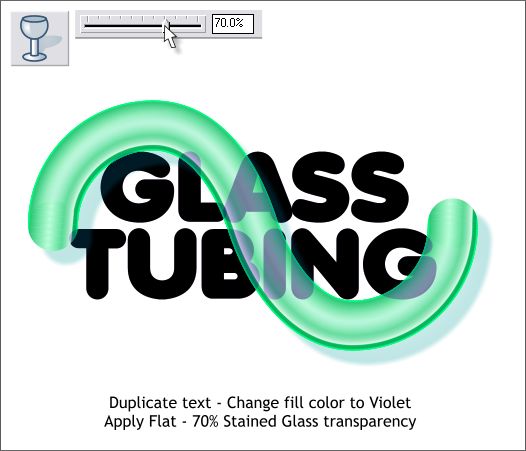
Clone the text (Ctrl k). Change the fill color of the text to Violet and apply a Flat, Stained Glass, 70% transparency. You can try out different colors for the cloned text. Different colors have different effects. This last step came out of nowhere except I wanted to make the tube look more transparent and I knew that a clone of the text with a small amount of Stained Glass transparency would do this. Adding the color to the cloned text was pure luck! As always your comments and questions (and corrections) are appreciated and provide valuable feedback to your editor on the tutorials. Please use the feedback form on the next page to let me know what you think. Gary Priester
|
||
|
|


